Projector Reviews Images

Vivitek Qumi Q7 LED Projector Review - Hardware Tour

Posted on April 4, 2014 by Art Feierman
QUMI Q7 LED PROJECTOR HARDWARE TOUR:  Overview, Control Panel, Inputs, Lens Throw Distances

Qumi Q7 Hardware Overview:

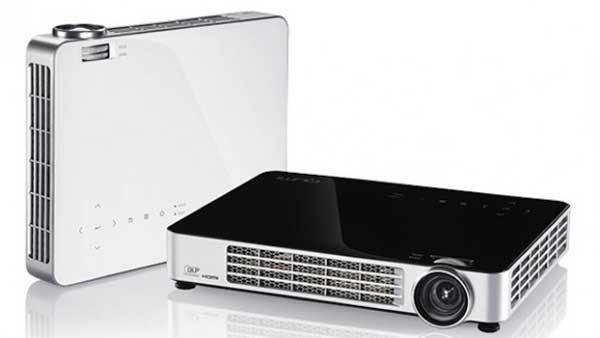
This is by no means a pocket projector.  It measures  9.3 inches by 7.1 inches.  That's still a size smaller than a typical sheet of paper, but the real strength in its compactness is the Q7's 1.57 inch height.  Even in its nylon carry case with a few cables it's pretty small.  compared to just about anything 4 or 5 years old, except for 50 lumen projectors.

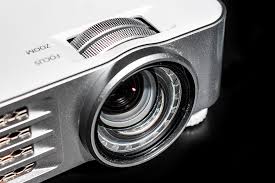
The small lens is recessed.  There's a translucent lens cap that comes tethered to the projector. The 1.1:1 zoom lens does provide limited placement flexibility, but that's better than most.  The lens controls - zoom and focus - are manual and just above the lens, on the top.  The control panel is of the touch variety, and is located on the top just forward of the rear of the projector.  Labeling could have more contrast or be larger on the white version of the Q7.  I found it slightly hard to see when lights were low.  There is also a black topped model. Not sure about reading the icons on that.

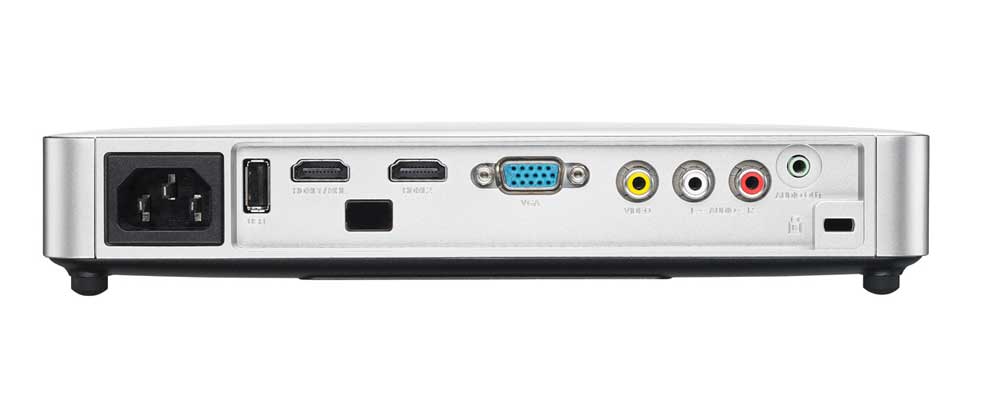
All the connections, inputs and others, are located on the back of the projector.

The projector has two screw-thread style adjustable feet in the front, and two fixed ones in the rear.  They are all small and white in color.  They probably add a half inch to the projector's official height when in normal position.

Of note, there seems to be no front IR sensor for the remote control, unless it's hidden behind the grill (unlikely).   Front and back is better than just one, but it should hardly inconvenience anyone.

We'll start with the control panel, move to the inputs and other connectors, and then deal with the two menu systems and the remote control.  Let's go.

Q7 Control Panel

No real surprises.  And, with a solid state projector, I guess we have to expect solid state controls instead of buttons.  Touch away.

Qumi-Q7-control-panel

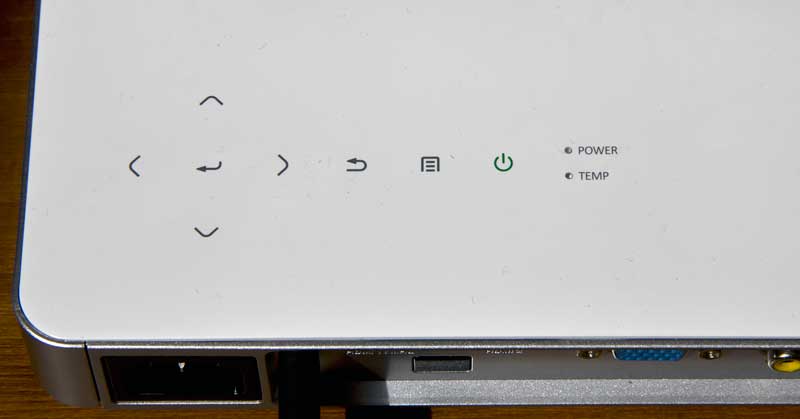
I usually start on the left, but it makes more sense for this projector to begin to the right with the two indicator lamps for Power and Temperature.  Next over to the left is the power on/off (press once for on, twice for off).  Next is the icon for the menu, and then an Escape/Return button.  That brings us to the main navigation, which is four arrow keys in a typical diamond configuration.  In the center of the four is the Enter button.

The navigation controls work for the normal projector menus, and for the media player menus. It seems of no other sources are found at power up, the projector starts you off in USB for the media player capabilities.

All considered, there really were no real surprises here, as it is a pretty basic control panel.  The one item of note, is that Vivitek didn't provide a Source button which is pretty standard stuff.  That said, they provide a work around so you don't have to rely on the remote control, or the menus.

You can select Sources from the control panel (which the Qumi manual refers to as the Keypad), by pressing both the left and right arrows at the same time (or the up and down ones).

Qumi Q7 Inputs and Connections

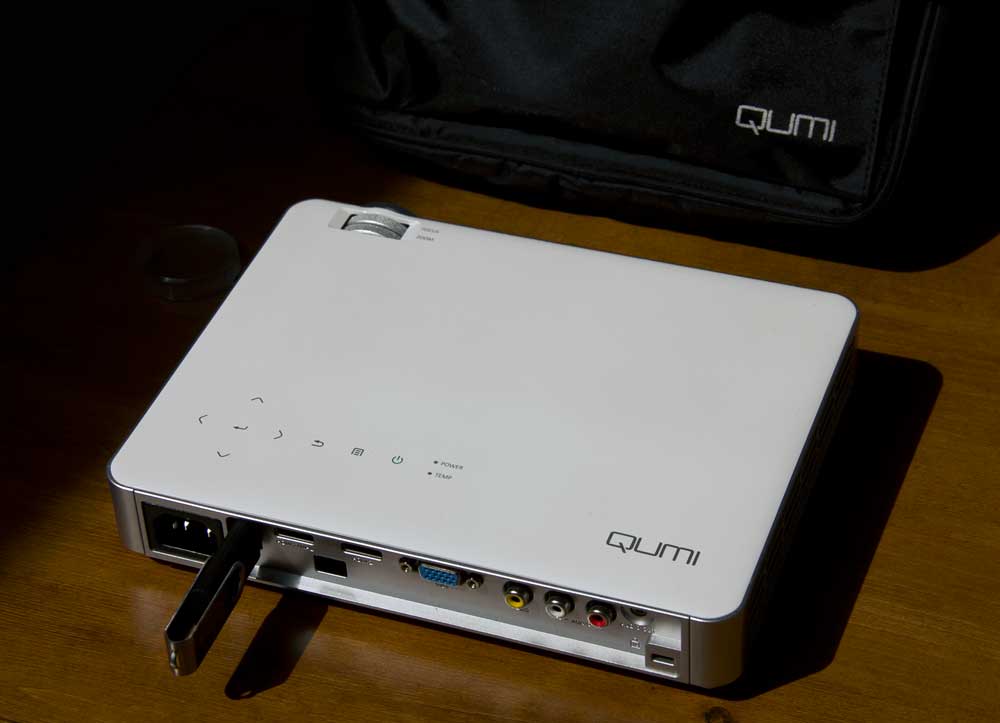
Pretty well endowed for a small portable projector!  All the connections are on the rear panel.  Let's consider them, from left to right.

Qumi-Q7-inputs_1000

Qumi Q7 inputs

First up is the power receptacle of the usual type.  Immediately to its right is the USB connector, but unlike most, it's mounted vertically.  That's clever in this case, since you may use it for devices that aren't that minimal in size, such as my Roku stick or some larger USB "thumb drives".

Further over the right are a pair of HDMI 1.4a inputs, but only the left most one, HDMI 1, supports MHL for working with mobile hdmi devices.  In between those two, but below is the rear IR sensor for the remote control.  Note that having a couple of thick HDMI cables plugged in to the two HDMI's is likely to at least partially block that sensor, limiting the range of the credit card remote controls effectiveness.  There is no front infra-red sensor for the remote.

Next up is a typical HD15 connector for the usual "VGA" analog computer input.  It works as advertised, but should be able to also handle a component video signal, which I did not try.

That brings us to the traditional "low res" composite video (the usual yellow RCA jack) and the pair of stereo inputs (red and white RCA jacks.

Very nice to find on the Q7 is a stereo audio out, which is on the far right.  The only other thing to note is that there's a Kensington lock slot just below the audio out.

Lens Throw Distances

Qumi Q7 Lens Throw for 100"  16:9 screen  (approximate)
Closest 110 inches
Furthest 121.6 inches

We normally provide the closest and furthest position of each projector for a 100" diagonal screen - in this case 16:10 (WXGA aspect ratio).  Since the Q7 has only a 1.1:1 zoom lens there isn't a whole lot of placement flexibility, but every little bit helps.  While this projector will mostly be projecting smaller images, we stuck with displaying  the 100"  numbers in the table because it's easier to convert for other sizes.  Thus, if you plan a 60" diagonal image, just multiply these distances by 0.6 for the correct numbers.

The distances are measured from the front of the lens, to the screen.

What's weird is that in the manual Vivitek only provides the closest distance placement which is a fraction over 110" for a 100" diagonal screen.  Fortunately they provide the formula for the longer distance, which is 1.43 times screen width. So, for our 100 inch screen that would be 121.6 inches away.

© 2024 Projector Reviews

crossmenu linkedin facebook pinterest youtube rss twitter instagram facebook-blank rss-blank linkedin-blank pinterest youtube twitter instagram