Projector Reviews Images

Viewsonic PRO8300 Projector - Physical Tour

Posted on July 27, 2013 by Art Feierman

Viewsonic PRO8300 Appearance

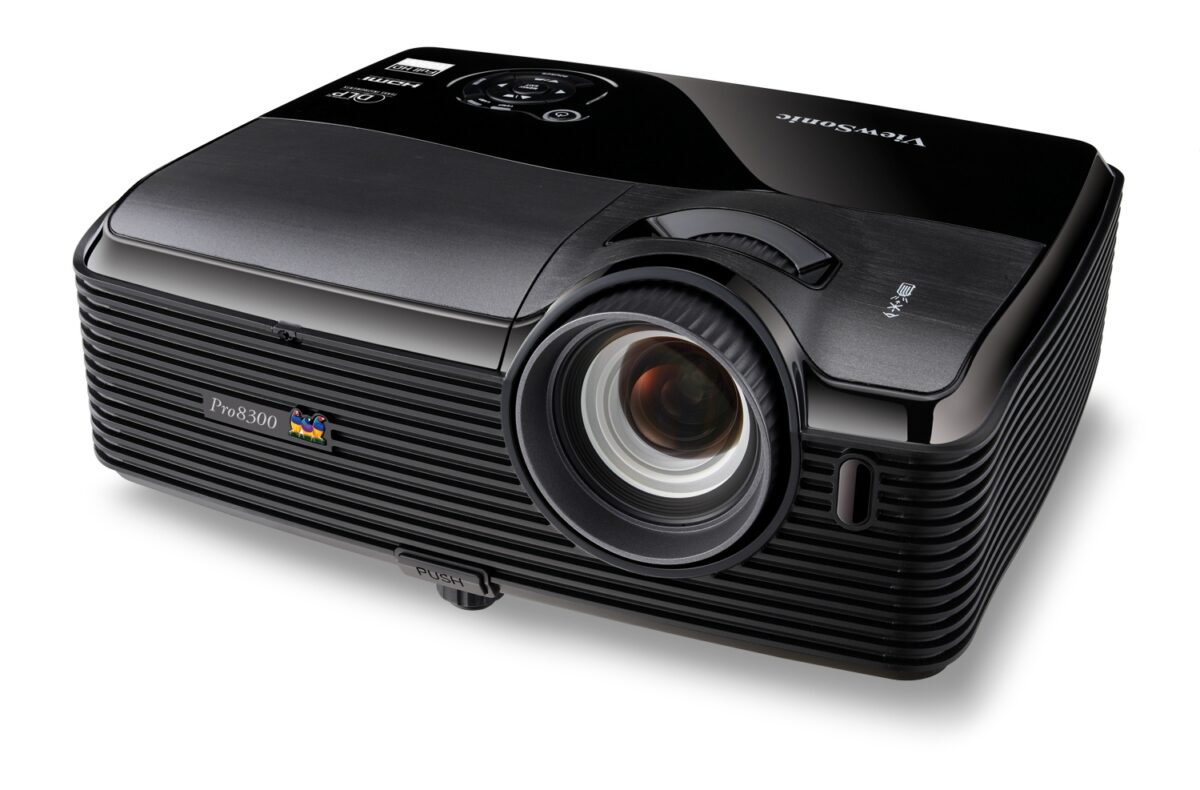
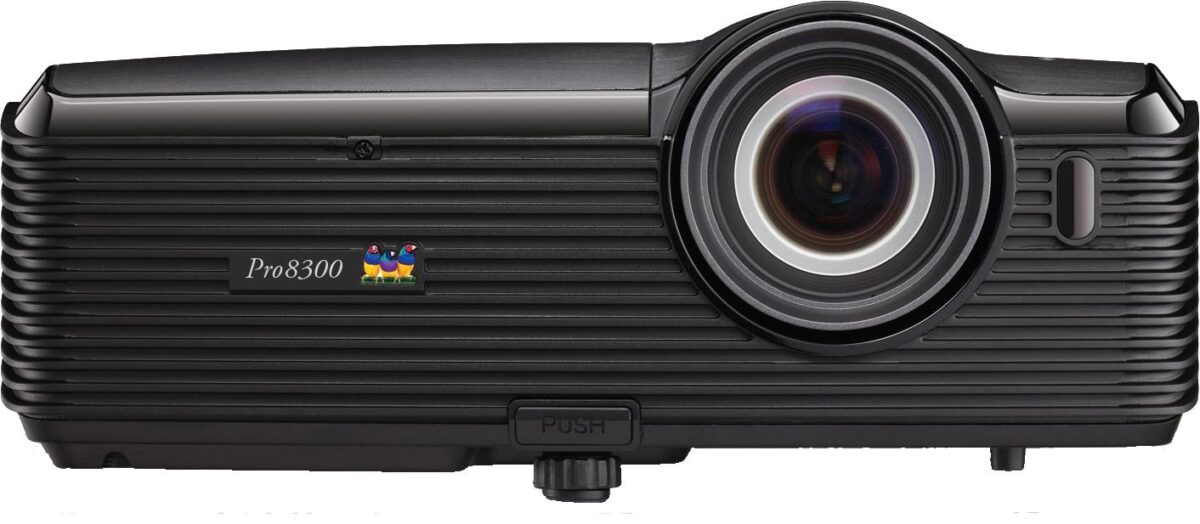
The Viewsonic PRO8300 has an attractive black plastic case.  The lens is located slightly right of center and protrudes from the top and front of the projector.  It has a very substantial plastic cap tethered to the projector to protect the lens when not in use.  The lens is surrounded by a focus ring with a zoom ring in a recess right behind the focus ring on the top of the projector.  Immediately to the right of the lens, is an IR receiving eye.  There is a single height adjustable screw foot in the center for adjusting the height and, thankfully, there are two height adjustable feet in the rear corners.

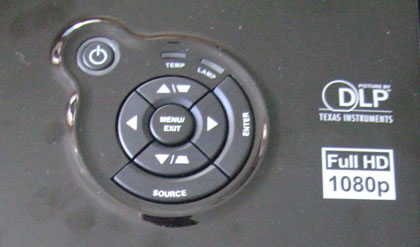
On the top left side of the projector (when facing it from the front) is a cover to access the lamp.  Having this cover on top of the projector allows the user to remove and replace the lamp easily, even if the projector is ceiling mounted.  Right behind the lamp cover is a control panel with basic control functions.  There are buttons for Power (with indicator light), Source selection, Menu and menu navigation (Up/Down/Left/Right/Enter buttons).  The Up/Down buttons also function as manual keystone adjustment buttons.  There are also trouble indicator lights for Lamp and Temperature.

On the right side of the projector is one of the two built-in 10 watt speakers and a cover to access the dust filter.  On the left side, there’s the second 10 watt speaker and a large exhaust port.

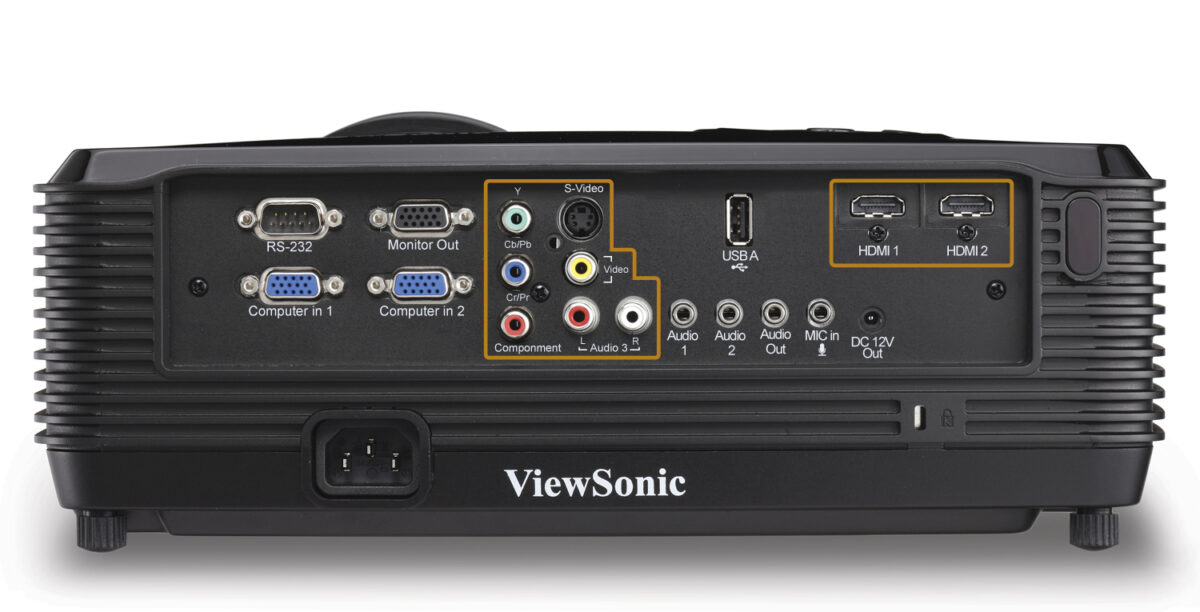
The rear panel features a fairly complete number of connection options.  Starting on the left side, there are two VGA computer inputs, a monitor output and an RS232 control port.  They are followed by component video, s-video and composite video inputs.  There are three audio inputs (two single 1/8” jacks and one L/R RCA jack combination) and one 1/8” audio output.  Above them is a USB Type A jack which unfortunately does not allow for presentation from a USB thumb drive and is only for firmware updates.  Next up are two HDMI inputs, a microphone input and a 12 volt output for triggering a screen drop.  Finally, there is a second IR receiving eye, a Kensington lock port and the power cord jack.

Viewsonic PRO8300 Setup and Menus

Setup of the PRO8300 is fairly easy due to the adequate zoom range (1.5x) and the rear height adjustable feet.  The PRO8300 has also has both automatic and manual keystone correction if necessary.  While we always recommend minimal use of any keystone correction, it’s probably even more important with a high resolution projector like the PRO8300, where it will usually be used to display fine detail across the screen.  Nonetheless, the automatic keystone correction works fairly well and when kept to a minimum, does not cause noticeable distortion.

Click Image to Enlarge

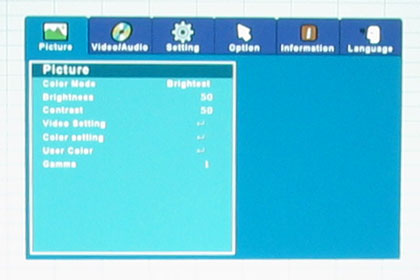
Once the PRO8300’s in position, the user can select the desired picture mode and make the usual adjustments (contrast, brightness, color and tint) to the picture.  There are four picture modes to choose from (Dynamic, Standard, Theater and Dark Room) and two User modes.  There are also three color temperatures to choose from, plus a User color temp that allows the grayscale to be properly set by a professional.  There are also multiple gamma settings available (from 1-6), with 6 resulting in greater brightness for presentations where dark blacks are not necessary.  It should also be noted that the PRO8300 differs from many other projectors in its class by offering a full CMS (color management system) for individual adjustment of each of the projector’s primary (red, green and blue) and secondary (cyan, magenta and yellow) colors.  While fairly common on more expensive home theater projectors, this level of control is unusual for business/education projectors, even more so at the price point of the PRO8300.

Viewsonic PRO8300 Remote Control

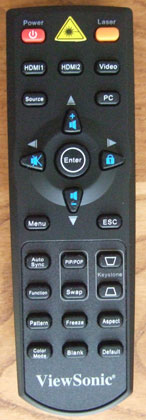
The PRO8300’s remote control is a small, black remote with nicely separated black buttons with white text.  The power button is red and stands out nicely against the black background.  Next to the Power button is an orange button (with a yellow warning symbol next to it) that activates the built-in laser pointer (a nice feature).

The Menu and navigation buttons are well placed in the center of the remote with plenty of space around them to make for easy use in a dark room.  The navigation buttons also double as controls for adjusting the volume of the built-in speakers and keystone adjustment.  There are buttons for all the usual functions, including buttons to freeze or blank the image, select the color mode or aspect ratio, and select individual inputs.

Another plus is the inclusion of transport buttons (play, rewind, fast forward etc.) for use with the projector’s built-in media player.

As is usually the case with most multimedia projectors, the buttons are not backlit or glow-in-the-dark.

Click Image to Enlarge

© 2025 Projector Reviews

crossmenu linkedin facebook pinterest youtube rss twitter instagram facebook-blank rss-blank linkedin-blank pinterest youtube twitter instagram