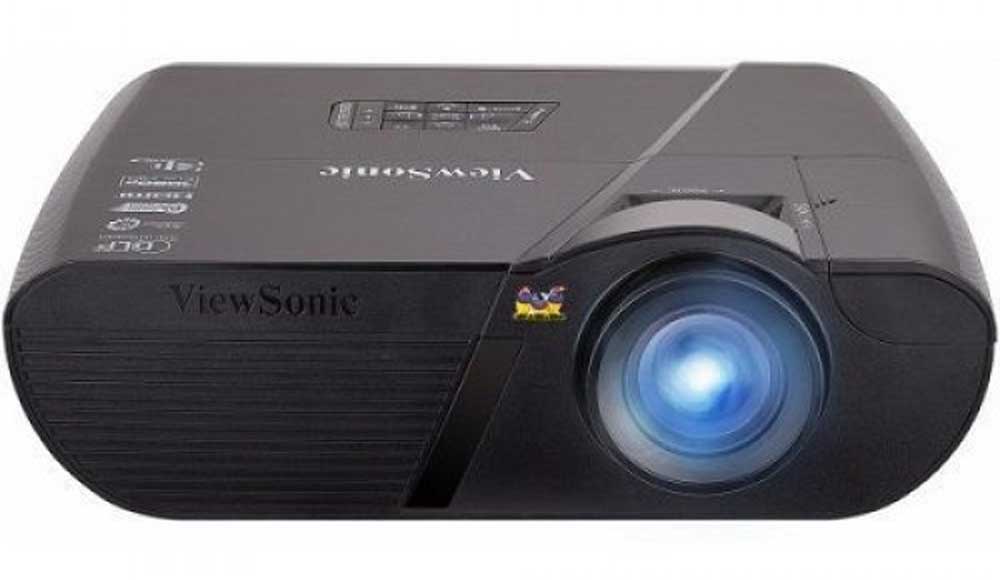
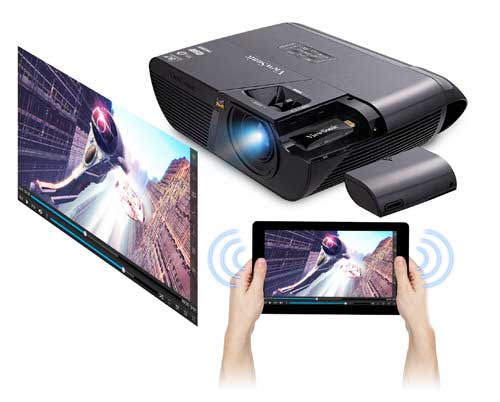
We start with an overview. The PJD7835 has a "not quite" recessed zoom lens mounted off center. The lens controls are on the top. The only features besides the lens on the front are the large IR sensor for the remote (it's large, on an angle, runs from the bottom to just short of the Viewsonic birds logo near the top), and also the front exhaust.
A single screw thread adjustable front foot is below the center. Two fixed feet are respectively on the left and right bottom rear, for a solid 3 point stance. Still I prefer to see that all projector feet be adjustable, whether three of them or four.
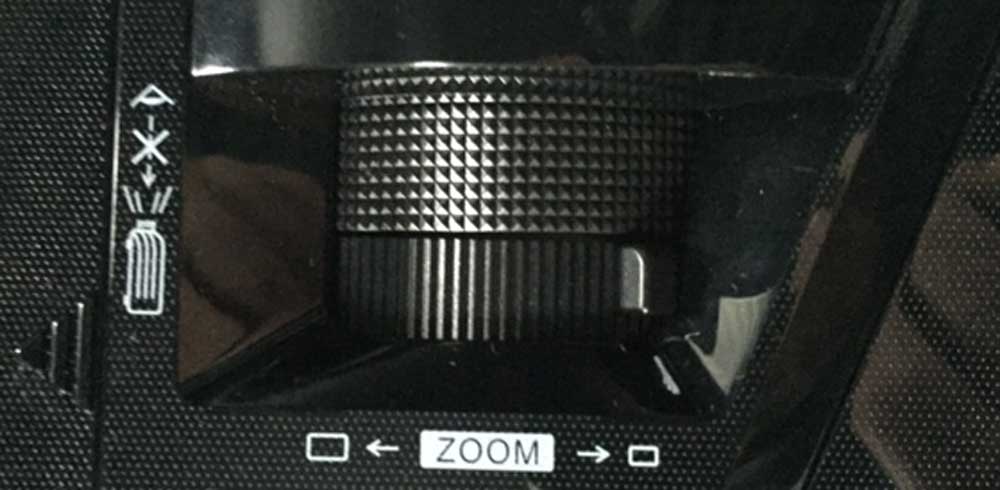
Moving to the top, the focus and zoom controls for the lens are recessed, directly behind the location of the lens on the front. The control panel is toward the back. On the right side top (looking from the front) is a sliding door (a screw locks it down) hides the PortAll with the 2nd HDMI. On the opposite side, a second compartment opens (after removing a securing screw, so you can replace the lamp) and since it’s on the top, you don’t have to unmount a ceiling mounted projector.
The inputs and other connectors are all on the back, except of course, that already mentioned 2nd HDMI/MHL port in the PortAll compartment.
[sam_pro id=1_53 codes="true"]
PJD7835HD Lens
As noted, the lens has a 1.36:1 zoom ratio. That’s a bit more than is typical. There are competitors with less (1.1, 1.2, 1.3), there are even some LED large pocket projectors (nowhere near as bright though), that just have a fixed lens - no zoom.
Although typically more money, there are projectors (also typically a bit heavier) with 1.5 and 1.6 zooms around.

The PJD7835HD sports more zoom range for placement flexibility than most comparably priced competitors. That's especially true among short throw projectors.
But the most distinguishing aspect of the PJD7835HD’s lens is that it is a short throw design. That’ means you will get a significantly larger image than with most standard projectors. This can be advantageous but it depends on your environment. On a table top, that’s a plus – for in a conference room that normally means at the front of the conference table, while a normal lens projector might be in the middle of the table.
Unlike ultra-short throw projectors (which tend to be expensive, and no zoom lens) or Very short throw projectors, a typical Short throw model like the PJD 7835 still needs to be far enough from a typical screen that it needs (if mounted) to be mounted to the ceiling, not a telesoping wall mount above the screen.
| Wide Angle (closest distance) |
94 inches |
| Telephoto (furthest distance) |
127 inches |
|
Lens offset is 7.9 inches for a 100” diagonal screen.
Translated: That means that if you put it on a table top, and don’t use keystone correction, then to fill the screen properly the center of the lens will be 7.9 inches below the bottom of the screen surface. (The bottom of a screen in many conference rooms is still higher than the table top.) Alternately, if ceiling mounted, then the center of the lens would be 7.9 inches above the top of the screen’s surface.
That’s a pretty typical amount of lens offset for a projector lacking lens shift. Lens shift is almost unheard of on sub-$1000 non-home projectors, although there are a handful of sub-$1000 home projectors that do have lens shift. Note that those that do, typically have very little range to their lens shift, very different than more expensive home theater projectors. But that’s a story for another projector.
In a home environment, a short throw translates into people sitting behind the projector, rather than in front, which is a plus in most cases if not ceiling mounting, as it’s less likely people on the move will walk though the picture
PJD-7835HD Control Panel
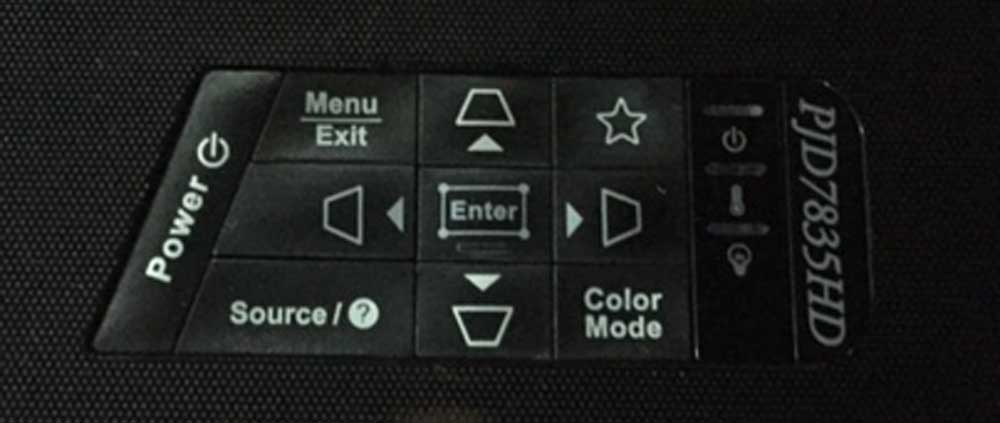
Viewsonic, for some reason experiments with the shapes of their control panels. They’ve come up with a couple of very interesting ones. That said, the controls found on the panel are pretty standard stuff.

On the far left of the control panel is the Power switch – press once for powering on, press twice to power down. Moving to the right, and towards the front is the Menu button. Two below it, is the Source button.
The navigation arrows are in a diamond formation, with an enter button in the center of them. The left arrow button is between the Menu and the Source buttons. On the upper right is a star for the My Button which is a user definable button letting you select the feature you want it to control from a list of choices. In the lower right is the Color mode button for – guess what - changing the color mode, of course!
That’s all there is, other than the three indicator lights on the right – the usual Power, Temperature, and Lamp indicators.
PJD-7835HD Inputs and Connectors
Time to look at the inputs and connectors on the back of the PJD 7835HD.

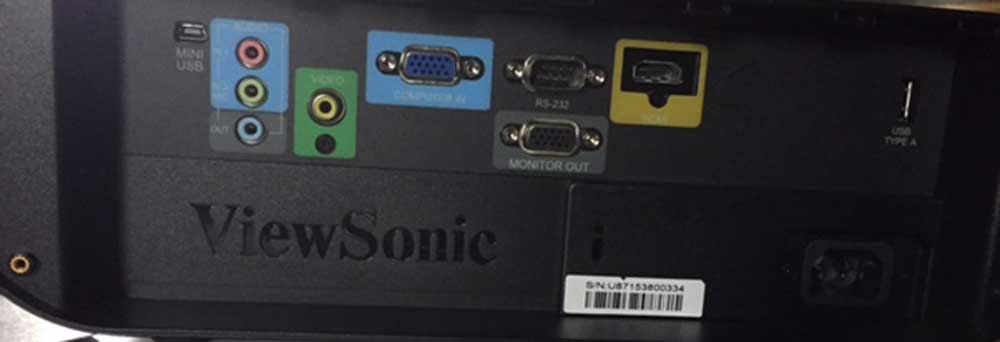
Inputs and Connectors on the back of the Viewsonic PJD-7835HD
Again, we start on the left, with the first connector being a small mini-USB. This USB is used for connecting to a computer for remote mousing functions to work, or to do firmware upgrades. Next over are three stereo mini jacks. The top of the three is Audio 1, in, the middle one is Audio 2, which can be adjusted (in the OSD menu) to be a microphone input, and the Audio Out jack.
To their right, all alone is a standard RCA jack for composite video, and to its right the usual HD15 connector for a traditional computer analog input, which can double as a component video input.
Further to the right are an RS232 serial port for “old school” computer command and control of the projector, and below it, a Monitor out.
Move to the right again, and you will find the other HDMI input, and far right is a second USB which can be used as a 5V/2Amp power source which with the right cables can charge cell phones, tablets, 3D glasses and other compatible devices needing 5 volts.
That takes care of the back of the PJD7835HD except for mentioning the power receptacle and a Kensington lock slot.

