In this day and age, every remote control should have a backlight. This one does not. But that’s expected for a Pocket Projector, and even typical for higher priced home entertainment projectors. It just makes it that much harder to use the remote in a low-light environment.
I like the feel of the remote. It’s contoured and it has that nice matte, almost velvety black coating. I did notice that the icons and text on the buttons seem to be screen-printed on, and I could see there is potential for them to wear clean off over time and regular use.
This remote utilizes simple, every day AAA batteries, which are included. As the projector only has one IR sensor, and it’s on the front of the projector, pointing your remote at the back of the projector is futile. The remote must be pointed at the front of the unit, or pointed at the screen for the sensor to pick up on the signal.
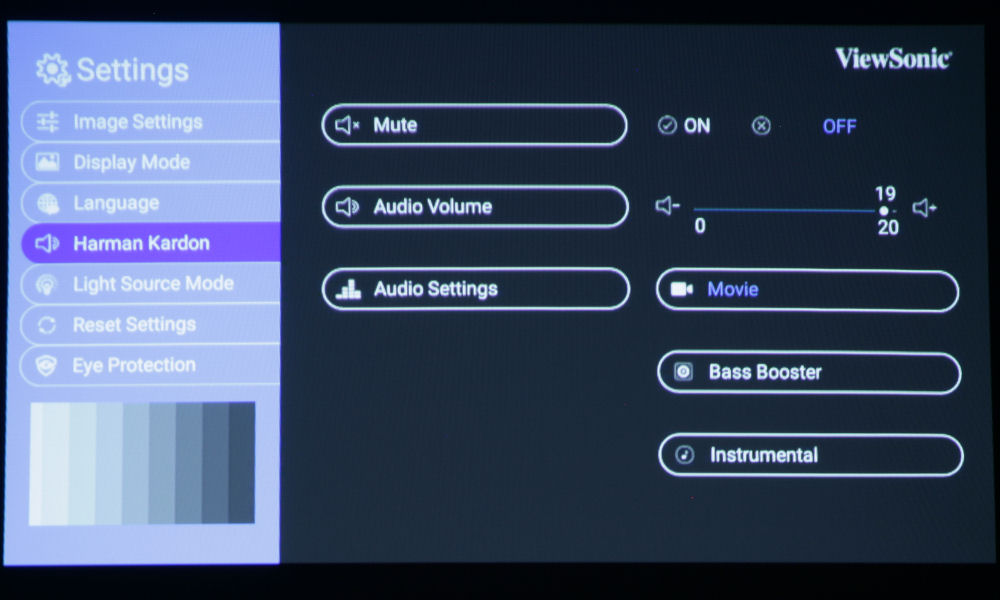
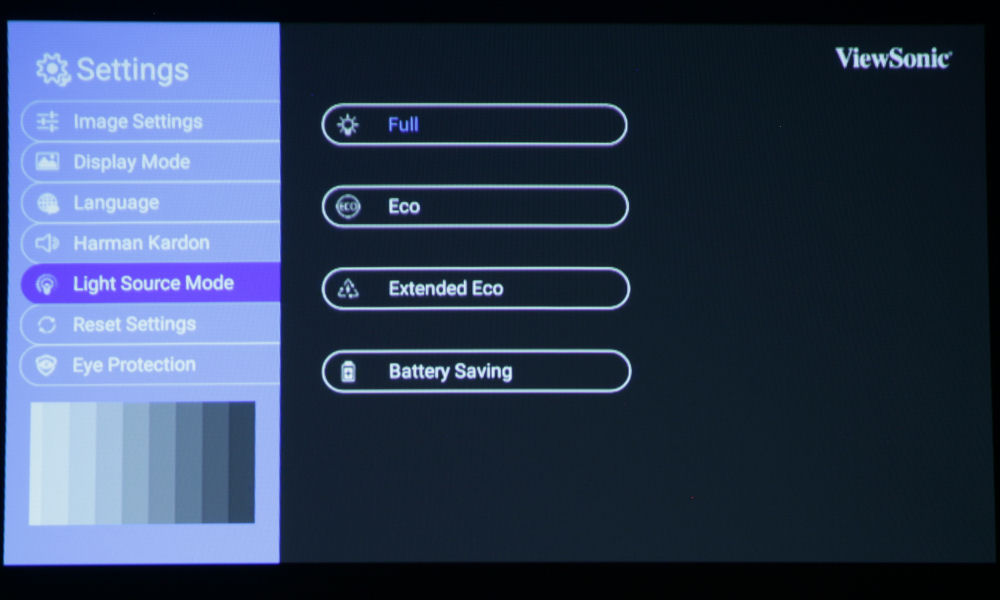
The remote is laid out in a fairly simple way. In the top left, there is the red Power On/Off button. Across on the top right is the Settings button, which access the menus. The next row consists of three buttons. On the left is the Home button, which displays an input source menu, as well as the option to set wallpaper, access the settings menus and access projector information. To the right is a white Harman Kardon button, which toggles between the unit's three audio modes. The last button in that row is a button that turns off the light source, but leaves the audio functions running, so music can be played without a projected image.
Next is a standard directional keypad: Up, Down, Left, Right arrows with an OK button in the center. The left button doubles as a rewind/back button, the right doubles as a fast-forward/next button, while up and down also adjust the vertical keystone correction. The OK button, which viewing video content, opens the small 3D menu.
The next row consists of a Mute button, Play/Pause, and Go Back/Return. The final row consists only of a Volume Down, Volume Up button bar.