Projector Reviews Images

Sony VPL-VW600 ES 4K Projector: Special Features 2

Posted on March 4, 2014 by Art Feierman
VPL-VW600ES PROJECTOR - SPECIAL FEATURES PAGE 2:  CFI for Smooth Motion, Auto Calibration, Panel Alignment, Gamma Controls, Blanking

CFI - Creative Frame Interpolation on the VW600 ES

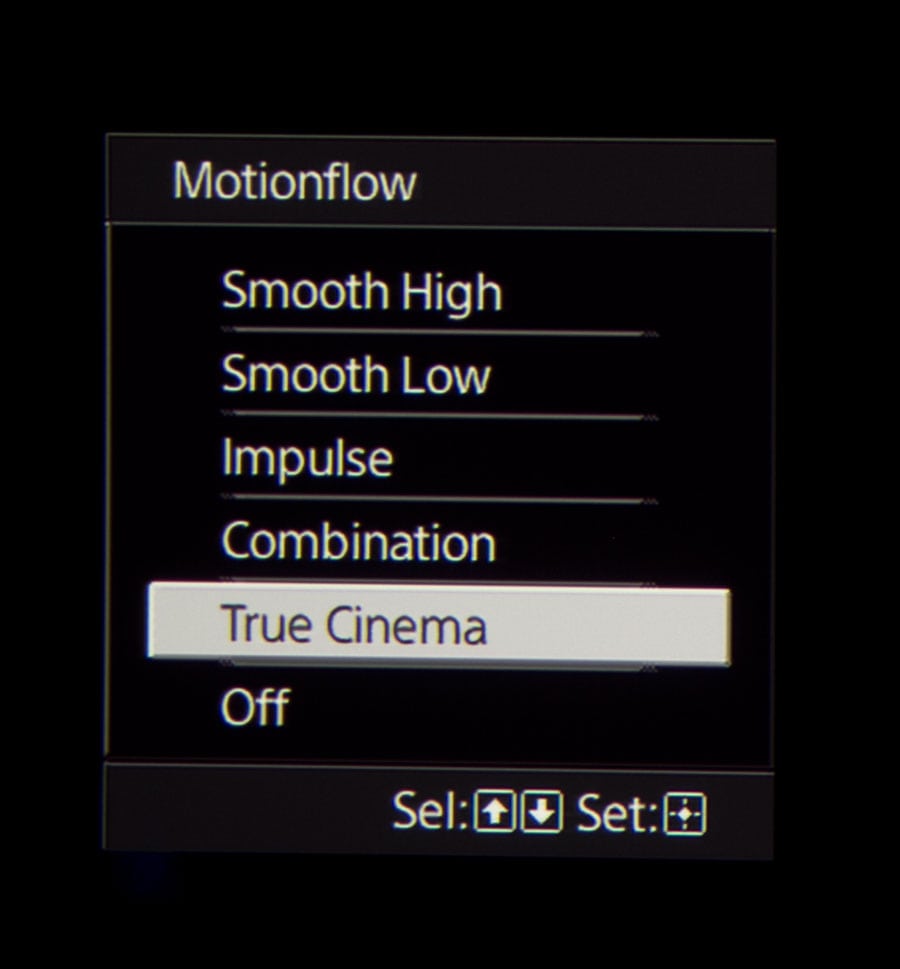
No surprises here.  This VPl-VW600 ES offers two speeds of (creative) Frame Interpolation.  In addition it offers several options which relate.  The image here shows the MotionFlow (as Sony calls it) options.

Interestingly Smooth High, Sony indicates is best for working with typical 24 fps content if you want smooth motion.  I am not a fan of using "smooth motion" with 24 fps movies, but I must admit it  wasn't bad.  Oh still a touch of "soap opera" or live digital look to the movies, but not bad. Some of you will like it, it's a personal call.

I used the Smooth Low setting for all of the Olympics I watched.  It worked nicely, with no complaint.  There are always barely detectable artifacts around the fast moving objects with CFI, but on this Sony, not normally noticeable (to me).    I'm one of those who likes having CFI for sports mostly, but generally figure it's a feature that most can live without.

There's also a mode called Impulse, and one called Combination.  Combination should be a very viable compromise mode, it is a little brighter than when engaging Smooth High.  I'm not up on the tech, but it may have to do with whether  black frames are used in between the regular ones.

True Cinema is the mode for natural movie watching at 24fps.  That works for me!

One comment which I'll repeat on the performance page when I discuss image noise.  This Sony projector like all the others I've reviewed in the last few years has an achilles heel.  When the camera in a typical movie is panned at a particular slow speed, the Sony shows more bouncing of the image than any other projector I can think of.  Weird.  The movie I alway see this in, is Red, near the beginning with a pan of the neighborhood.   I just wanted to point out here, that using the Smooth High setting completely eliminates the problem, but then of course you are watching with CFI engaged.

Click Image to Enlarge

Auto Calibration

Well, this feature took me by surprise.  That is, I hadn't worked with it on the Pre-production VW600ES I had here many months ago.  (For all I recall, it may not even have been there at the time.)   When this VPL-VW600 ES arrived, I had Mike go to work calibrating it immediately.

Once working with the projector and noticing it, I ran through the Pre-Check feature, but wasn't prepared to run the Auto Calibrate, until I knew more of what it would do to Mike's settings.

The manual was helpful.  It describes the feature as a coarse setting, and compares and adjusts back to the original factory default, if I understand it correctly.  There's even a comparison mode, pre vs. post.  Thus, the assumption here, is that over time, the color  (due to lamp aging in) will shift slightly, but the projector will adjust to take you back so it matches how the projector was, right out of the box in default.

That's great assuming the image is perfectly calibrated from the factory, but that isn't the case (although pretty good).  I'd like to really explore the benefits of the feature over time, as the lamp shifts color slightly, but that won't be possible.

What would be an improvement (again, if I'm reading the info in the manual correctly, would be if it could instead match up against calibration settings put in when installed.  In that case, your calibrator would deliver the best calibration, and in theory, every few hundred hours you could auto-calibrate and have it adjust for the lamp color shift.   I'll make that a suggestion for Sony for the next generation projectors.  Meatime, I will try the full auto-calibration and report back.

VPL-VW600 ES Panel Alignment

Sony's VPL-VW600ES offers a Panel Alignment feature which is digital in nature.  It is typical of other such controls.  The short version is that when you engage the feature, you select which of 2 colors you want to align first, Red, or Blue (against Green as the fixed).  The screen turns to a grid and you work the corners then middle in terms of getting first Red to line up better with green. Then you go back, switch to Blue, and do the same.  It works.  It's not perfect, but it does improve sharpness by eliminating mis-alignment, and those trailing red edges, that can sometimes be visible if the alignment is off more than 1/2 pixel.

It's about a 10 minute job to do the panel alignment.  No rocket science involved, its really easy.  Do it.

Gamma Control

The VPL-VW600 ES projector offers up 10 different gammas, (and off, which should be the same as 2.2).   The range, as you can see in this image, runs from 1.8 to 2.6.  With 2.4 or 2.6 having that dark mid-range content sometimes described as film.  But officially, 2.2 is where most people want to be.

There are also four unique gamma's which we'll call "non-linear" in that thy favor bright or dark areas.   For most, stick to 2.2, or perhaps 2.0 for some TV type content that you don't want to be quite so dark in the mid ranges.   But, if you like those other gammas for some content, go for it.  At the end of the day, watch things the way you like them best, not the way you are "supposed to."

Click Image to Enlarge

Blanking - Instead of Overscan or Masking

In reality the Sony's Blanking feature is a masking feature, but lets you control all four sides separately.  The Sony does not offer Overscan (which you use to eliminate noise around the edges as you might find with some TV signals) by zooming in a bit.  Now Overscan means no 1:1 pixel mapping, for less precision, a less sharp image, but it eliminates the edges while still filling your screen.

Typical masking is different.  It simply crops off the edge all the way around, removing the data, so that area is black, thus also elimnating the noisy edges.  The result is a slightly smaller image that no longer fills the entire screen, but 1:1 pixel mapping is maintained, for a precise, sharp image.

Sony's Blanking is just like masking, but you only need do one side at a time.  So, if the noise is only on the top edge, just knock off (blank) 1,2, or 3 rows across the top, and leave the sides and bottom alone, for an image that suffers the least changing.

© 2024 Projector Reviews

crossmenu linkedin facebook pinterest youtube rss twitter instagram facebook-blank rss-blank linkedin-blank pinterest youtube twitter instagram