Projector Reviews Images

Sony VPL-HW40ES Projector Review - Hardware Tour 2

Posted on July 10, 2014 by 

Sony VPL-HW40ES PROJECTOR - HARDWARE TOUR 2: Remote Control, Lens Throw, Lens Shift

Sony VPL-HW40ES Remote Control

Sony’s  VPL-HW40ES remote control is very familiar.  In fact, with only two exceptions, it is identical to the HW55ES’s remote.  The first is that the HW40ES has an amber blacklight, rather than blue.  Personally I prefer the blue color esthetically, but find the amber easier to read in a dark theater.  The other difference is one of the buttons, which is now labeled Contrast Enhancer while on the HW55ES remote it’s Advanced Iris.  Well, with no iris on the HW40ES that change was necessary.

Here’s the rundown on all those buttons, and here's a photo of the remote to follow along:

The Sony VPL- remote control with a moderately bright amber LED light when you press the top left button.  The light seems to stay on for about 30 seconds when pressed.  That’s a bit long by my taste, 10-15 seconds being optimal I would think.

Next button, in the center top row is the input selector.  Although there’s an auto sensing feature, it seems to have trouble distinguishing between the two HDMI inputs.  So, at least with the remote,  pressing that Input button once brings up the list of inputs, each additional time the input button is pressed, it moves through the list to the next source.  Leave it in the one you want, and the projector will switch to it in a few seconds.  Power is the upper right button, in green.  As is most common, press once for on, twice for off.

On the next section of the remote control, there are the same nine buttons as the HW55ES, for the 8 pre programmed picture modes, and the last one is the User button (which we save the calibrated settings in).

Navigation is next.  The four navigation arrows are in a round formation.  Three other button bars surround them.  The bottom one is the menu.  The upper left has a test pattern adjusting focus, over scan and other lens functions.  Opposite on the right is the Reset button.  I thought it a strange place.  Don’t worry, pressing it once won’t get you into trouble, in fact it seems only to bring up a small “Not Applicable” message.

The next section has 9 buttons, including direct access to most of the image controls.  I’ll just run through top row first, left to right:

  • Aspect Ratio, Motion Enhancer, 3D
  • Color Space, Color Temp, 3D
  • Gamma Correction, Contrast Enhancer,  Reality Creation

That leaves only the very bottom buttons which consist of three rocker switches:  Sharpness, Brightness, and Contrast.  Contrast Enhancer is what I would call a really minor feature.  I’d say it only earns a button on the remote control because this Sony remote doesn’t have an iris or an iris control.

Nice remote control (again)!

Click Image to Enlarge

Sony VPL-HW40ES Lens Throw

1.6:1 is a healthy amount of zoom range, but what counts is what works for your situation.  Most people who choose to ceiling mount tend to place their projectors relatively close to the screen, when possible, if for no other reason that the rule is that a projector is brighter, some times approaching being twice as bright, compared to being at the furthest end of its distance range.  Still, for those who want the simple solution of placing a projector on a rear wall, that’s usually a reasonable trade-off.

With that said, the HW40ES at its closest sits about as close as any competing projector, or for that matter almost any home projector with a standard zoom lens.

For a 100” diagonal 16:9 (HDTV shaped) screen, measured from front of lens to the screen the closest placement is 9.7 feet.

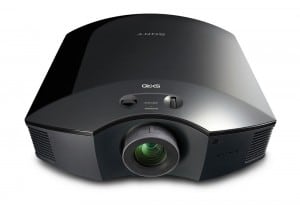
VPL-HW40ES_front_top

lens shift controls (manual) are located on the top, behind the lens

The maximum distance for that screen size is 15.7 feet.  For a lot of rooms where a 100” screen would be used, 15.7 feet may not be closer than the rear wall.  Those projectors with longer zooms typically get out to 20 or 21 feet.  Again, it’s what works for you.  If you aren’t shelf mounting, then the 9.7 to 15.7 range will probably cover what you need.

Lens Shift

Lens shift simplifies installation or table placement because it corrects optically to keep the image rectangular when the projector isn’t placed straight back from the center of a screen.  For ceiling mounting, most folks have the projector (from center of the lens) somewhere close to the top of the screen.  If high ceilings you would prefer lots of lens shift and the projector mounted close to the ceiling rather than little lens shift, and the projector mounted on a longer pole further down from the screen.

The HW40ES had a healthy amount of lens shift.  Not the best of what’s out there around its price, but a lot better than some.  Generally DLP projectors have less vertical range, and the 3LCD ones have some additional vertical range.

The center of the lens, in the case of this Sony, can be up to 8 inches above the top of the screen surface, 8 inches below the bottom of the screen surface, or anywhere in between.  Of course if you need to use some horizontal lens shift, it diminishes the amount of vertical shift.

© 2024 Projector Reviews

crossmenu linkedin facebook pinterest youtube rss twitter instagram facebook-blank rss-blank linkedin-blank pinterest youtube twitter instagram