Projector Reviews Images

Sony VPL-FHZ55 Projector Review - Hardware Tour

Posted on February 4, 2014 by 

Appearance

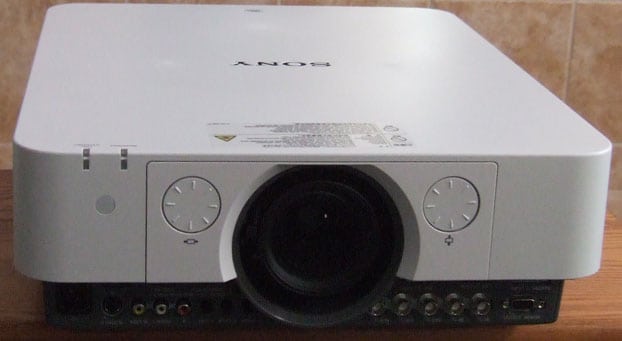
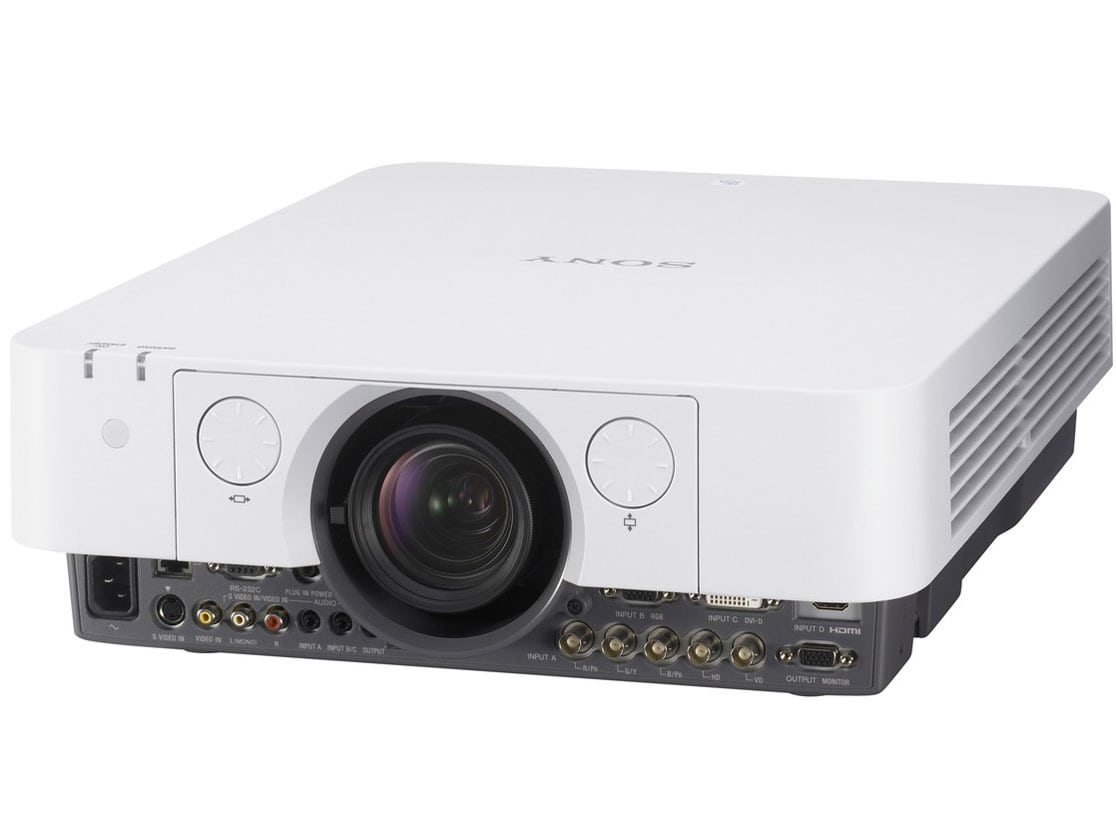
The VPL-FHZ55 has a clean, industrial design with a white (also available in black) plastic case.  The design departs from the usual layout in that there are no user controls on the top of the projector (they’re on the left side) and all connections are on the front panel, rather than the rear. Facing the front panel of the projector, the lens is mounted in the center, flanked by manual turning knobs for vertical and horizontal lens shift.  There is a ring around the lens for focus and a tabbed lever on one side of the lens for zoom.  Height adjustment can be made via two screw feet in each of the front corners.  There is an IR receiving eye for the remote to the left of the lens and indicators for power and lamp status on the top front edge.

Control Panel

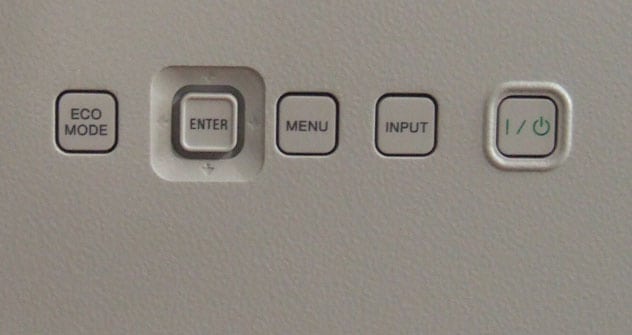
On the left side of the projector, we have a small control panel near the front and a large air intake port toward the rear.  The control panel includes a Power On/Off switch, an Input selector button, Menu and menu navigation buttons, Enter and a button to drop the lamp into Eco mode.  On the right side of the projector is a Kensington lock port, an antitheft lock bar and another large intake vent.  Finally on the rear of the projector, we have a hot air exhaust vent a secondary IR receiving eye and a removable access cover for the air filter.

Click Image to Enlarge

Inputs

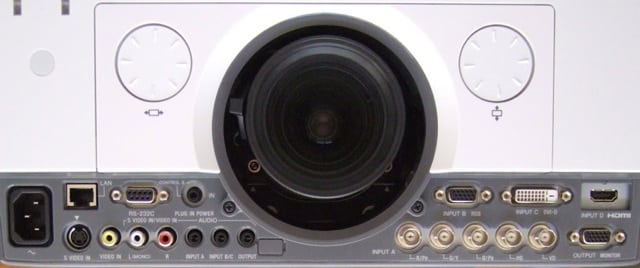
All connections to the FHZ55 are made to a variety of jacks along the bottom of the front panel.  These connections are, from left to right: the power cord jack, LAN port, S-video and composite video inputs, RS-232 serial control port, wired remote connector and audio inputs that separately match up with the various video inputs.  There is a break in the panel as the bottom half of the lens separates the two sides of the panel.  Starting just right of the lens, we have: 5-BNC video input jacks, an RGB computer input, a DVI-D input, an HDMI input and an RGB monitor output.  Having all the connections along the bottom front edge is inconvenient for table mounting, but the FHZ55 is most likely to be ceiling mounted, where cables could easily run up into the ceiling and out of the way.

Click Image to Enlarge

Setup & Menus

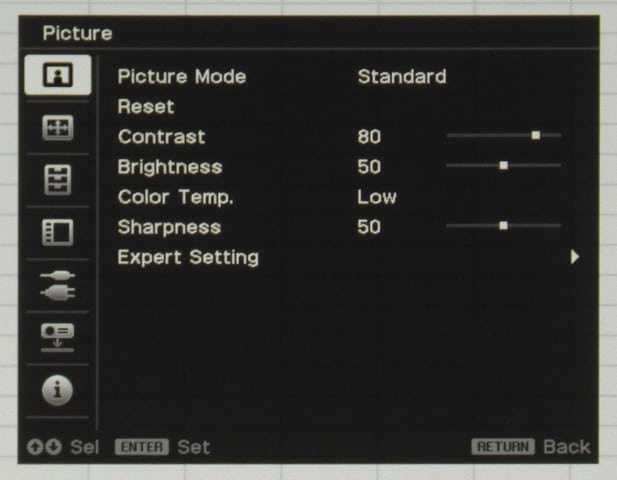
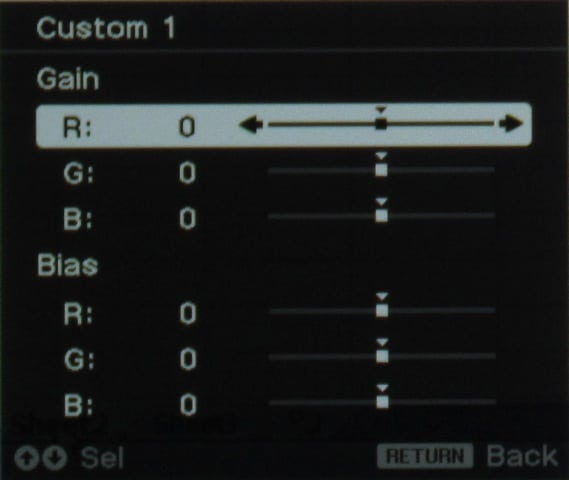
While the VPL-FHZ55 will normally be mounted in a permanent installation, it is easy to setup up in a table mount installation thanks to its two front adjustable feet and horizontal and vertical lens shift.    That adjustment capability will usually make keystone correction unnecessary, but it’s available if needed to minimally correct a misaligned image.  Sony also provides a four corner keystone correction feature that allows the user to square the corners without adversely affecting the majority of the image.  Ideally, you would not want to use more than the corner correction, as excessive correction will have an adverse effect on the sharpness.  The FHZ55 provides a very sharp image and the last thing you want to do is detract from that. Once you used the lens shift to line up the image with your screen (there’s a test pattern that can be displayed to assist in that), you can bring up the menu to select the desired Picture mode, as well as more advanced picture adjustments.  Choose one of the three available Picture modes, fine tune it with the usual Brightness, Contrast, Color, Hue and Sharpness adjustments and you’re ready to go.  For the advanced user, Sony has also added three custom color temperature modes in addition to three preset modes (Low, Middle and High).  The three custom modes start with each of the presets and allow adjustments to each. The VPL-FHZ55 fires up quickly and has four test patterns that can aid in initial setup (using the picture geometry and crosshatch patterns), as well as more advanced picture adjustment (using the grayscale and color bars).  The menu will be familiar to anyone who has previously used a Sony projector and is simple to use.  Simply choose one of the available color modes, fine tune it with the usual Brightness, Contrast and Sharpness adjustments and you’re ready to go.  For the advanced user, Sony has also added full color management, allowing adjustment of hue, saturation and brightness of both the primary (Red, Green, Blue) and secondary (Cyan, Magenta, Yellow) colors.  This allows for the greatest color accuracy when presentation needs demand it.

Sony VPL-FHZ55 Menus

Picture menu

Custom color temperature menu

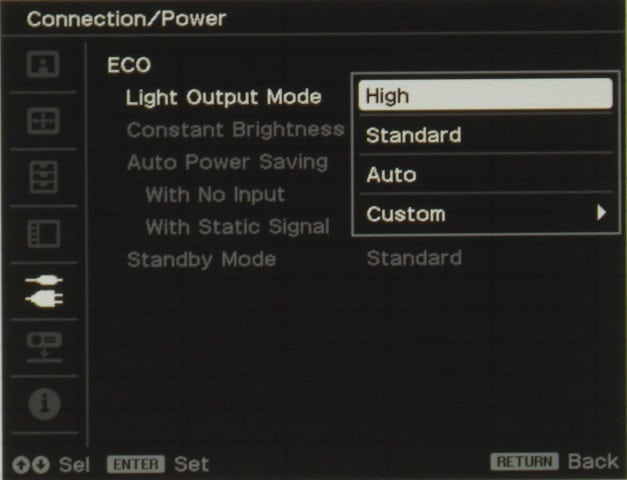
ECO menu

Remote Control

The FHZ55 has a basic, but well laid-out remote.  The remote is white with a combination of white and gray buttons, with the exception of the Power on/Standby buttons which are green (a good idea as they stand out and are not easily accidently used).  The Power and input buttons are right on top, with separate buttons for each input.  The inputs are labeled with letters (A, B, C etc.) on the projector and duplicated on the remote, so you have to know in advance what input the letters correspond to.   It would be much simpler to label all the inputs properly (as the S-video and composite video inputs are for some reason).  Below the input buttons are the usual menu and navigation buttons.  There are additional buttons for digital zoom, audio volume, freeze and both audio and video muting.  There is also a button to enable the display of two images at the same time on a split screen (Twin).  As we noted with the VPL-FH30 (which uses the same remote), this remote is used with other Sony projectors, so there are a number of buttons that do not function on the remote (lens shift and zoom, for example).  Since the FHZ55 does have lens shift, but not motorized lens shift, this can be confusing to the new user.

Click Image to Enlarge

If the projector is mounted in a hidden location (with only the lens exposed), the remote has a jack on the bottom of it enabling it to be wired directly to the projector.  Another feature allows you to control more than one FHZ55 at a time independently from a single remote.  By turning on the “ID” slide switch on the side of the remote, you can switch the remote between three different projector IDs and have completely independent, full control of each projector. The buttons are not backlit, but that is typical for presentation projectors.  In general, I found the buttons to be well laid out and spaced sufficiently to avoid hitting the wrong one, even in the dark.

© 2024 Projector Reviews

crossmenu linkedin facebook pinterest youtube rss twitter instagram facebook-blank rss-blank linkedin-blank pinterest youtube twitter instagram