The PT-RW430UK has a sleek industrial design with a black case. Facing the front panel of the projector, the lens is mounted right in the center. The lens is surrounded by two rings for zoom and focus. There is an IR receiving eye for the remote to the left of the lens and indicators for power, light source, and temperature status on the top left, front edge. To the right of the lens is a joystick for manually shifting the lens horizontally and vertically. For the rare occasion where this projector is table mounted, height adjustment can be made via two screw feet in each of the front corners.
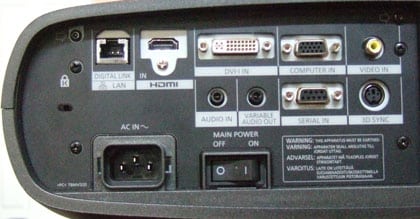
The connection panel is on the left side of the projector, rather than in the rear as usual. This connection panel is adjacent to a large air exhaust vent. The connection panel is well appointed for the projector’s intended uses, without accounting for every conceivable connection. From left to right, the panel has the following connections: a LAN port for Digital Link or network control, an HDMI input, a DVI-I input, a standard RGB computer input and a composite video input. Below that are a mono audio input and variable audio output, an RS-232 serial control input and a 3D Sync jack for a 3D IR transmitter. Finally, there is a Kensington lock port, a power cord connection and a power on/off switch.
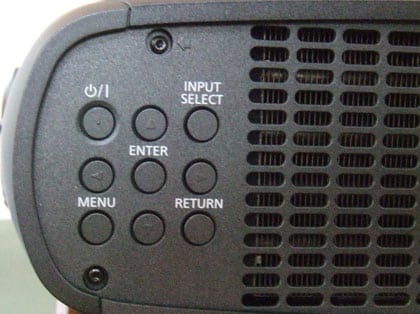
On the right side of the projector, we have the main intake vent and a small control panel. The control panel has buttons to access the main functions. There is a Power on/off button, an Input button, menu and menu navigation (left, right, up, down, enter and return) buttons.
The rear of the projector has two air intake vents, one air exhaust vent and a second IR receiving eye.
The PT-RW430UK’s ability to be placed in any position vertically, along with its manual lens shift allow it to be easily set up in a ceiling or wall mounted installation. This adjustability will usually make keystone correction unnecessary, but the PT-RW430UK offers a digital keystone correction that offers up to 40 degrees of correction. Ideally, keystone correction should be kept to a minimum as the more it’s used, the more image quality suffers.
Due to its conventional lamp-free design, the PT-RW430UK fires up quickly, displaying an image within 10 seconds. There is an assortment of built-in test patterns that can be displayed to assist in alignment setup, as well as for making other picture adjustments.
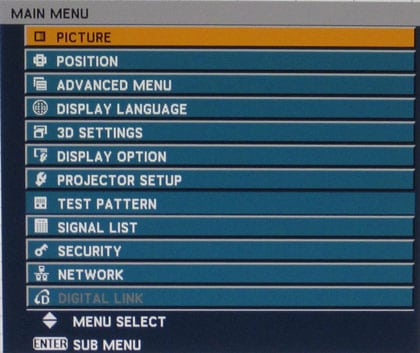
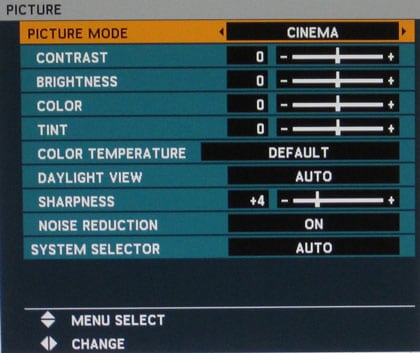
Once the image is properly aligned with your screen, you can bring up the menu to select the desired Picture mode, as well as additional picture adjustments. There are seven available Picture modes (Dynamic, Graphic, Standard, Cinema, Natural, Rec. 709 and DICOM Sim) to choose from and each can be fine tuned with the usual Brightness, Contrast, Color, Tint and Sharpness adjustments. There are other adjustments for the advanced user, such as full grayscale RGB adjustment in the User color temperature mode.
If you’re using the PT-RW430UK in a multiple projector configuration (see the Special Features section of this review), there are other adjustments to create a seamless transition from one projector to the next.
The PT-RW430UK’s remote is silver with white buttons (with the exception of the Power On/Standby button which is red) that are well spaced. The Power button is on the top left, flanked by the Auto Setup button and there are separate buttons for each input below them. Below the input buttons are the usual menu and navigation buttons.
There are additional buttons for Freeze, AV mute, Default, Eco and three Function buttons. At the bottom of the remote are volume buttons to control the audio output from the projector and buttons for use with multiple projectors, to either set the ID or access all projectors at the same time. The remote has two IR emitters (rather than the usual one) and is rated to work at distances up to 49 feet.
The buttons are not backlit, but that is typical for presentation projectors. For the most part, I found the buttons to be well laid out and spaced sufficiently to avoid hitting the wrong one, even in the dark.