The Control Panel
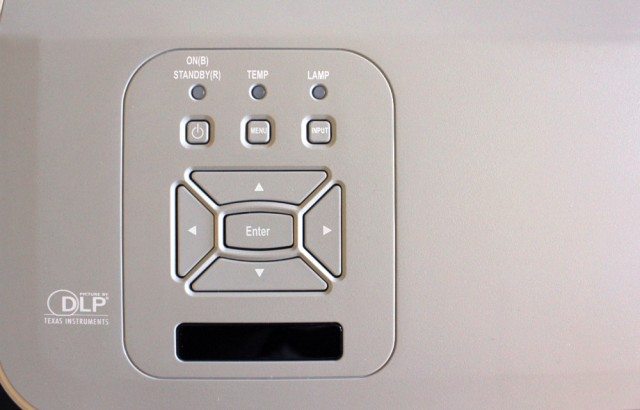
The Optoma ZW300UST has a simple control panel and three indicator lights.
The Optoma ZW300UST has a typical control panel that is simple in design. Located on the front left of the projector, just above the inputs and connectors panel and opposite the recessed lens, the control panel allows you to do basic commands. The control panel is separated into sections, so we will discuss them starting at the top.
The first section contains the LED indicator lights. The On/Standby light turns red when in Standby, blue when the projector is On. Next to that is the Temp light to indicate when the projector is overheating, and the Lamp light illuminates when the light source needs to be serviced.
Below that are three buttons: Power, Menu, and Input. The Power button, naturally, turns the projector on and off. Press once for on, twice for off - this is pretty typical. The Menu button brings up the menus. Input brings up the source inputs to choose from. One cool thing about this projector is that it can automatically sense the input when a new image source is plugged in and operational, so this button is most useful when switching between two images sources that are powered on at the same time.
Under that, in the next section, is the standard four-directional arrow keypad with the Enter button at the center. Those arrow keys are used to navigate the Main Menus (discussed later on this page) and that Input Menu. Directly under that is the RF emitter for the remote control.
[sam_pro id=1_99 codes="true"]
The Remote Control
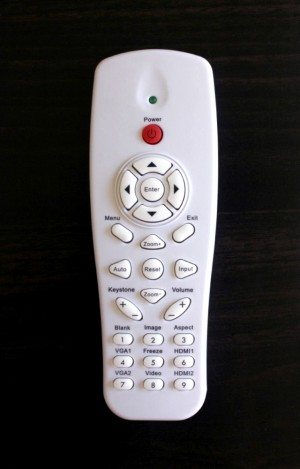
The Optoma ZW300UST has a lightweight and well laid out remote, though it is not backlit.
The ZW300UST's remote control is weird looking. It's slightly bulbous in places and skinny in others. At first glance, the layout looks a little strange due to the remote's shape, but it is actually pretty well laid out. No backlight, which is always a bummer, but at least there are some buttons which serve dual functions and it is lightweight.
At the top of the remote, there are the indicator light and the Power button directly below it. The simple navigational arrow keys surround an Enter button, just like it is laid out on the control panel. Underneath, there's the Menu and Exit buttons, which are used to enter and exit the Main and Advanced Menus.
Next, we have what looks like four directional keys and an enter button, but they serve different functions. The top and bottom buttons adjust the Digital Zoom, which simply punches into the image and out, rather than adjusting the entire image size. The two side buttons are for Auto and Input. Below that, there are the buttons to adjust the vertical Keystone Correction and the Volume.
Lastly, there's the numerical pad, and many of its buttons serve dual functions. Numbers 1, 2 and 3 are also the commands for Blank, Image, and Aspect. Number 4 switches the input to VGA 1. Number 5 causes the image to Freeze, which is much like a "pause" button, but stops the image via the projector rather than the media player. Number 6 will switch the input to HDMI 1, and number 7, to VGA 2. Number 8 changes the input to Video, and number 9 changes it to HDMI 1.
[sam_pro id=1_101 codes="true"]
The Menus
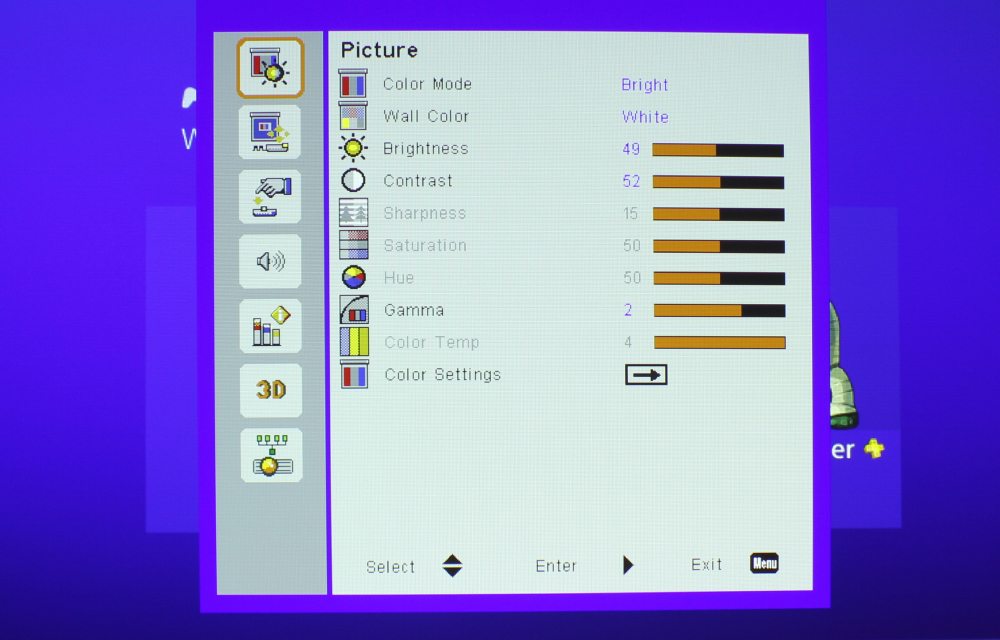
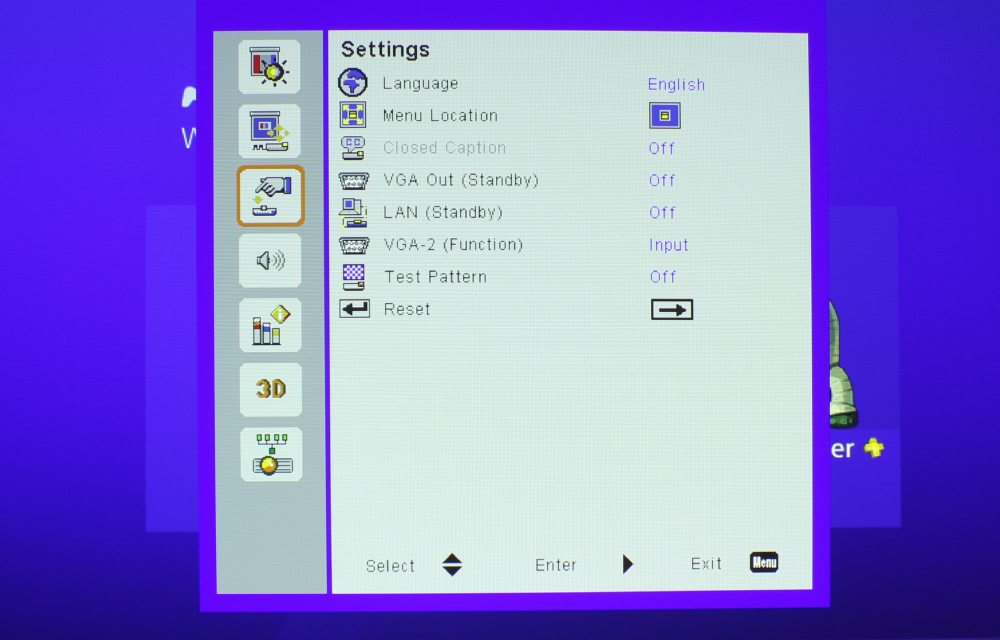
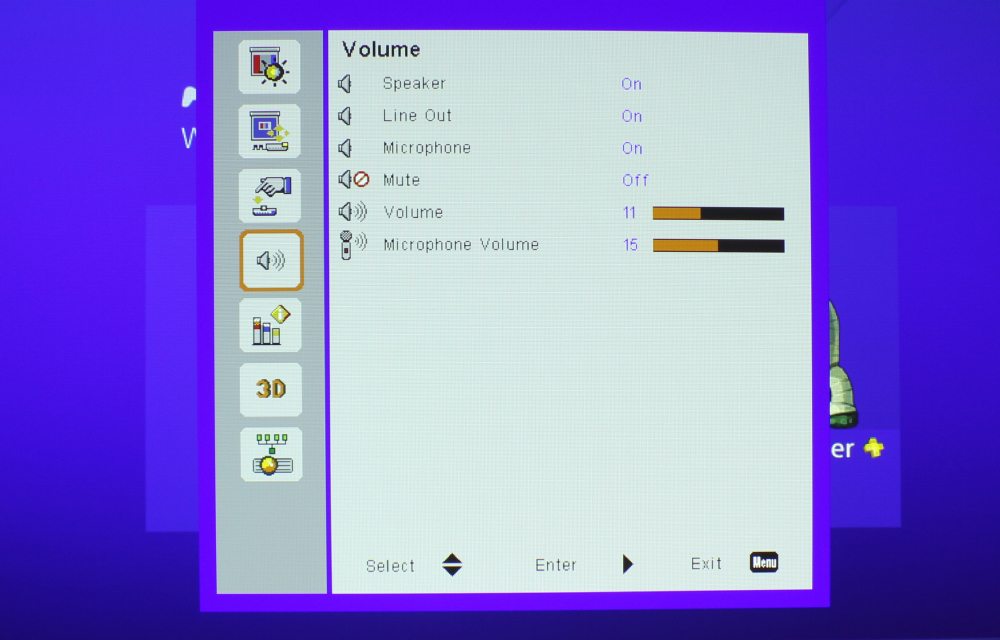
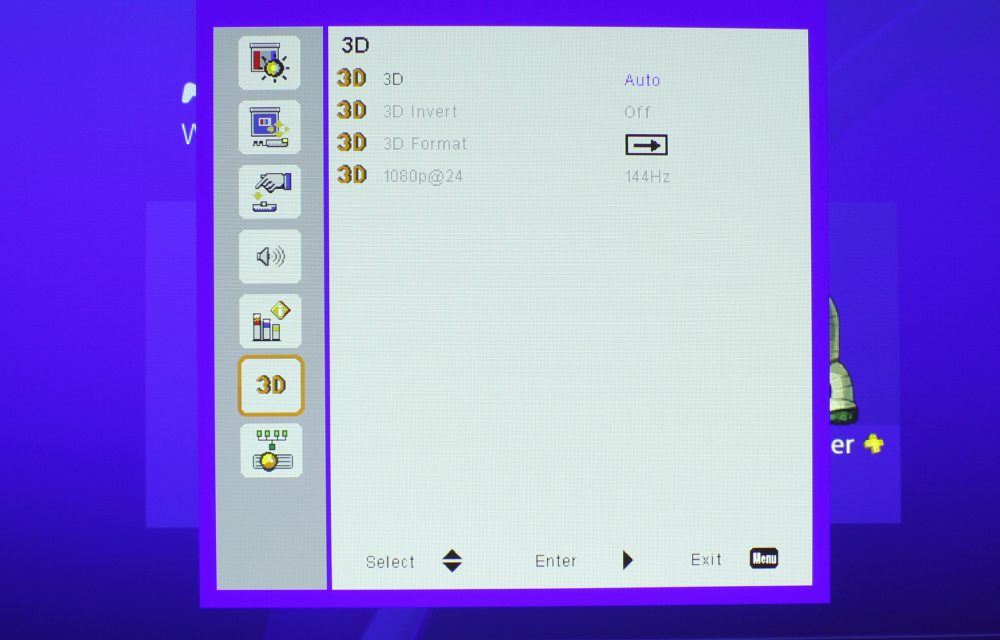
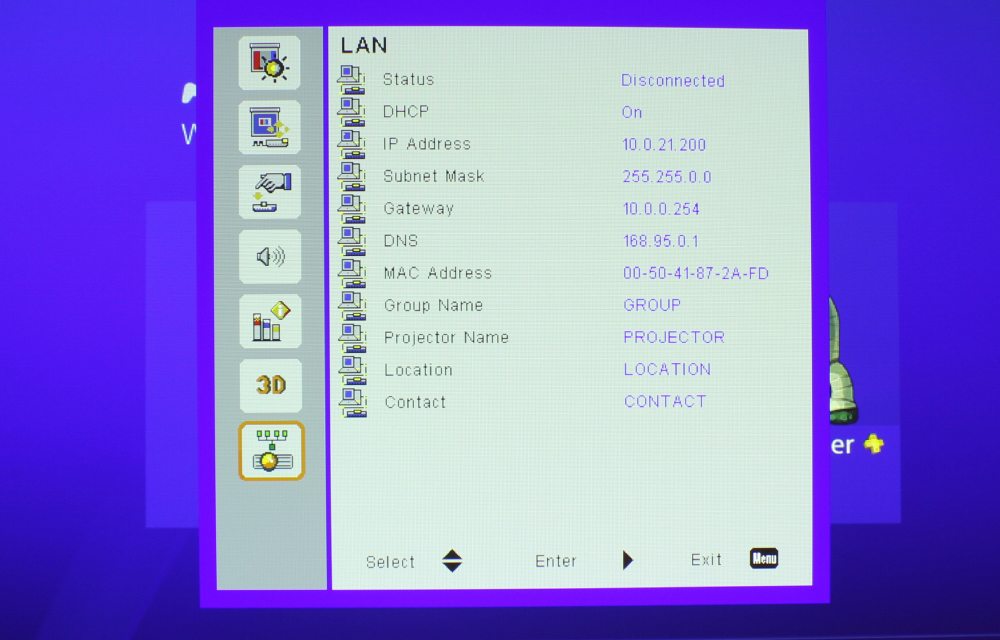
The Optoma ZW300UST's menus consist of seven main categories – Picture, Screen, Settings, Volume, Options, 3D and LAN. The menu is simple but with multiple settings to customize this projector to your liking and, more importantly, your needs.
Optoma ZW300UST Menus


