Optoma HD81 Menus
Overall the HD81 Menus are fairly logically out, although there are a lot of levels for some of the advanced features. For example from the main menu system, switching lamp brightness or controlling Iris settings are two levels down, three if you count the top Main menu.
Let's take a look.
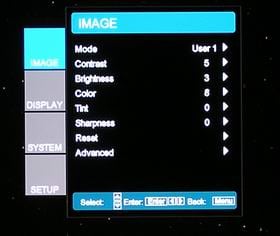
Upon pressing the Menu button on the remote, or the Outboard processor, you see the menu to the right, the Image Menu. On the left side, you can see the four primary menus: Image, Display, System and Setup.
The Mode gives you the choice of 3 User presets. All are slightly different. I used User 1 as the basis for most of my work. In addition the Mode lets you select from ISF Day, and ISF Night, if you have had your projector professionally calibrated.
After that, there are the usual basic image controls, like brightness and contrast. Unfortunately if you scroll down, to, say, Brightness, you then have to Enter or right arrow key which will then bring up your ability to adjust Brightness. It would be nicer if once on Brightness, the left and right arrow keys simply let you change the value, instead of essentially opening another window, and adding several extra keystrokes.
Last on the Image menu, is the Advanced option, not shown, gives you access to adjust the following: Noise Reduction, Gamma, Color Temperature, Image Mode, Edge Enhancement, Color Vividness, Black and White Extension, Demo, and a Reset. Shown here is the Color Temp Menu. In addition to the three presets (Warm, Standard, and Cold, you can access the User menu, shown immediately below. From this menu, you can individually control the R,G, and B Contrast and Brightness settings.
Some notes on a few of these options. Gamma allows 10 steps of control of the image, leaving the blacks black and the full intensity colors and white, as is, but adjusting the lower, mid, and upper ranges. For example, movies are looking for a higher gamma to provide a richer (and some would say darker) image.
Color Vividness, seems similar to TI's Brilliant Color circuitry, it seems to affect a number of aspects of the image, but basically allows you to increase intensity, without oversaturating.
Demo, is very interesting, it puts up a rectangle on the screen that allows you to compare the original settings with the changes you are making to controls, thus essentially giving you a bit of side-by-side comparison.
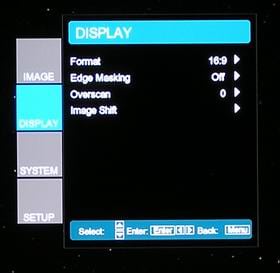
The next major menu is the Display menu shown here.

HD81 menu Image ColorTemp choice
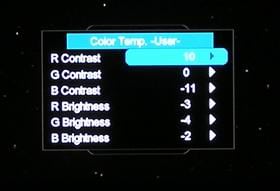
HD81 Menu Image ColorTemp user
Format allows you to select the aspect ratio for your content. From reading the manual the most interesting feature might be the Edge masking. The manual does not clearly explain what this is for. At first glance, it sounded like the projector was going to put a physical mask where you want it, to, for example eliminate the dark gray light in the letterbox area. Problem is, I could never get it to do anything noticeable. So my assumption may be wrong. When I get back from vacation, I'll try to get someone at Optoma to explain exactly what it's for, and how to make it happen. Image shift, on the other hand, I am familiar with. It allows you to move the image up or down the screen. If you have a full screen image, using image shift will cause you to lose part of the image. If, though, you are working with a letter boxed 16:9 movie, you could move the image up the screen so the top of the actual content, is even with the top of your screen. If you have the ability to control how far down your screen goes (motorized or manual), for example, you could only extend it as far as the 2.35:1 Cinemascope shape. Then by moving the image up, you would fill the visible screen and not have a letterbox. I always thought that was a usable feature for some.
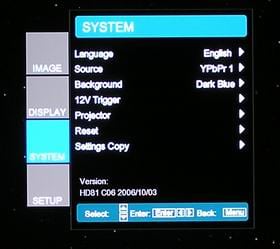
Moving to the System Menu, we find a couple of key capabilities, beyond selecting menu language or the background color. You can select source from here, but more interesting, you can program the 12 volt triggers for screen control, which would allow you to control a motorized masking screen. Equally important, is the Projector sub menu, which allows you to control the Iris (auto, off, or manual - with 16 settings), and the all important lamp mode. From there you can select low power or full power settings.
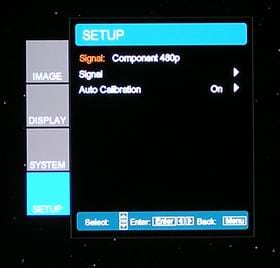
The last major menu is the Setup menu - which tells you the current source signal information, and allows more adjustments, such as choice of 0 or 7.5 IRE for most inputs, as well as additional white level, black level and saturation controls. It also provides access to the Auto Calibration mode.
In other words, the HD81 gives you a wealth of adjustable features, enough to likely keep even the most hard core tweakers happy.

