Projector Reviews Images

Optoma HD72 Projector Review - Physical Layout

Posted on February 21, 2006 by Art Feierman

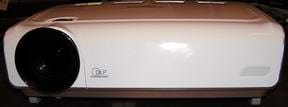
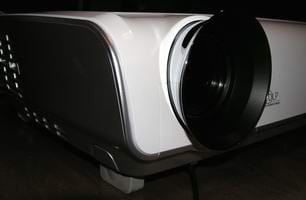
Starting from the front, the HD72 has a lens mounted off center, (toward the left if you are facing the projector). The lens itself is recessed, but has a large outer (silver) guard, which is also the focus ring. (The inside of this trim ring is black, no doubt to absorb any stray light coming from the lens assembly). On the right of the front is the IR sensor for the remote control. Below the front are two drop down feet - left and right, with the releases located at the bottom front of the left and right side of the projector.

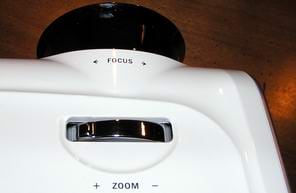
Moving to the top of the projector, just behind the lens is the adjustment control for the 1.2:1 zoom lens. It should be noted that 1.2:1 is a small amount of zoom, allowing limited placement flexibility. This amount howeer is fairly typical of DLP based projectors, which due to their technology are more limited than LCD projectors which often have 1.5:1 or even 2:1 zoom ratios, for a great deal of placement range.

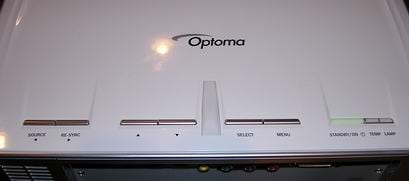
Across the back top of the HD72 home theater projector are seven bar like buttons, and two indicator lamps. Looking at the projector from the rear, from right to left: The lamp indicator, and a temperature indicator. Next is the Power/standby bar. Then after a space are the Menu and Select (enter) bars. another break and the down and up arrow keys, and finally two more bars, each with two functions. when the menus are in use, they are the right and left arrow keys. When you are not using the menus, one is the source (input) select. The other bar, labeled re-sync, triggers an auto adjust to provide the best possible image.

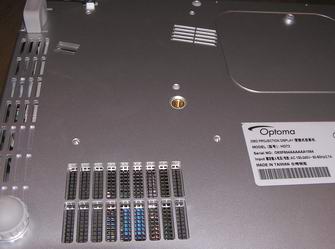
The bottom of the projector has 4 small recessed screw recepticles for attaching a ceiling mount. Optoma offers one, or you can use one of many universal mounts on the market. As Optoma chose small (metric, I believe) threading, make sure, if you order a 3rd party mount that it has the correct screws included.

Of particular note there is also a large standard thread recepticle for a tripod. This allows some interesting options. If you need to shel mount up high (which means the projector is inverted, this could allow an extremely small, and neat alternative to adapting a ceiling mount, or building a cradle. It's a nice touch, and I'd like to see Optoma offer a custom wall bracket that would take advantage of this. I all ready mentioned that there are two drop down feet, at the front left and right. An additional nice touch - there are two rear adjustable feet as well, both screw thread style.

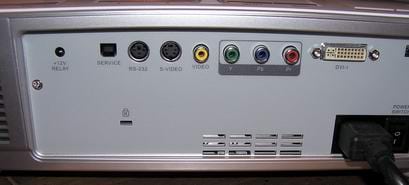
That takes us, finally to the back of the projector, where all the inputs are located. Facing the rear of the projector, from the left:

  • A 12 volt trigger for operating motorized screens
  • A USB service port
  • An RS-232 command and control port
  • S-video input
  • Composite video
  • A component video input (Red, Green, and Blue RCA jack inputs)
  • A DVI-I connector, which can handle a digital input, or analog computer
  • A separate HDMI digital connector
  • There is also the recepticle for the AC power cord and the master (hard wired) power switch
  • Lastly, a Kennsington lock slot (for physical security).

Of important note, the HD72, is the only projector I have reviewed to date, with two digital inputs, a real plus for many users. Of course if you do plan to also hook up your computer, you will need the DVI-I for that. Note, you can buy a HDMI or DVI switch box, but they tend to cost about $250 or more at this time.

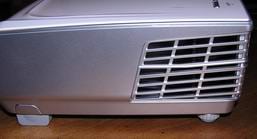
Lastly, the venting of the HD72 projector, which is an important issue relating to whether you ceiling mount, shelf mount or place the projector on a table: The HD72 seems to have several intakes, on the bottom, and on the lower right side. The hot air vents straight out the left side of the projector from vents mounted near the rear. This should allow the projector to be shelf mounted fairly close to the back wall. In speaking with Optoma on this matter, they advise that you have about 6 inches between the back of the projector and the wall the shelf is on. As the projector is only about a foot deep, and you would need at least 3 inches for cables, that seems very reasonable, and it means that an 18 inch deep shelf should do the trick!

Time to get to the the all important image quality of the Optoma HD72 home theater projector. Please click on the Image Quality link.

© 2024 Projector Reviews

crossmenu linkedin facebook pinterest youtube rss twitter instagram facebook-blank rss-blank linkedin-blank pinterest youtube twitter instagram