Projector Reviews Images

NEC P506QL 4K LASER BUSINESS PROJECTOR REVIEW - HARDWARE

Posted on February 8, 2021 by Phil Jones

NEC P506QL 4K Laser Business Projector- Hardware: Connections, Lens, Control Panel, Remote Control

OVERVIEW

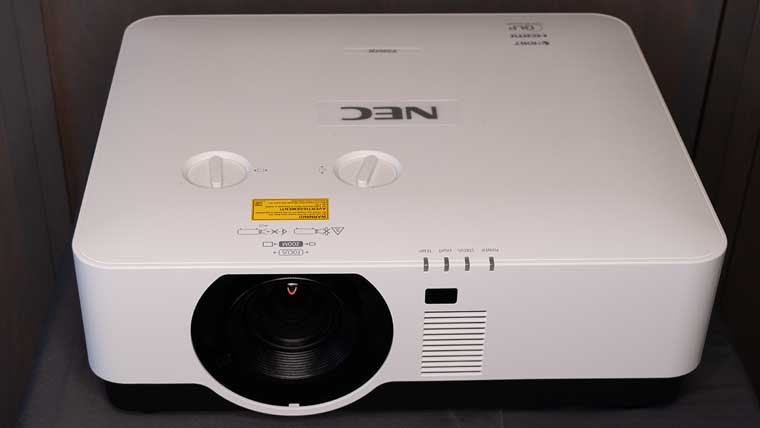
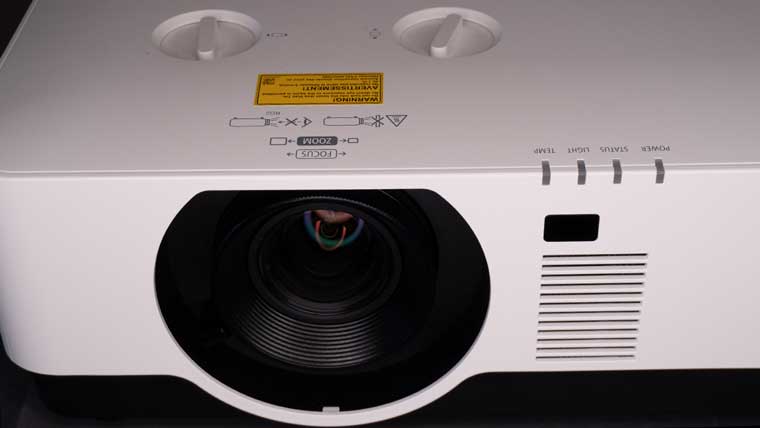
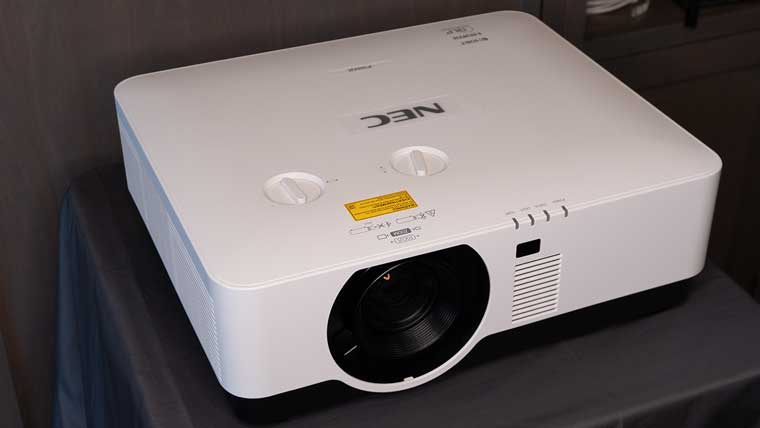
The P506QL is considered a medium-sized installation class projector. The projector's lens is on the left side of the front panel. Focus is done manually by turning the lens focus ring. The image size is zoomed in and out via the zoom lever next to the lens. Beside the projector's lens is the unit's mono speaker.

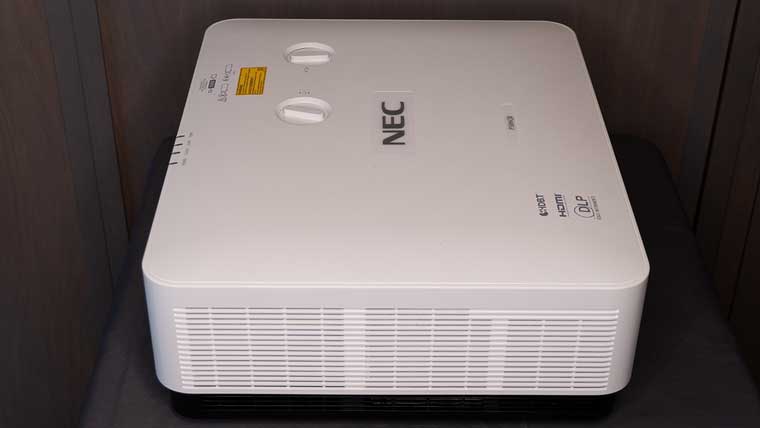
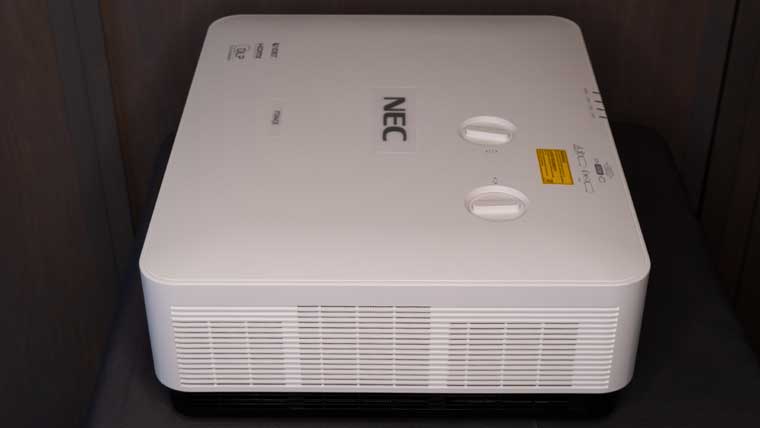
On top of the chassis are horizontal and vertical lens shift adjustment knobs. There are four status lights along the front edge of the projector's top panel. The ventilation intake is on the projector's left side, while the hot air exhausts from a ventilation grill on the right side. On the rear of the chassis are the connections and control pad.

INPUTS AND CONNECTIONS

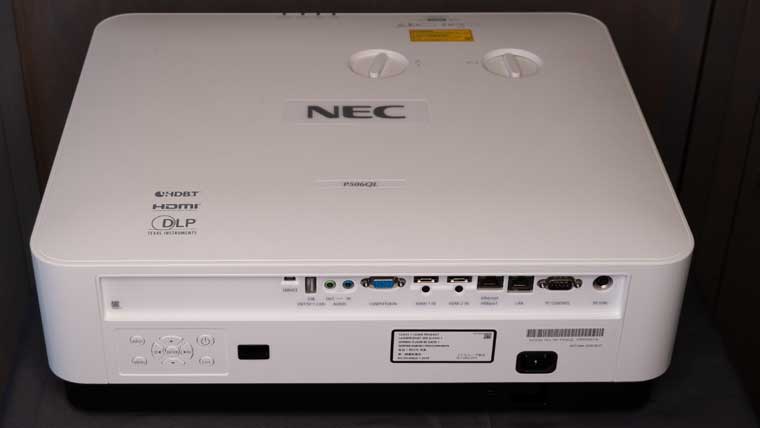
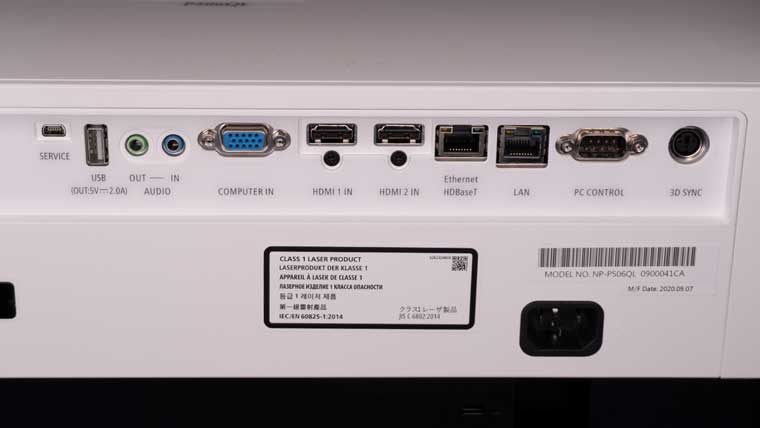
The power and signal connectors for the P506QL are located on the rear panel of the projector, and it has a USB-A input, a computer input, two HDMI inputs, an HDBaseT port and a LAN part. There is also an Audio IN/OUT stereo mini-jack and a PC control serial port.

InputAmount
HDMI 2.0b (HDCP 2.2)2
USB Power (5V / 2.0a)2
RJ45 - LAN port for Network1
RJ45 - for HDBaseT1
D-sub 9pin - RS232 serial 1
Computer RGB Input1
3.5mm Headphone jack1
IR Receiver (Back + Front)2

LENS

The P506QL has a manual lens. Zoom adjustments are made using a lever located to the left of the lens, while a ring is used to focus the image. It has a zoom range of 1.5x and a throw ratio of 1.3 to 1.7. The throw distance can quickly be calculated using the width of the screen.  For example, on a 100" wide image, the throw distance would be between 130" and 170".

Since diagonal screen size is usually listed and to eliminate the need for you to do the math, below is a basic for your reference.

Throw Distance for a 16:9 Screen

Screen Size (Diagonal)Min Screen Distance (in)Max Screen Distance (in)
80”78.2 (1986mm)117.9 (2994 mm)
100”98.1 (2492 mm)147.7 (3752 mm)
120”118.1 (2999 mm)177.6 (4510 mm)
150”148 (3758 mm)222.3 (5647 mm)
180”177.9 (4517 mm)267.1 (6784 mm)

The P506QL also has both horizontal and vertical optical lens shift. The horizontal and vertical lens position adjustments are made using dials on top of the chassis right above the lens. As you turn the wheel, it moves the image accordingly until you reach the limits of adjustment.

Lens Shift (Hortizontal +/- 20%, Vertical +/- 60%)

The picture can be raised or lowered by 60% of the vertical image height. It can also be shifted to left or right by 20% of the image width.

Of course, like all projectors with H/V shift, moving the image in the horizontal direction will limit the amount of shift available in the vertical direction. So the maximum shift in one direction comes when the other is centered.

While the ability to move the image location via optical lens shift provides the best image quality compared to digital geometry adjustments, the P506QL also includes horizontal and vertical digital keystone correction adjustments.

CONTROL PANEL

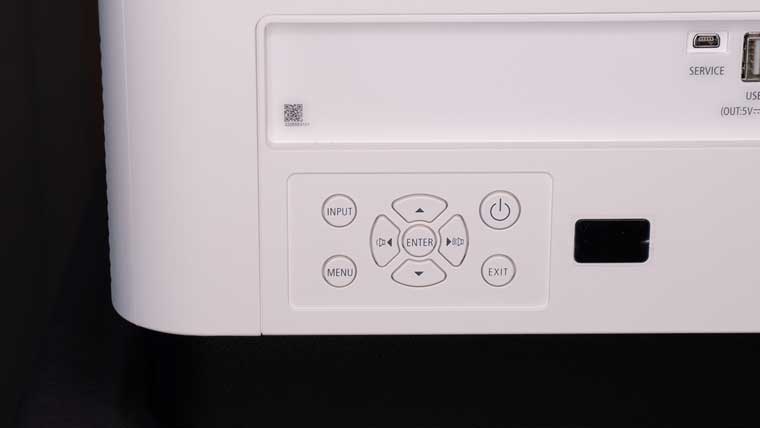
The P506QL has its control pad on the rear of the projector.  At the right top of the control pad is the power button. The input button (to select the desired signal input) is located on the top left. The 4-way menu navigation buttons plus the enter button are in the middle. Below those are the Menu button (to display the on-screen menu) and an Exit button.

REMOTE CONTROL

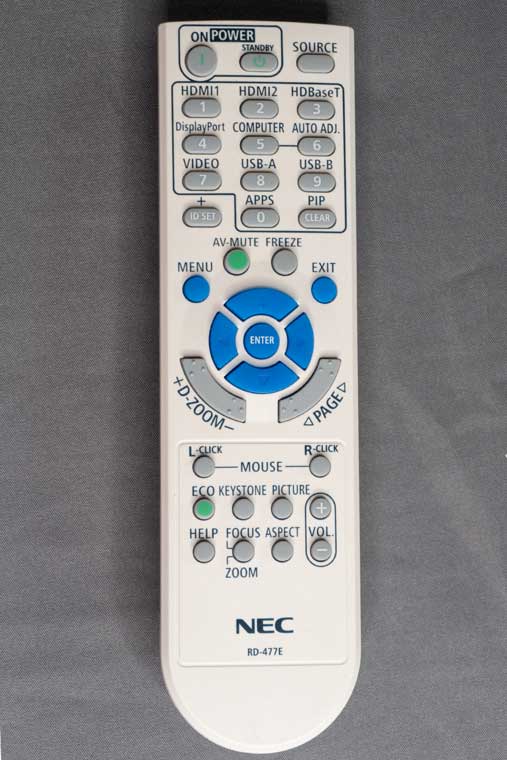
The P506QL comes with NEC standard remote control, which is compact and non-backlit. The Power On and STANDBY and the Source (Input) buttons are located at the top of the remote. Below that is a group of buttons that do double duty as either a numeric keypad or direct input source selection

Next are buttons for AV Mute and Freeze (to freeze the current on-screen image), Below those are buttons to access and exit the on-screen menus. The next group of buttons contains the 4-way navigation buttons with an enter button in the center.

Below navigation buttons are rocker buttons for Digital Zoom and Page (used with the Viewer App).

The next row contains two buttons for mouse right and left click functions (does not work with this projector model). The final two rows of buttons are for placing the projector in ECO mode, making keystone corrections, making picture adjustments, controlling the speaker volume, displaying the Help information, Zoom/Focus (does to work with this projector model), and selecting the display aspect ratio.

© 2024 Projector Reviews

crossmenu linkedin facebook pinterest youtube rss twitter instagram facebook-blank rss-blank linkedin-blank pinterest youtube twitter instagram