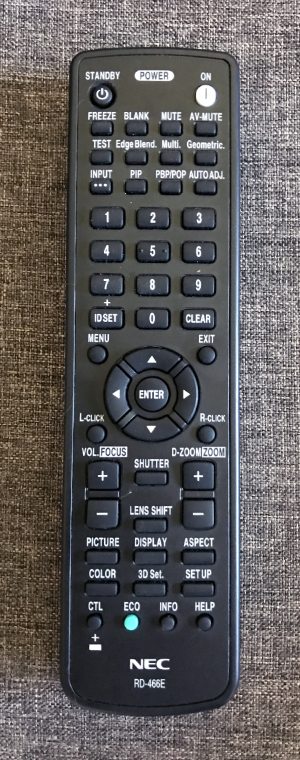
Below that are the final four buttons in this section of the remote: Input, PIP, PBP/POP, and Auto Adj. Input, of course, brings up the Inputs menu. The PIP button is for Picture In Picture and PBP/POP button is for Picture By Picture or Picture On Picture. Auto Adj. is used to automatically adjust the picture quality if the edges of your screen are cut off or the projection quality is bad when projecting a signal from the computer video input, HDMI 1 In, HDMI 2 In, DisplayPort In, or HDBaseT In/Ethernet ports.
The next section has the standard 1-9 plus 0 number buttons, and some of these serve a dual purpose. The number 1 also acts as a trigger for the HDMI 1 input, 2 is for HDMI 2, and 3 changes the input to DisplayPort. The number 4 button switches the input to Computer, and 5, to HDBaseT. There are two buttons on either side of the 0 button. On the left, there is the ID Set button, which allows you to assign an ID to the projector. If using multiple projectors, you can assign the same ID to each and use one remote to control them all. On the right, there’s a Clear button.
Underneath that, we have the traditional directional arrow keypad surrounding an Enter button. On the top left of the keypad, there’s the Menu button to bring up the menus, and on the right, the Exit button to exit the menus. On the bottom left, there’s a L-Click button, and to the right, a R-Click button.


