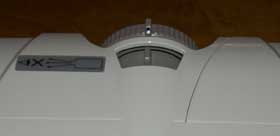
On the right side (facing from the front of the projector), there is another air intake vent and on the left side is the exhaust vent.
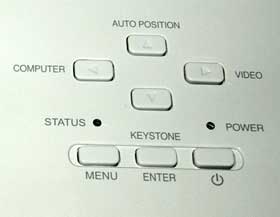
Moving to the top of the projector, just to the left of the lens is a removable cover for accessing and replacing the lamp. This is well located for easy access if the WD510U is ceiling mounted. The lamp can be changed without unmounting the projector. Continuing along the top of the projector, heading toward the rear, we find a control panel with indicator lights. There are buttons for Power, Menu, Enter and Up, Down, Left, Right menu navigation. When not in the Menu, the Up and Left buttons also control Auto Position and Computer input. Finally, there are indicator lights for Power and Status (for overheating and lamp replacement notification).
The rear panel consists of the usual assortment of connections. Facing the rear of the projector moving from left to right, we start with the power cord connector, followed by an RS-232 terminal for serial control, two standard computer monitor inputs (mini D-SUB, 15-pin), a DVI-D (with HDCP) input and a monitor output. Next are S-video and composite video inputs, stereo audio RCA jacks, audio input and output mini jacks and a computer USB input. A lock bar along the bottom edge, a second IR receiving eye, a Kensington lock port and finally a small speaker on the bottom right side of the rear panel.
Connecting the WD510U to a laptop via the typical analog connection and using the auto position button resulted in perfectly synced and aligned image. Bringing up the on-screen menu, there are a number of picture modes which are identified as Color Enhancer modes. It appears that each mode uses different setting for gamma and BrilliantColor, which are not adjustable except in User mode. One of the Color Enhancer modes is an Auto setting, which automatically sets color balance and a Dynamic gamma feature “dynamically adjusts power to selective color wheel segments” (Mitsubishi’s description) based on the input source. I found the Auto setting to be useful if high lumen output is not a requirement, as it reduces the maximum output by 25%. There is also a User mode that enables you to adjust different gamma settings, levels of BrilliantColor and RGB Color and Tint.
In addition to these settings, there are three color temperatures (Low, Standard and High) and a fully adjustable (RGB Contrast and Brightness) User color temperature. While some multimedia projectors have whiteboard and blackboard picture modes, the WD510U takes it a step further by providing a “Wall Screen” menu option. The Wall Screen menu allows you to choose from wall colors of Beige, Light Blue, Light Green and Pink (with adjustable levels for each), as well as Whiteboard and Blackboard. When using the WD510U with a conventional screen, this feature is turned off.
The WD510U has an RS-232 control port, which allows for integration with such popular system controllers like AMX and Crestron. This can facilitate preset commands for even speedier setup.
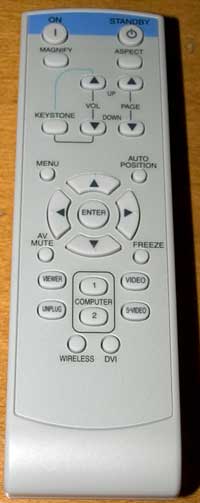
There is a USB port that, if connected to a PC that supports it, enables the user to go up and down through the pages of a presentation projected from a computer using the remote control - the most basic "remote mousing" functionality. Other notable menu items include Closed Captioning, editable Splash Screen, AV Mute and full signal control.


