menu
main
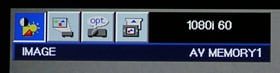
Overall, the menu system is easy to use. Pressing menu brings up a horizontal strip of four menu items. Arrow keys allow you to choose one, and the enter key takes you to the first menu item. The strength of the menu system is that you don't have lots of menu levels to navigate. Almost all controls are on those four menus. Items that have multiple choices allow you to scroll through them with left and right arrow keys.
I personally would favor highlighting and getting a pull down menu, so that you can see all the options, but this is a perfectly acceptable and fast menu system. The main menu shown above does not go away over time, just stays on the screen. I'd be happier if the projector had the option for the menu to go away after a short while without using it.
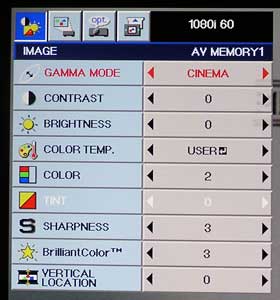
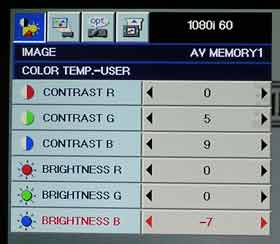
The Image menu (right) of the HC1500 contains all of the controls for image quality. Gamma mode lets you choose one of the main presets - Cinema, Natural, Sports, and User defined. After that, there are the usual contrast, brightness, color (saturation), and sharpness controls. Also on the Image menu is the Color Temp which offers up presets, and a User savable area (shown below) for custom adjustments (such as we did to come up with a slightly better color balance than the original out of the box performance). Also found on this menu, is the control for Brilliant Color, and Mitsubishi's vertical image control, which allows you to do things like move a letter boxed movie's image up or down on the screen. This in turn would allow you to not fully drop down a motorized or pull down screen, so that the the screen shape becomes 2.35:1 for Cinemascope width movies (most movies). A nice touch, though most people won't use this feature.
main
image
colortemp
installation
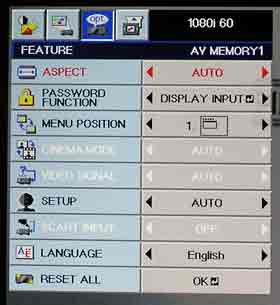
feature
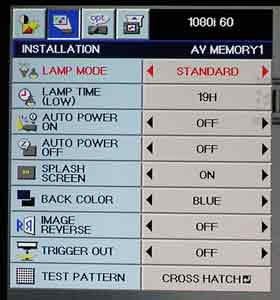
The next major menu is the Installation menu, shown here. From this menu, you can choose lamp brightness, auto power settings, background color (when there is no source image), and your positioning (front, rear, ceiling mount, table). Also on this menu, is control for the 12 volt screen trigger, test pattern options, and the lamp timer.
Moving to the Feature menu, here you get control of aspect ratios, you can input a password for security, adjust where the menus appear on the screen, language selection, and several features for manual or Auto selection for video sources.
A Signal menu, not shown, allows adjustments for computer signals, if the auto feature doesn't do a flawless job of locking onto your computer's output.
The HC1500 offers three savable settings. Each can be accessed from either the menu system, or directly off of the remote control. You must select one of them to get into the advanced menu controls to separately control RGB brightness and contrast.