Appearance
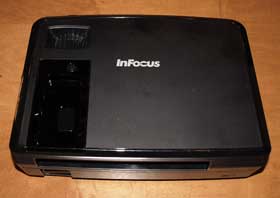
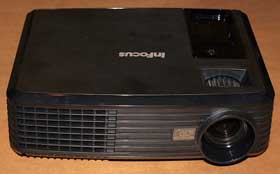
The X9 is a very small (though not the smallest - which I believe is the Optoma HD65) home theater projector. It is basically rectangular projector, with a little sculpting, and I'd say that while hardly "stylin", it is cute. The InFocus X9 is finished in a combination of shiny black, and flat black surfaces.
The zoom lens is mounted off center to the right (when looking at the X9 from the front). There is a single screw thread adjustable foot in the center below the front, and two more feet for a stable three point stance, in the rear (only one is adjustable). The hot air exhaust is in the front on the opposite side from the lens.
Control Panel
Click to Enlarge.So close
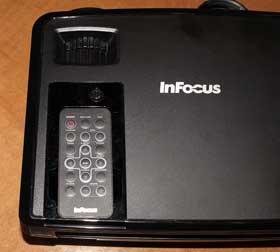
This is easy! The entire on-board control panel of the InFocus X9 home theater projector consists of a Power button. All other controls are only accessable through the remote control.
The Power button flashes it's LED blue light when at rest, solid blue, when on, and will switch to red patterns to indicate problems. To control the other features, you must use the remote control, which, when not in your hand, stores on the top of the X9.
 Click Image to Enlarge
Input/Output
Click to Enlarge.So close
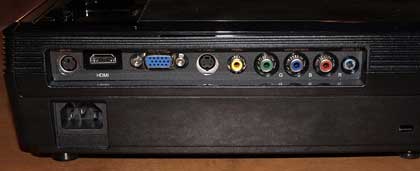
The InFocus X9 comes with a pretty basic set of inputs. No surprises here, except that it is one of the very few home theater projectors with only one HDMI input. That input is HDMI 1.3 with support for 24fps and Deep Color.
In addition, there is one computer input - a standard HD15 computer connector - which can alternately be used as a component video input. There is also a regular component video input with the usual three color coded RCA input jacks, plus the obligatory S-video and composite video inputs. There is also a stereo mini jack for audio input. Lastly, there is a serial connector for control of the projector from a computer, or room control system.
 Click Image to Enlarge
Menus
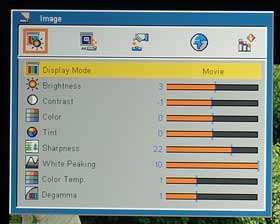
The X9 has five main menus. They are Image, Display, Default, Language and Info. Shown immediately to the right, is the Image menu, which is the one users will access the most frequently. The Image menu has the usual goodies: Display (preset) mode, Brightness, Contrast, Color (saturation), Sharpness, Color Temperature, Degamma, and a few other settings
The X9, as is typical of most DLP projectors offers no adjustable vertical or horizontal lens shift. As with virtually all projectors, the lens has a predetermined amount of fixed offset. This will allow an X9, sitting on a table, to be placed slightly below the bottom of your screen area, or an equal amount above the top of the screen area, if you are ceiling mounting the X9 projector.
Notably there is no way to do a grayscale calibration, as the usual separate R,G, and B controls are lacking on the X9.
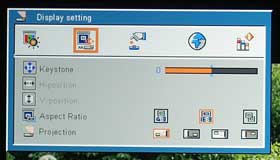
The Display menu is next. It is pretty basic, offering keystone adjustment, aspect ratio selection, and projection mode (ceiling, table, rear ceiling, rear table). In addition there are horizontal and vertical controls for re-aligning a computer signal, if the auto feature is a little off.
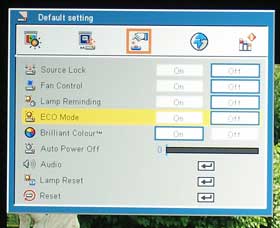
There are a number of key features to be found on the Default menu, starting with the Source lock. With Source lock off, the projector will scan for the first source it finds. With it on, it will go back to the last source used, when powering up. There is a fan control for high altitude, and an off/on option for the lamp reminder feature
Then come two of most important features on the menu. Eco-mode (low power) Off/On, and Brilliant Color Off/On. Other features on this menu include Auto Power off (no source), Audio controls, and Reset functions.
Remember, we recommend Brilliant Color to be on with this projector.
There is also an Auto Power feature which will shut down the X9 projector after a period of time when it sees no source signal.
There are two additional main menus, not shown, one is for language selection (menus), and the other is an Info menu that provides data on lamp hours, source signal, and the projector's firmware version.

