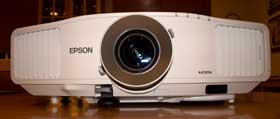
Facing the front panel of the projector, the lens is mounted in the center with an exhaust port to left of it. There are manual knobs on the sides of the lens for zoom and focus. Height adjustment is obtained via a push button, adjustable foot in the center front of the G5350, and two screw feet in the rear corners. There is an IR receiving eye on the bottom right side and easy access to the dust filter, which pulls straight out from the front right side. It can then be cleaned by vacuuming or replaced. The dust filter runs the full depth of the projector, sitting behind the intake vents that cover the entire right side of the G5350.
The only thing on the left side of the projector is the cover for access to the lamp, which is at the rear of the projector. As is the case with the dust filter, the placement of the lamp cover allows for easy access when the projector is ceiling mounted, without having to unmount it.
Moving to the rear panel, we are faced with a staggering assortment of connections and controls. Facing the rear of the projector moving from left to right, we start with the removable cover for the optional wireless LAN module. The cover is easily removed and the module plugs right in to a recessed USB jack. To the right of that is a small control panel with a number of control buttons that provide some of the functions also found on the remote control. There are buttons for Power, Source Search, Up, Down, Left, Right, Escape, Menu and Help.
Continuing to the right, we find quite an array of connections. Starting from the top and working our way across, there are outputs for a VGA monitor and 1/8” audio, followed by a VGA input and an 1/8” audio input. Then we have video inputs for HDMI, composite, S-video and stereo audio RCA jacks. Next, there is an LAN jack, followed by an SD card slot and two USB connectors, a standard Type A for a USB thumb drive and a Type B that is used for connection to a computer to output video over USB to the G5350. Below these connectors is a Kensington lock port and to the right, a built-in speaker.
Epson Powerlite Pro G5350NL Remote Control
 The G5350 has a basic, but well thought out remote. Power and input buttons are on top, right above a thumbpad which offers 360 degree response, making it very usable as either a wireless or wired mouse (with an optional mouse adapter or cable). The “trackball-like” action of the thumbpad also comes in handy when using the G5350’s built-in pointer.
The pointer display button, as well as buttons to control the electronic zoom and presentation pages, is right below the thumbpad. Also in an easily accessible location at the bottom of the remote are the Help and speaker volume. If external speakers are connected to the audio out, the remote’s Volume control will control them as well.
The buttons are not backlit, but that is typical for presentation projectors. In general, I found the buttons to be well laid out and spaced sufficiently to avoid hitting the wrong one, even in the dark.
Another feature allows you to control more than one G5350 at a time independently from a single remote. By turning on the “ID” slide switch on the side of the remote, you can switch the remote between different projector IDs (a total of nine selectable in the projector menu) and have completely independent, full control of each projector.
As the G5350 may be mounted some distance from the screen (recommended maximum of 47.8’), the remote has powerful IR emitters that are rated to work at a distance as great as 49.2’. I was able to control the G5350 from a distance of 50’ (as far as could get from it), so it easily met its rating. There was also no problem with a signal bounced off the screen at fifteen to twenty feet.


 The G5350 has a basic, but well thought out remote. Power and input buttons are on top, right above a thumbpad which offers 360 degree response, making it very usable as either a wireless or wired mouse (with an optional mouse adapter or cable). The “trackball-like” action of the thumbpad also comes in handy when using the G5350’s built-in pointer.