Overview
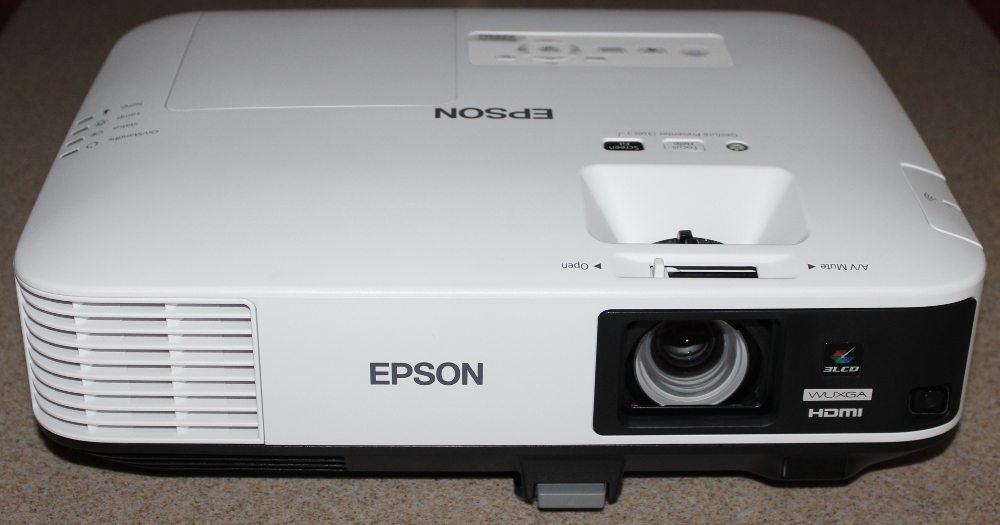
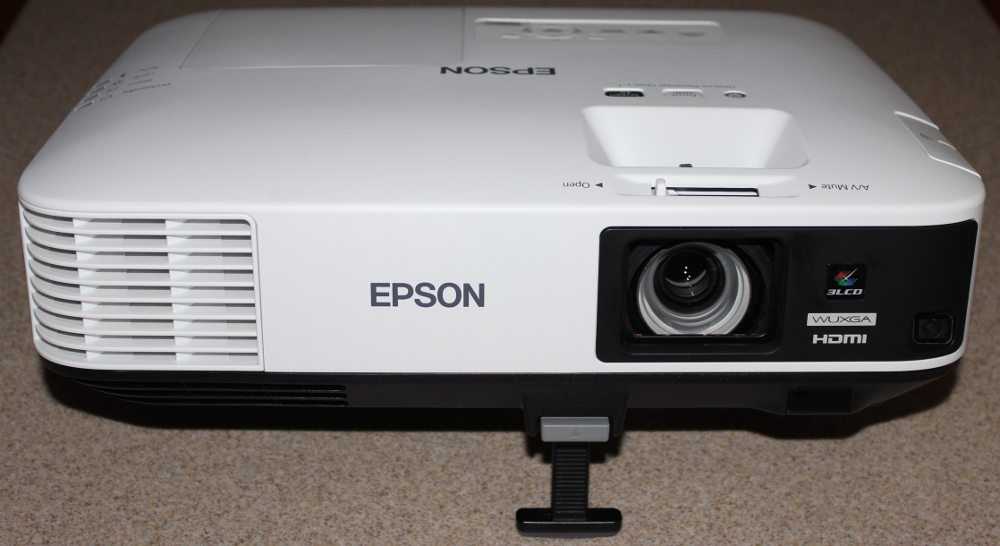
Considering its 5500 claimed lumens, the PowerLite 2265U is actually fairly compact, but as a 'portable' projector it is rather large (that weighs in just over 10 lbs.) It’s smaller than most projectors that can actually put out over 5000 lumens which I found to be impressive given its footprint of roughly 14.8 inches by 11.4 inches and by 4.3 inches high. If you ceiling mount it, it will seem modest in size. The projector has its manual zoom lens mounted off center (see 1st photo above), and has a door to cover it for protection when not in use. The front panel also has a grill for the air exhaust vent, as seen in the 1st, 2nd and 5th photos above. There is a front adjustable foot that drops down when you need to tilt the projector upward, as seen in the 2nd photo above.
The zoom and focus controls are on the top, as is the control pad and the slider for the lens cover which doubles as a switch to engage AV Mute, when the projector is on. More information on these are provided below.
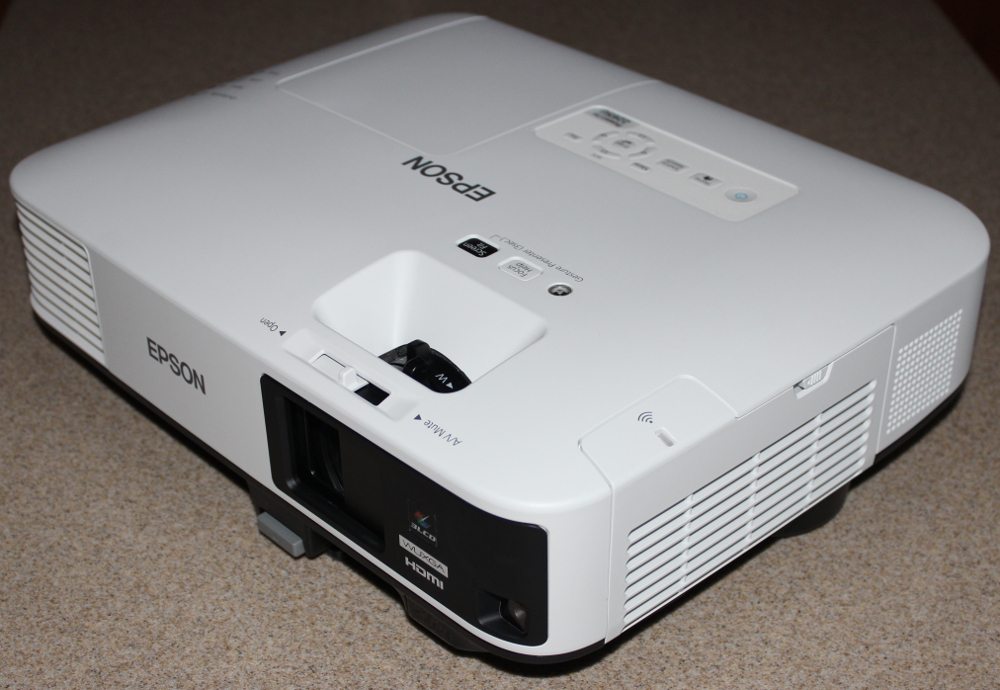
On the right side (viewed from the front when sitting on a table) is the air inlet grill/door, which hides the air filter. Toward the rear of the right side of the projector is the speaker grill.
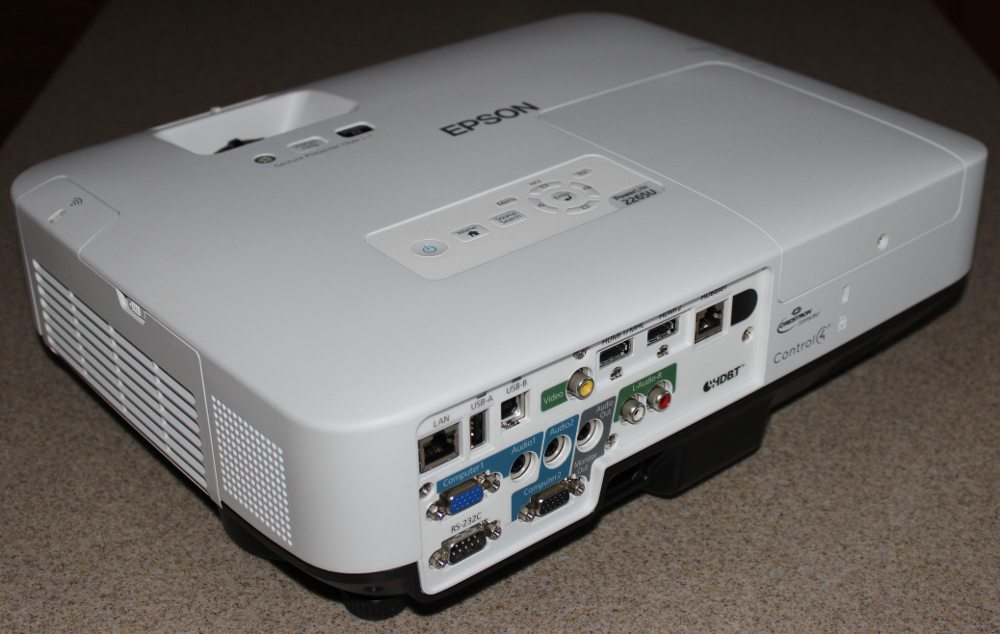
The projector's connector panel is located on the rear of the projector, as seen in the 4th photo above, where all of the signal inputs/outputs are located. More information on the connector panel is provided below. Infra-red sensors for the provided remote control are located on both front and rear.
The left side of the projector, as seen in the 5th photo above has the air exhaust vent that wraps around the front corner of the projector.
[sam_pro id=1_75 codes="true"]
Connector Panel
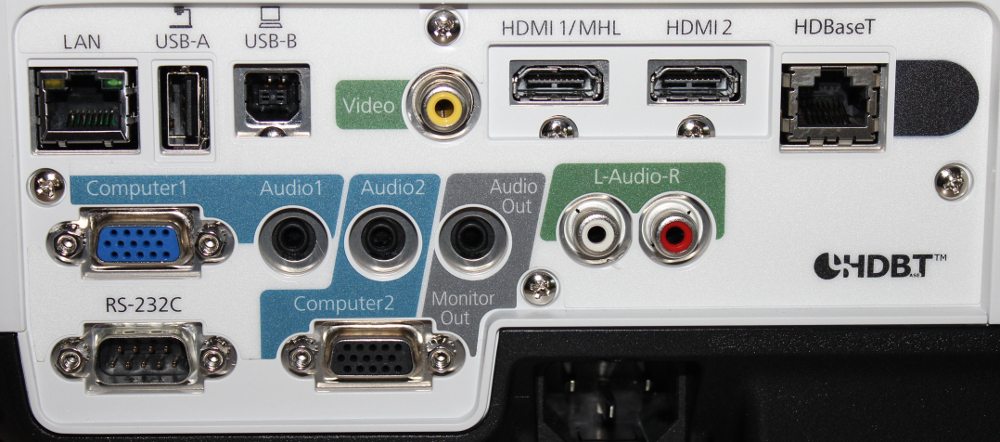
All the inputs and other connectors are found on the rear panel of the projector, as seen in the photo above.
Going from left-to-right: Hard wired networking is accomplished via the RJ45 LAN connector found top left. Next to that are a pair of USB connectors (an A and a B). Next over is a composite analog video input (standard definition only). Next are the connectors for HDMI 1 and 2, with HDMI 1 supporting MHL. Next is the connector for the HDBaseT (HDBT) network connection. Then comes the back IR remote sensor.
Next row: There’s a analog Computer #1 input (VGA style connector) and a companion stereo audio input jack (stereo mini). Below the Computer #1 input is a RS232 serial port for command and control, and to the right of that is the Computer #2 connector that can be configured either as a computer input or as a monitor output, as needed. Note that above it is the companion audio input for Computer #2 and to its right is a audio output that can be used when the Computer #2 connector is configured as a monitor out. Finally, there are a pair of stereo audio output connectors (RCA style) that can be used for a connecting to external powered speakers. That pretty much covers it except for the power cord receptacle at the bottom of the connector panel.
Control Pad and Status Lights
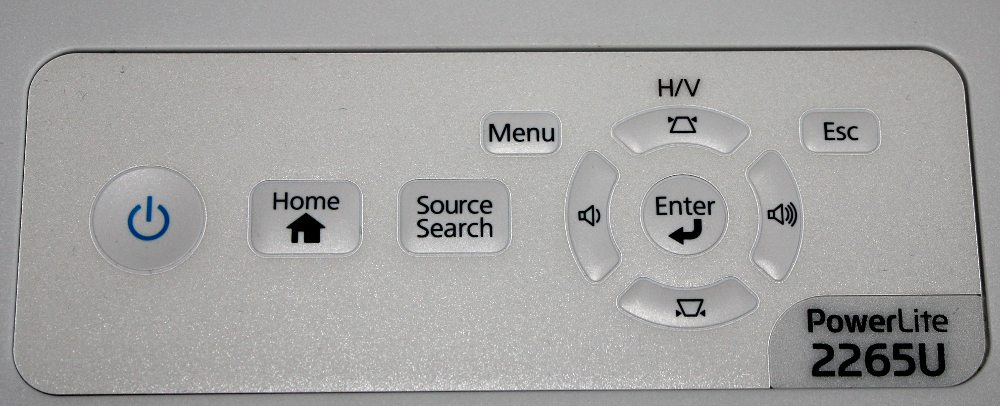
The Control Panel, shown in the 1st photo above, is pretty standard, especially for Epson. The control panel itself starts with the power button on the left. Moving to the right, you’ll find the Home button, input Source Search button, and then the menu/navigation area. To the right of the "source search" button and toward the top left of the 4-way navigation buttons is the Menu button. The Enter button is at center of the 4-way navigation 'ring'. Escape, which moves you back up a level when in the menus, is above to the right. When you are not in the menus, the four arrow keys have different functions. Up and down double for setting vertical keystone correction, while left and right are volume down and up. That pretty much does it. We’ll discuss the menus later.
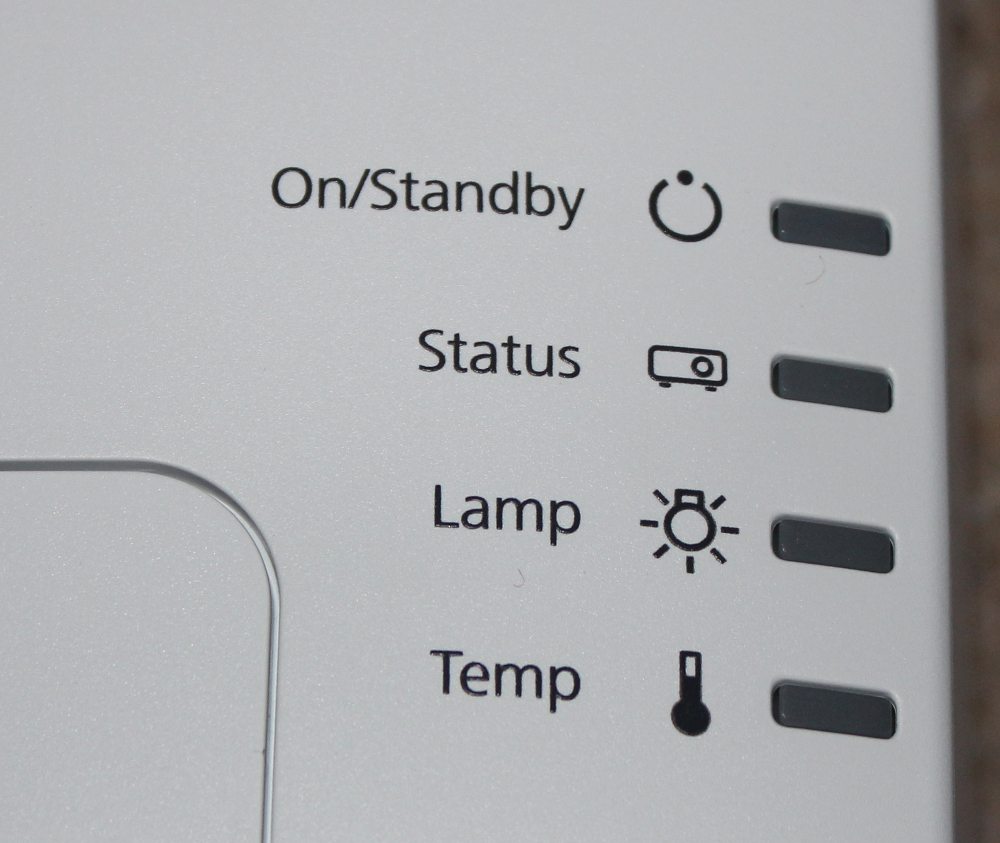
When looking down on the projector there are status indicator lights, shown in the 2nd photo above, on the far right-center of the top, for power, lamp, temperature, etc. with the manual showing a list of possible error codes should there be a problem.
Epson’s lens for the PowerLite 2265U is a manual zoom lens with a 1.6:1 zoom ratio. This is significantly more zoom – and therefore better placement flexibility, than most smaller portable and fixed install projectors many of which have 1.2:1 or 1.3:1 zooms.
Separate, but worth noting, this Epson has a user friendly feature called Screen Fit which will allow the projector to resize the image to fit the screen you are using. Press the button and it puts up a yellow border. Set the projector so that the border is slightly larger than the screen, and outside the screen area. Press again, and the image gets resized to fit. Done! You most likely wouldn’t need that if mounting, but if moving the projector from site to site, it’s quick. Not that normally adjusting zoom and elevation takes more than a few seconds.
As mentioned, the lens has a lens cover to protect it when not in use, and the lens controls are on top. The optics are very respectable with both focus being very good from center to edge. Yes, the projector isn’t as bright in the corners as the center, but the drop off is small enough not be noticeable unless you carefully look for it when displaying a full screen white image. There is no vertical or optical lens shift, but of course there is vertical and horizontal keystone correction, as well as other features like the Screen Fit just described.
Remote Control
Epson’s remote control for the PowerLite 2265U is medium sized with smallish buttons. It does not have a backlight, but then since a 5000+ lumen projector rarely has to work in a dark room, that should not be a problem. True, being backlit would be better, but few of today’s projectors – other than home theater models, have backlit remotes.
The range of the remote is pretty good. I had no problem bouncing the IR signal off the screen then back about 12 feet to the projector in my testing setup. Just remember to point in the appropriate direction, of course. The Epson has both front and rear sensors, so you can be a lot further back with the remote, if needed. Officially Epson puts the range at just over 26 feet, but it probably exceeds that.
The group of buttons toward the top of the remote include the power on/off button (blue) and buttons for input source selection.
Below that is a numeric keypad with 6 of those buttons doing double duty for “Screen Fit”, “Gesture”, "Link Menu", "Auto", “Aspect”, and “Color Mode”.
Below the numeric keypad are the buttons to display and navigate the projector’s menus. Also there is a “Pointer” button which displays an on-screen pointer that can be moved using the navigation buttons.
Below the navigation buttons are pairs of keys to (1) “Page” thru presentation slides, (2) electronic “Zoom” (i.e., to enlarge a portion of the image), and (3) a “Volume” control.
Near the bottom of the remote there are three buttons for (1) “A/V Mute” which turns off the picture and sound and places the projector in a lower power mode, (2) "Split" to use split screen mode, and (3) “Freeze” which freezes the current image being displayed. Finally at the bottom-right is a button labelled "Home" to display the home screen.
 Click Image to Enlarge
