Projector Reviews Images

Epson BrightLink 710Ui Interactive Projector Review – Hardware 2

Posted on January 30, 2018 by Nikki Zelinger

Epson BrightLink Interactive Projector Review – Hardware 2: Control Panel, Remote Control, Menus

Control Panel

Epson BrightLink 710Ui Interactive Projector Control Panel
The Epson BrightLink 710Ui's control panel is located on the side, and has plenty of functionality.

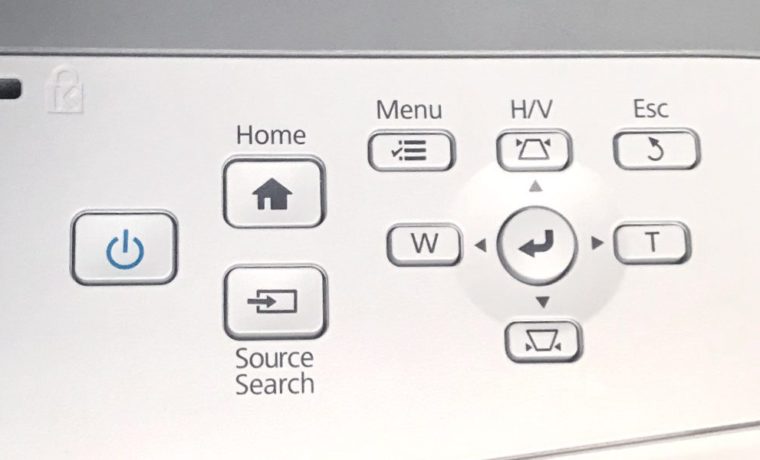
The Epson BrightLink 710Ui’s control panel is located on the left side of the projector next to the cool air intake vents. It is the same layout as the BrightLink 696Ui I reviewed last year. The control panel is inverted – that is to say, it is upside down when looking at the projector on a table top, as I have it set up for reviewing. That is because this projector is meant to be wall mounted, with the lens facing downward, which then makes the control panel face the right direction.

Starting at the left, there is a blue Power button next to the Home and Source Search buttons. Source Search, when pressed, cycles through the available source inputs until it finds one. This is a quick way to navigate between your sources. To the right, there are the four directional arrow keys surrounding an enter button to navigate the menus. Those four arrow buttons serve a dual function, with the up and down arrows controlling horizontal and vertical keystone correction, and the left and right buttons affecting the zoom. Now, that’s digital zoom, as ultra short throw lenses are fixed lenses that do not have zooming capabilities. There’s a button on either side of the up arrow key – Menu to the left, and Esc to the right.

Remote Control

One of the things I appreciate about projector manufacturers is that they tend to use the same remote across many models of their business/education and crossover home entertainment projectors. I’ve now seen and used this particular remote four times, which definitely makes writing about it a lot easier. When I reviewed one of Epson’s home entertainment projectors, some of the buttons on the remote didn’t function, as they related to business/education only – a fun fact. The remote still isn’t backlit, but I didn’t exactly expect them to make that change to this remote.

The Epson BrightLink 710Ui’s remote has 37 buttons, some of which serve multiple functions. Like most remotes, this one can be broken down into sections. The first section contains the Power button, Source Search, and four buttons to switch between popular inputs: Computer, HDMI/Video, USB and LAN. Below lies a section with a 0-9 Number Pad, the Number button to activate/deactivate it, and the ID button. Pressing the Number button allows you to use the 0-9 keypad as numbers, while pressing it again activates the second function of some of the numbers. Number 3 also serves as the Link Menu button. 4 is for Auto, which allows you to sync with a computer. Number 5 triggers Aspect Ratio, 6, Color Mode, and 8 activates Pen Mode. Pen Mode has two options: PC Free Annotation and PC Interactive.

Epson BrightLink 710Ui Remote Control

Next up is the section with the four directional arrow keys surrounding the Enter button. Here, the arrows do not serve a second function. The Enter button does, however. It also functions as the “left click” of a mouse. The Esc button, located at the top right of the section, serves as the right click. Directly opposite is the Menu button. Underneath that is the User button, which can be easily programmed in the Menu, and the Pointer button on the far right. That Pointer button brings up one of three pointer icons on the screen that can be used to direct attention to a particular point on the projected image without having to physically be up at the screen.

The section below has three functions, each with a pair of buttons. Page Up and Page Down, E-Zoom In and E-Zoom Out, and Volume Up and Volume Down. E-Zoom is different than digital zoom, as it does not affect the optics – it allows for zooming into the picture while keeping the size of the image the same, meaning you’ll lose the outside edges of the image. This is really just a feature for “punching in” on a specific point within the projected image, and not as a zoom in/zoom out function. The bottom section has four buttons: A/V Mute, Split Screen, Freeze, and Home. The remote comes with two AA batteries.

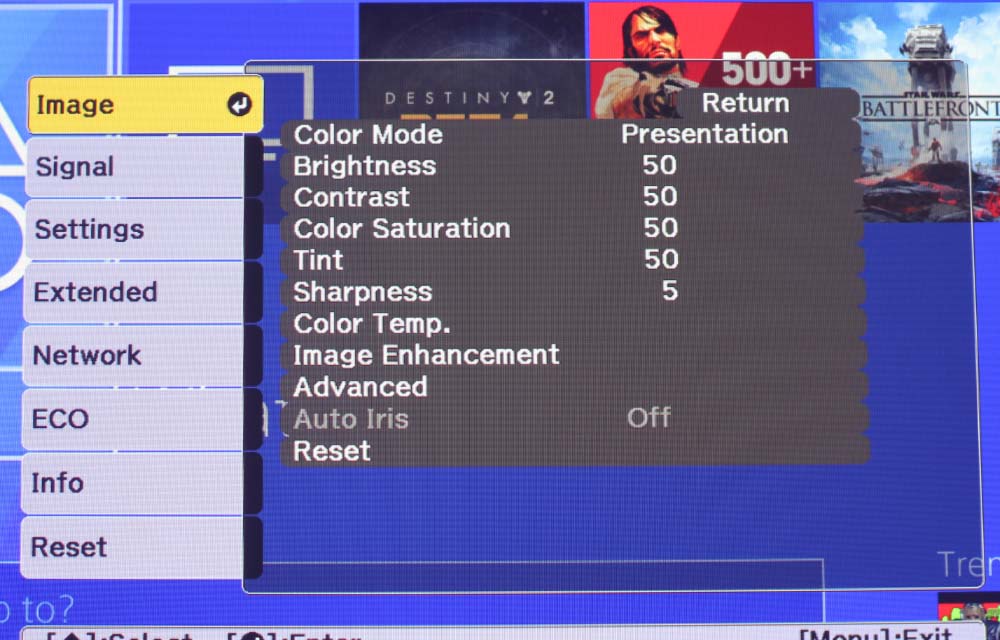
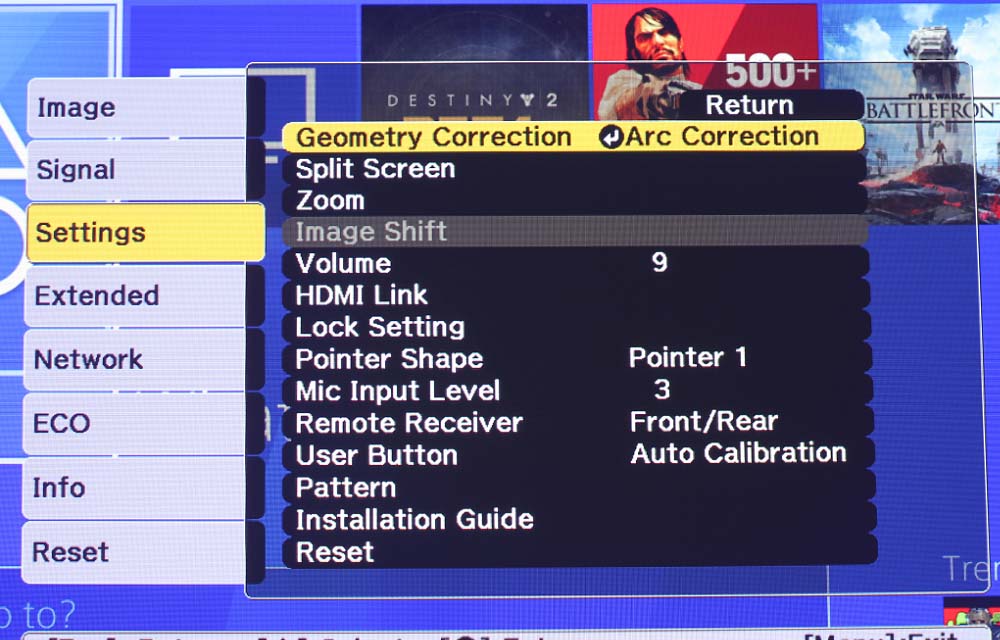
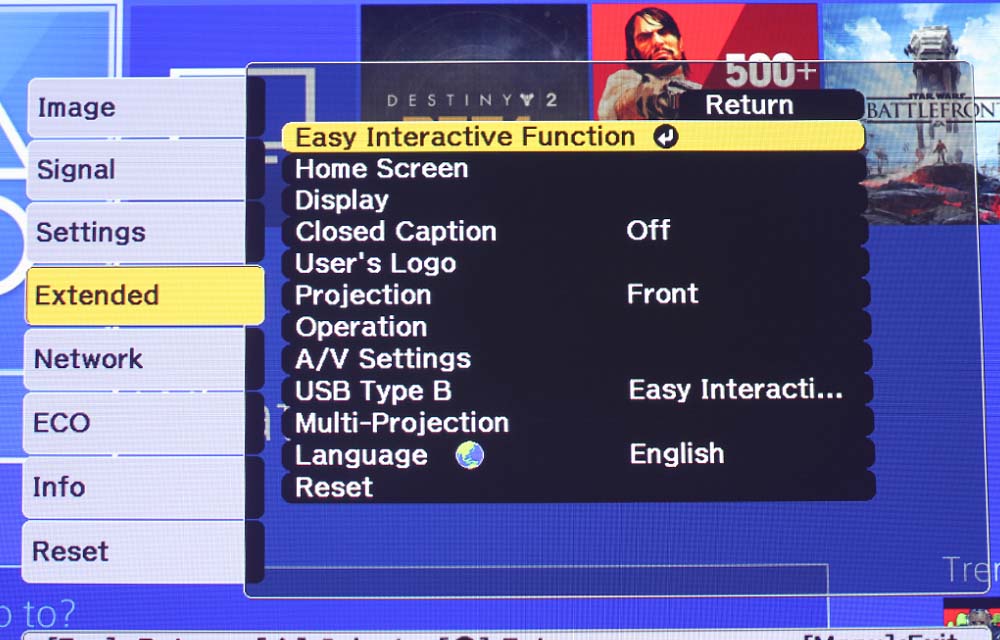
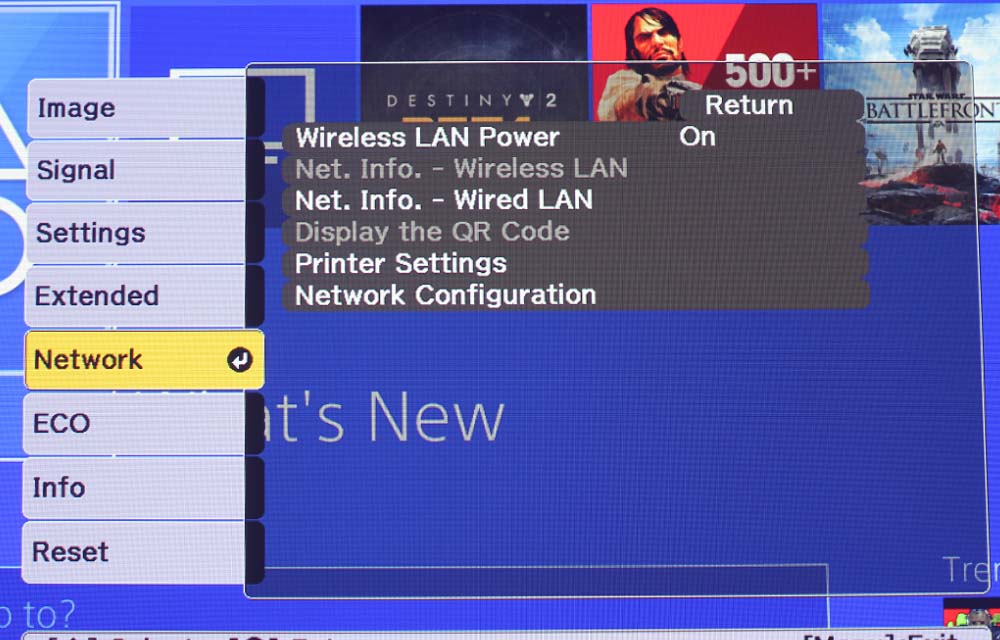
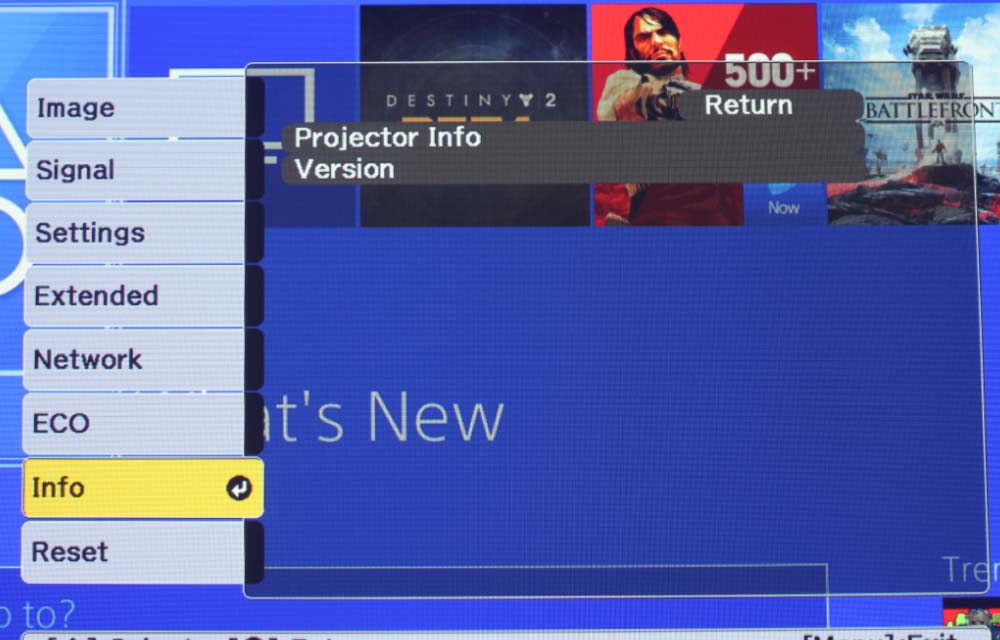
The Menus

That does it for our tour of the Epson BrightLink 710Ui's hardware! Next up is our discussion of the projector's picture and sound quality.

Epson BrightLink Interactive Projector Review – Hardware 2: Control Panel, Remote Control, Menus

Control Panel

Epson BrightLink 710Ui Interactive Projector Control Panel
The Epson BrightLink 710Ui's control panel is located on the side, and has plenty of functionality.

The Epson BrightLink 710Ui’s control panel is located on the left side of the projector next to the cool air intake vents. It is the same layout as the BrightLink 696Ui I reviewed last year. The control panel is inverted – that is to say, it is upside down when looking at the projector on a table top, as I have it set up for reviewing. That is because this projector is meant to be wall mounted, with the lens facing downward, which then makes the control panel face the right direction.

Starting at the left, there is a blue Power button next to the Home and Source Search buttons. Source Search, when pressed, cycles through the available source inputs until it finds one. This is a quick way to navigate between your sources. To the right, there are the four directional arrow keys surrounding an enter button to navigate the menus. Those four arrow buttons serve a dual function, with the up and down arrows controlling horizontal and vertical keystone correction, and the left and right buttons affecting the zoom. Now, that’s digital zoom, as ultra short throw lenses are fixed lenses that do not have zooming capabilities. There’s a button on either side of the up arrow key – Menu to the left, and Esc to the right.

Remote Control

One of the things I appreciate about projector manufacturers is that they tend to use the same remote across many models of their business/education and crossover home entertainment projectors. I’ve now seen and used this particular remote four times, which definitely makes writing about it a lot easier. When I reviewed one of Epson’s home entertainment projectors, some of the buttons on the remote didn’t function, as they related to business/education only – a fun fact. The remote still isn’t backlit, but I didn’t exactly expect them to make that change to this remote.

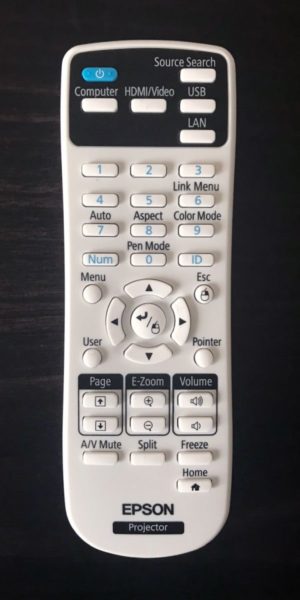
The Epson BrightLink 710Ui’s remote has 37 buttons, some of which serve multiple functions. Like most remotes, this one can be broken down into sections. The first section contains the Power button, Source Search, and four buttons to switch between popular inputs: Computer, HDMI/Video, USB and LAN. Below lies a section with a 0-9 Number Pad, the Number button to activate/deactivate it, and the ID button. Pressing the Number button allows you to use the 0-9 keypad as numbers, while pressing it again activates the second function of some of the numbers. Number 3 also serves as the Link Menu button. 4 is for Auto, which allows you to sync with a computer. Number 5 triggers Aspect Ratio, 6, Color Mode, and 8 activates Pen Mode. Pen Mode has two options: PC Free Annotation and PC Interactive.

Epson BrightLink 710Ui Remote Control

Next up is the section with the four directional arrow keys surrounding the Enter button. Here, the arrows do not serve a second function. The Enter button does, however. It also functions as the “left click” of a mouse. The Esc button, located at the top right of the section, serves as the right click. Directly opposite is the Menu button. Underneath that is the User button, which can be easily programmed in the Menu, and the Pointer button on the far right. That Pointer button brings up one of three pointer icons on the screen that can be used to direct attention to a particular point on the projected image without having to physically be up at the screen.

The section below has three functions, each with a pair of buttons. Page Up and Page Down, E-Zoom In and E-Zoom Out, and Volume Up and Volume Down. E-Zoom is different than digital zoom, as it does not affect the optics – it allows for zooming into the picture while keeping the size of the image the same, meaning you’ll lose the outside edges of the image. This is really just a feature for “punching in” on a specific point within the projected image, and not as a zoom in/zoom out function. The bottom section has four buttons: A/V Mute, Split Screen, Freeze, and Home. The remote comes with two AA batteries.
The Menus

That does it for our tour of the Epson BrightLink 710Ui's hardware! Next up is our discussion of the projector's picture and sound quality.

© 2024 Projector Reviews

crossmenu linkedin facebook pinterest youtube rss twitter instagram facebook-blank rss-blank linkedin-blank pinterest youtube twitter instagram