The Image Menu
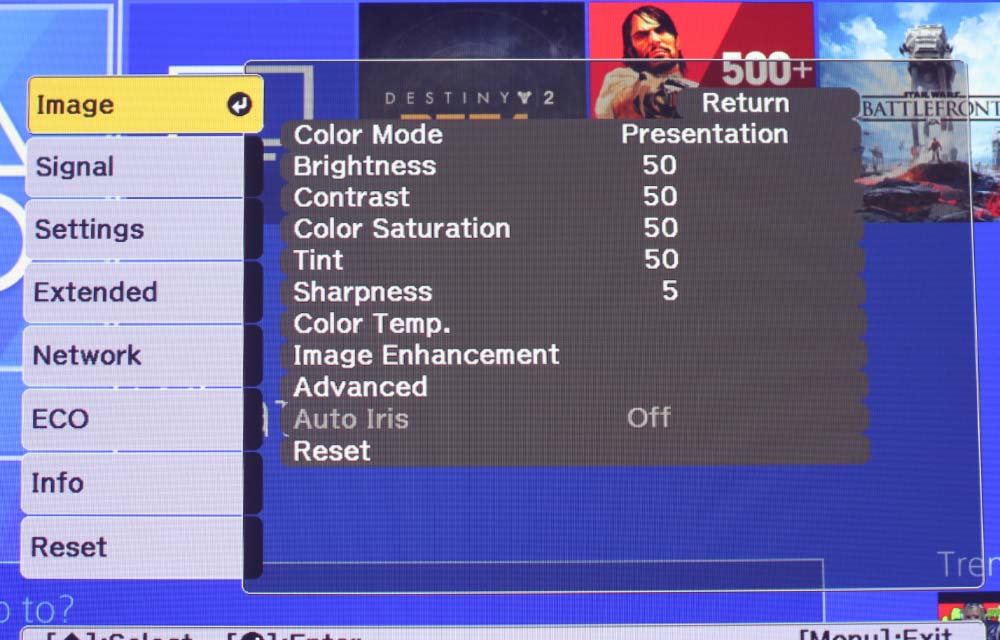
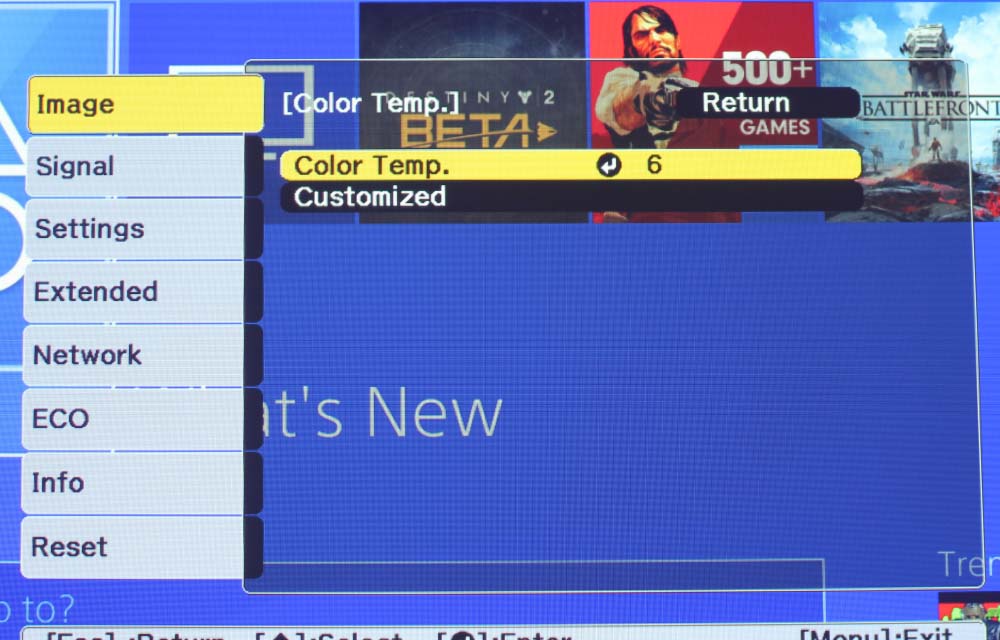
The Image Menu has a host of adjustable parameters. Cycle through the five color modes, and adjust Brightness, Contrast, Color Saturation, Tint, Sharpness and Color Temperature, as well as Image Enhancement, which adds or reduces noise. From this menu, you can turn Auto Iris on or off. The Auto Iris has two speeds – normal and high speed. There is also an Advanced Menu within the Image Menu.
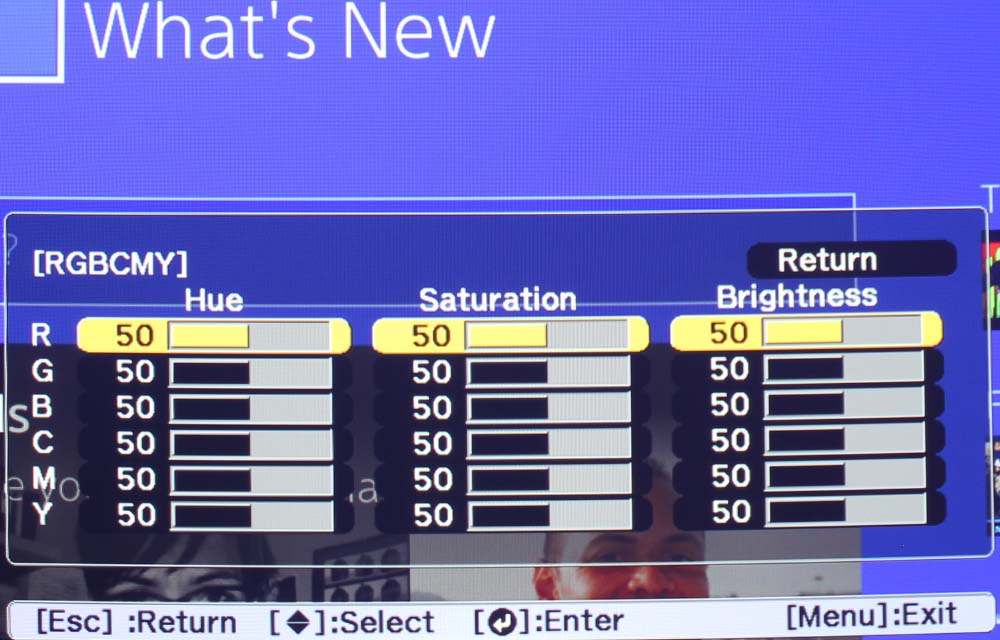
The Advanced Menu within the Image Menu allows for adjustment of Gamma and the RGBCMY color spectrum. No K though. Epson doesn’t care about K. Fun fact - the K in CMYK stands for Key, referring to black. Since you can adjust the blacks with a variety of other functions, it is neither necessary nor prudent for Epson to include the K in their RGBCMY color adjustments.
For the rest of those colors, sans black, you can adjust the Hue, Saturation, and Brightness. This is quite advanced color correction for a business/education projector, so you can truly get the right color. Also in the Advanced Menu, there is a grayed out Deinterlacing option that is automatically set to Film/Auto.
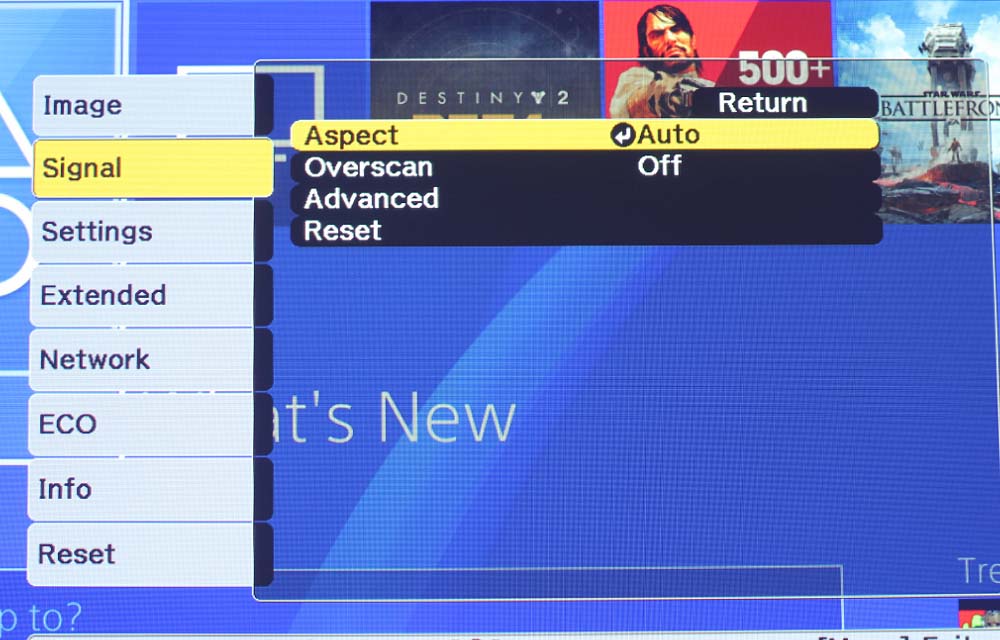
The Signal Menu
The Signal Menu has three main options when opened: Aspect, Overscan, and Advanced. There are five options for changing Aspect Ratio, which are Auto, 16:9, Full, Zoom, and Native. Overscan allows you to zoom in 4%, 8%, and set it to Auto or off. Keep in mind that with Overscan, you will lose a small part of the edges of your image.
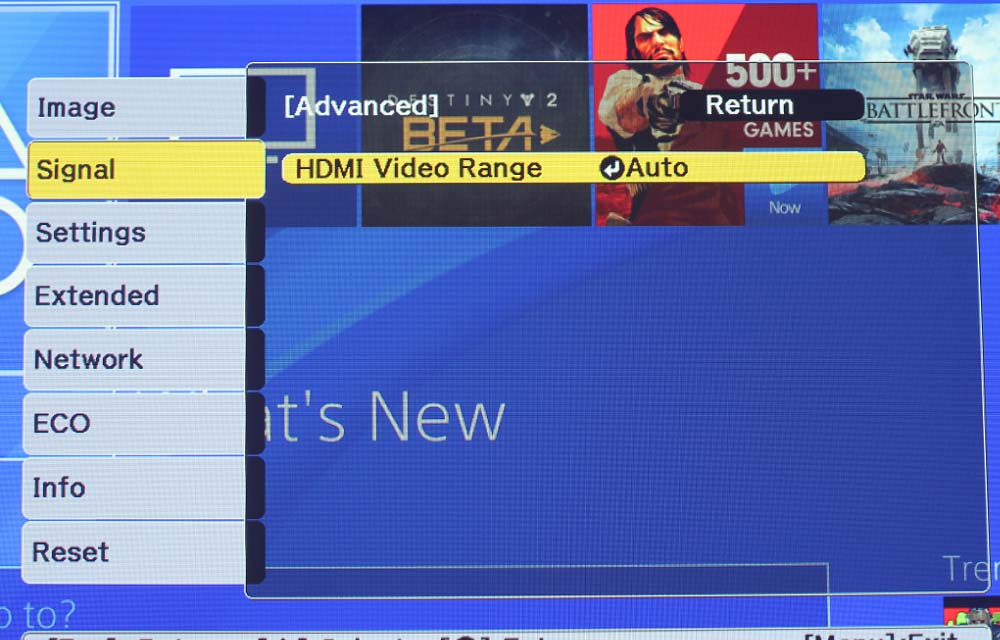
The Advanced Menu within the Signal Menu adjusts the HDMI Video Range. There are three options for this – Auto, Normal, and Expanded. This just adds a little saturation or desaturates the image slightly, and would be a faster alternative to manually saturating or desaturating the individual RGBCMY colors in the Advanced Menu of the Image Menu.
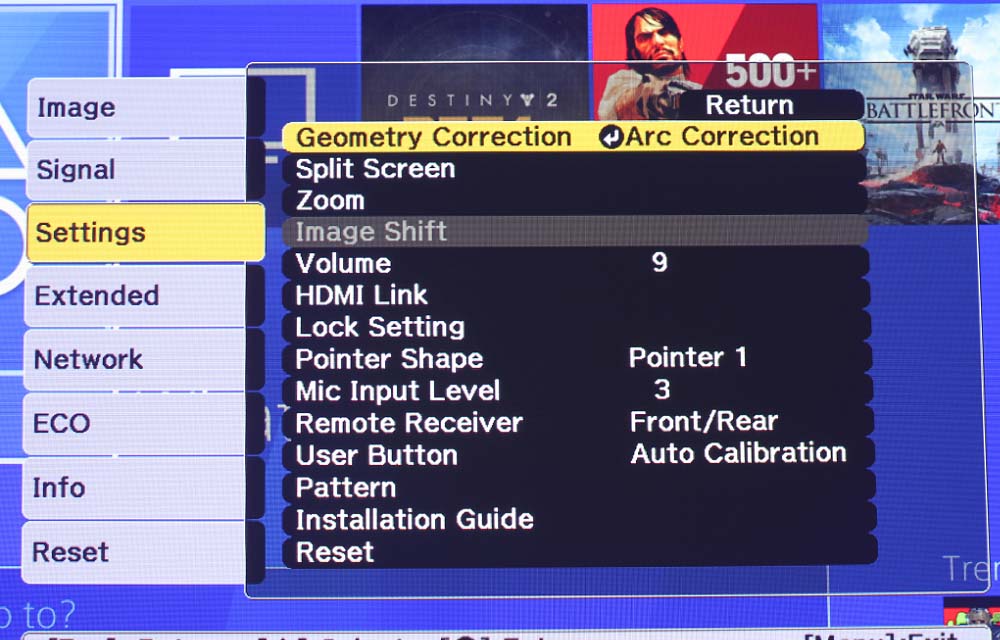
The Settings Menu
The Settings Menu is heavy with useful functions. They are: Geometry Correction, Split Screen, Zoom Image Shift, Volume, HDMI Link, Lock Setting, Pointer Shape, Mic Input Level, Remote Receiver, User Button (for assigning custom functions), Pattern (test patterns) and an Installation Guide screen that projects a blue image with a bullseye for adjusting the projector when installing in a classroom or conference room, so that you don’t need to have any inputs connected while wall-mounting.
Split Screen allows for two inputs to be used and seen on the screen at one time – in my case, the PlayStation 4 and a computer. Zoom adjusts the Wide or Telephoto digital zoom we talked about earlier. Image Shift is not available in full Wide Angle.
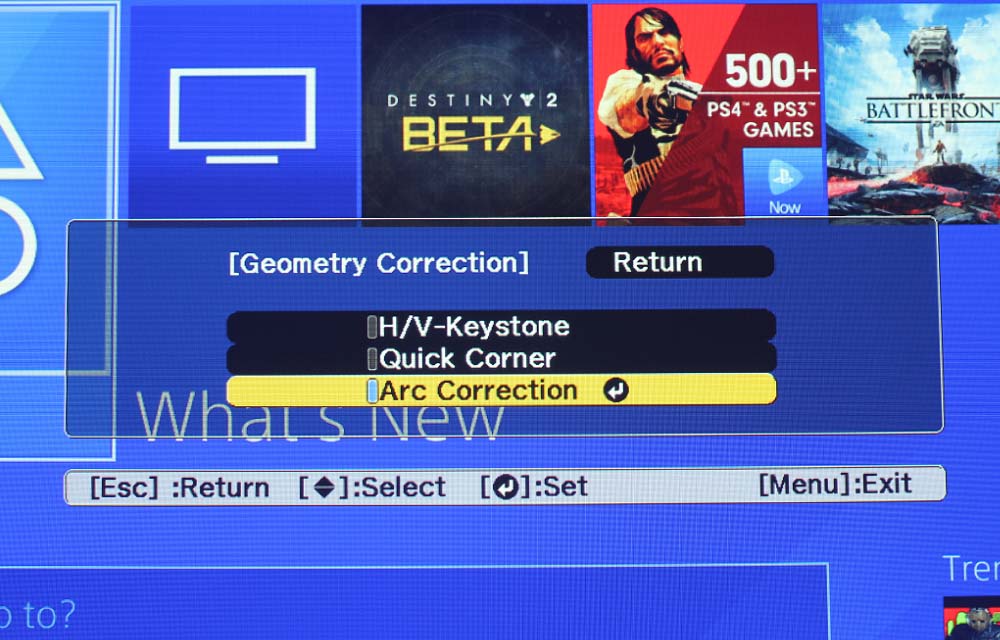
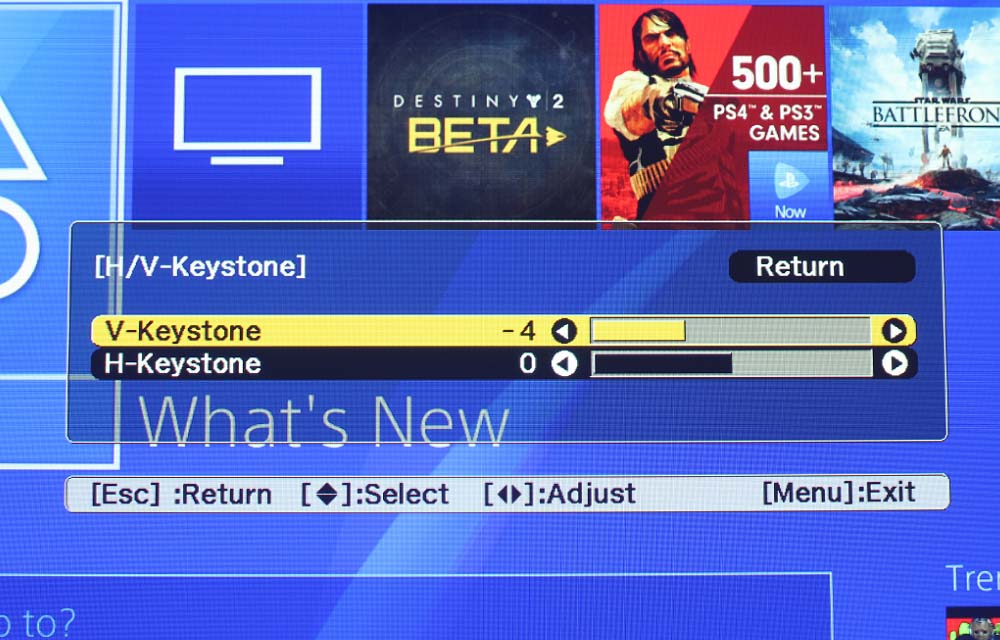
The Geometry Correction within the Settings Menu has several options, and are worth talking about in their own section. They are: Horizontal and Vertical Keystone Correction, Quick Corner, and Arc Correction. Horizontal and Vertical Keystone Correction is pretty much standard, but is excellent on this projector. There’s a good amount of Keystone Correction to work with.
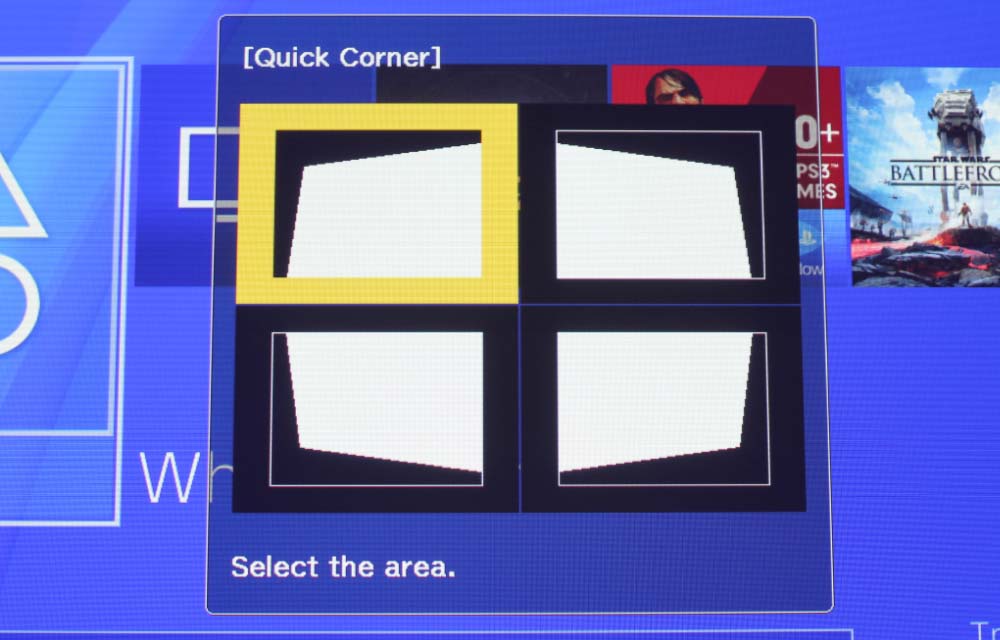
Quick Corner brings up an image of the four corners of the screen at an angle, and allows you to adjust each corner individually. If you’ve got one or two corners out of whack, you can edge them in (or out) to contain the image within your screen. Using this function, you might see some arc to the top, bottom, or sides of your projected image.
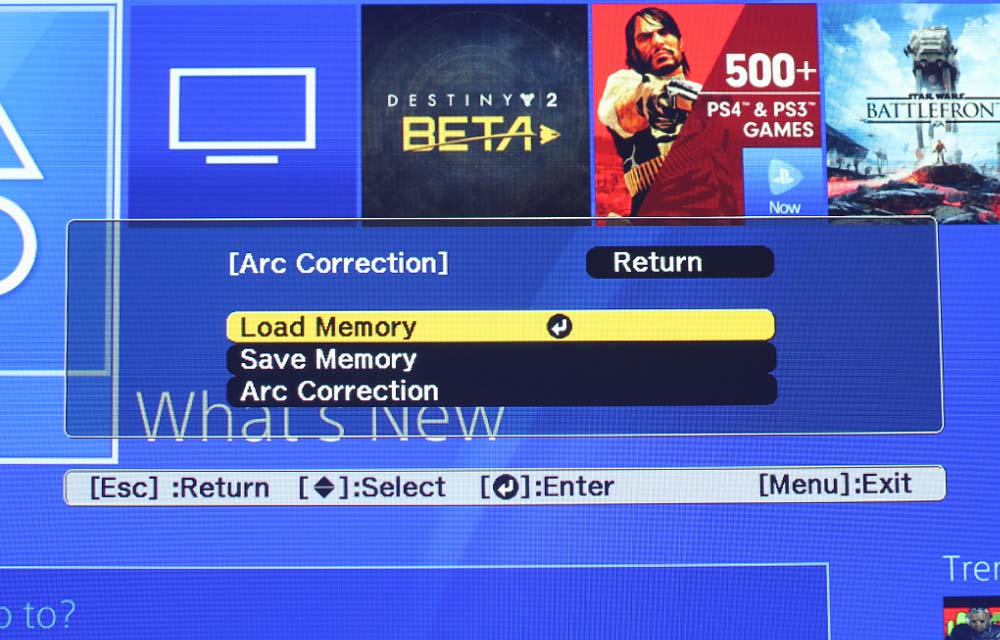
The Arc Correction has eight pictures, each leading to a different area of adjustment to the image. This is my new favorite Geometry Correction function, as it allows for both adjustment of the corners, and the sides, top and bottom of the image, which have a tendency to arc inward or outward on ultra-short throw and short throw projectors. That Arc Correction allows you to save your settings in one of three memory slots, and load those saved settings easily. The point is, you can get a perfectly rectangular image using the Geometry Correction within the Settings Menu.
The Extended Menu
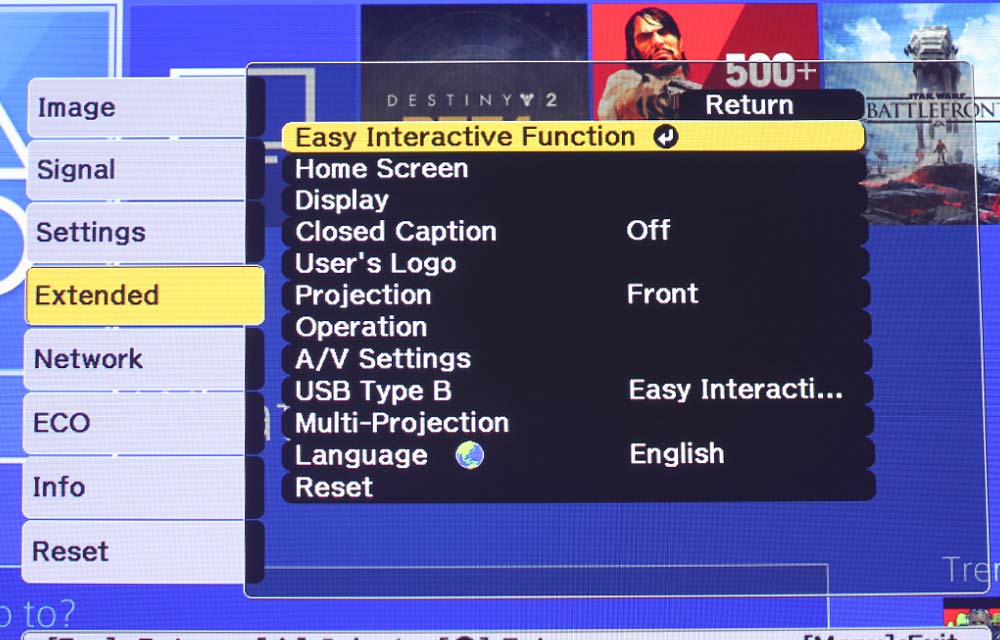
The Extended Menu has some of the interactive functions and settings useful for presenting. This menu consists of the Easy Interactive Function, Home Screen, Display, Closed Caption, User’s Logo, Projection, Operation, A/V Settings, USB Type B function, Multi-Projection, and Language. I will go into detail about the interactive features on the next page, so I will be save that discussion for then.
On this menu, you can access the Home Screen, but it’s far easier just to use the Home button on the remote control or the control panel. The Display option brings up a sub-menu that allows you to choose whether messages are displayed, and change other parameters such as the color of the Display Background, turn the Startup Screen on or off, change the A/V Mute display, Color Uniformity, Toolbars, turn the Pen Mode Icon on or off, and turn Projector Control on or off.
There are four Projection modes to choose from: Front, Front/Upside Down, Rear, or Rear/Upside Down. Keep in mind that the interactive function will not work if in Front or Rear mode, only if the projector is upside down. Operation gives you several options to work with, including High Altitude Mode, which I have turned on because I live nearly 4,000 feet above sea level. I believe what constitutes “high altitude” is as low as 1,800 feet above sea level, and if you turn it on below that point, it can negatively affect lamp life.
The A/V Settings option allows for the configuration of A/V inputs and outputs. The USB Type B option allows you to toggle through and choose the desired function of that port. The options are for Easy Interactive Function, USB Display/Easy Interactive Function, and Wireless Mouse/USB Display. The Multi-Projection option opens up a sub-menu where you can set individual parameters to your liking.
The Network Menu
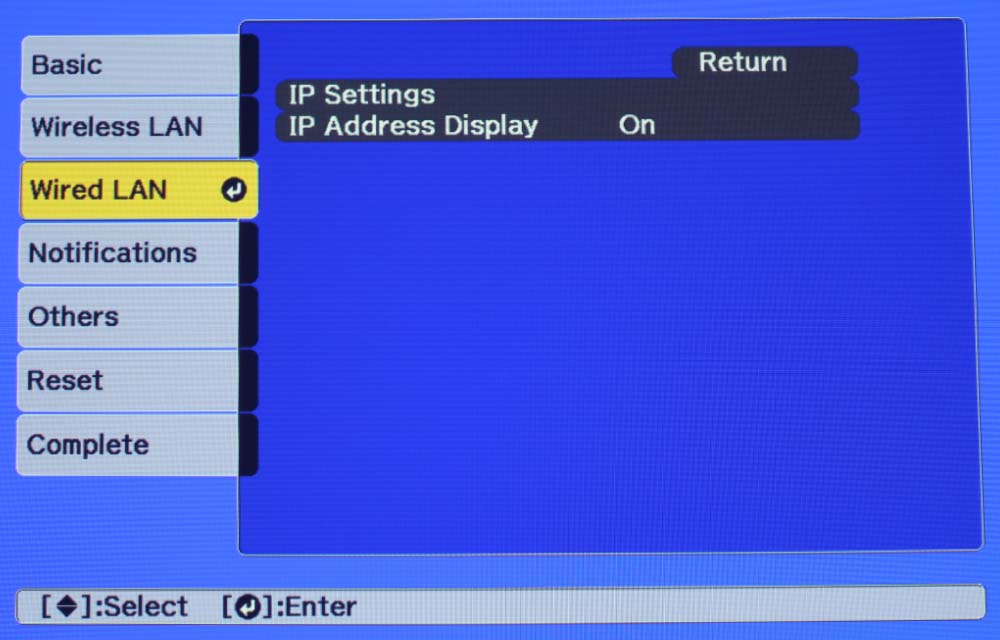
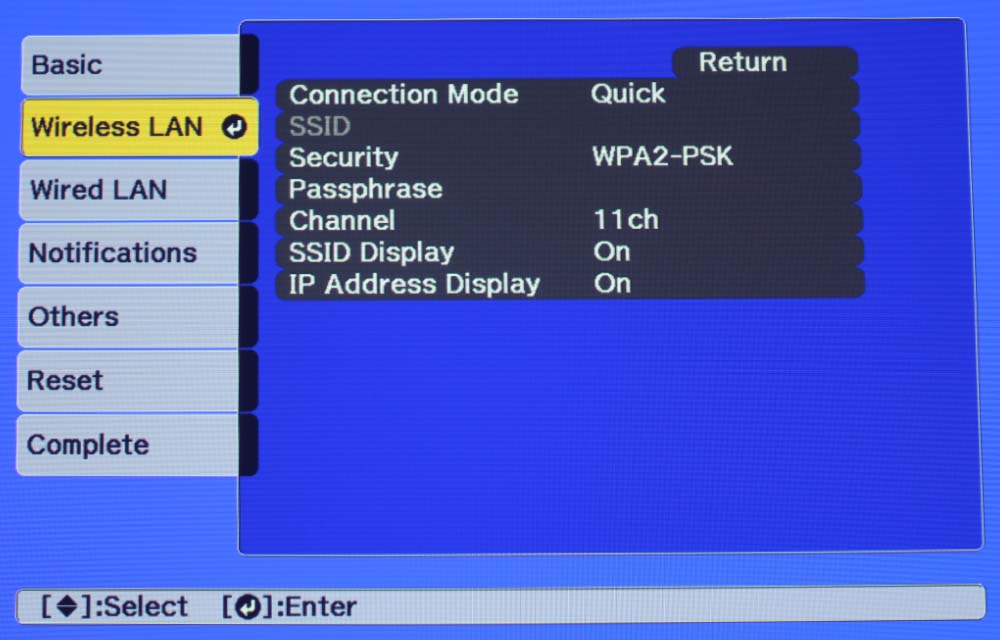
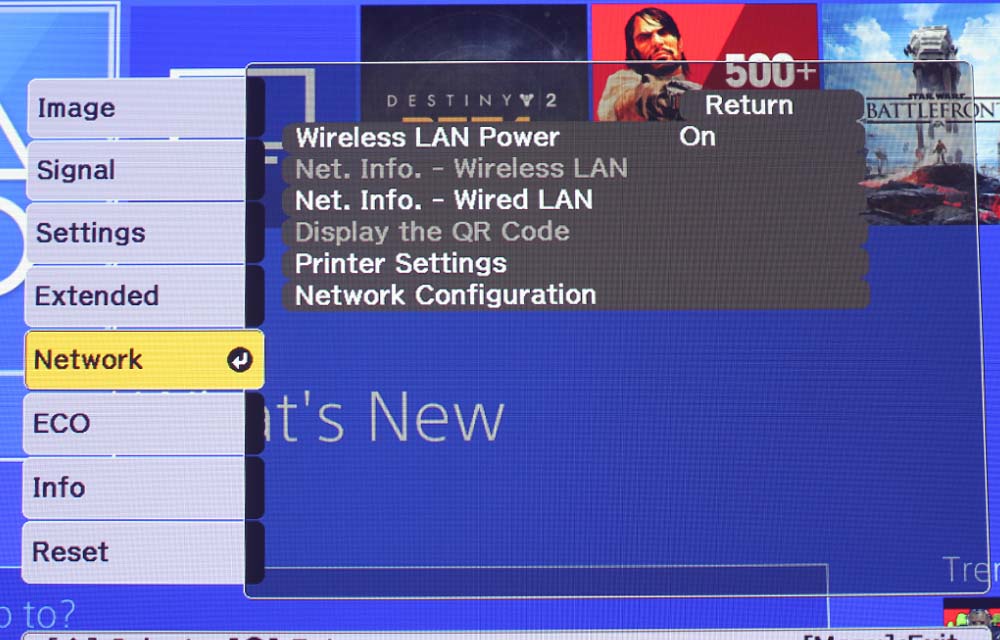
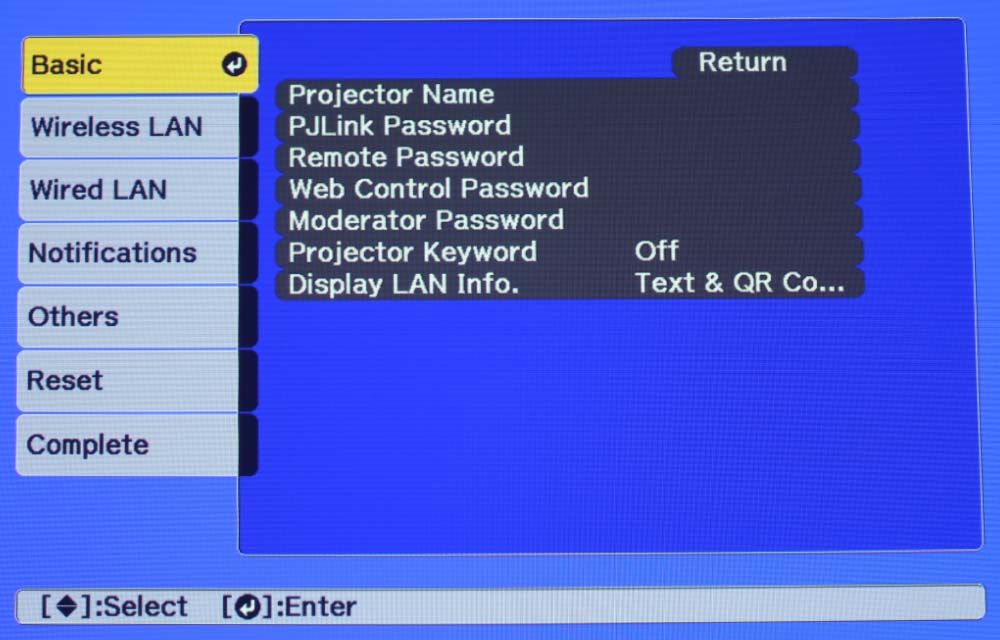
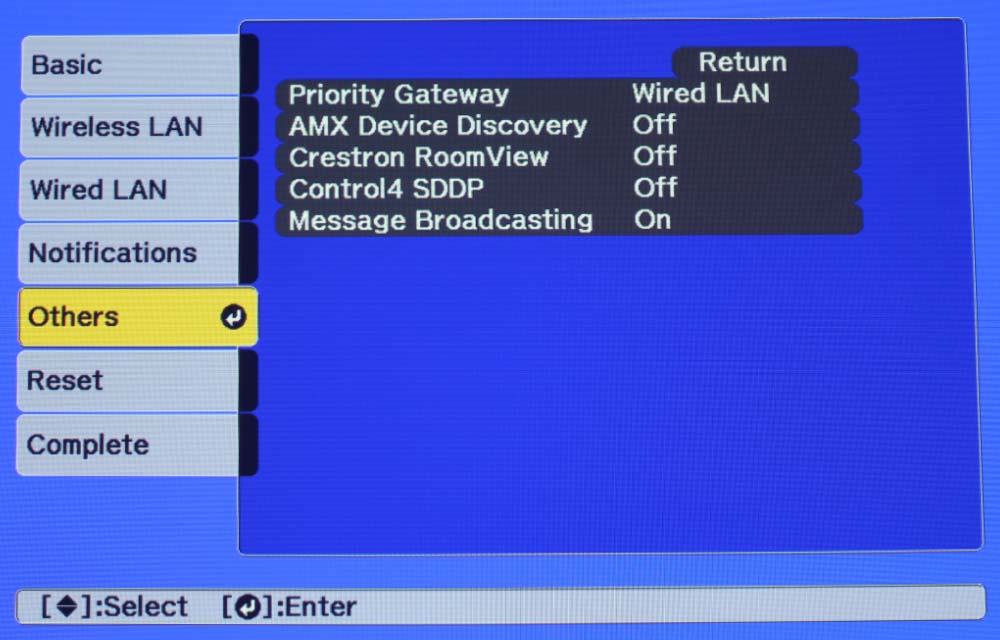
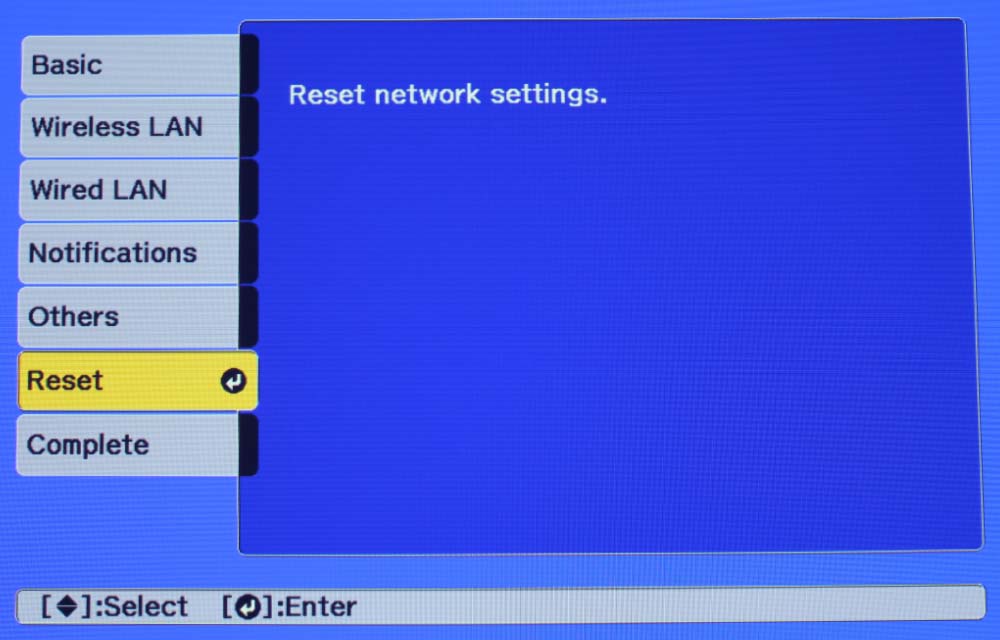
The Network Menu has a few simple settings to work through: Wireless LAN Power (on or off), Network Info - Wired LAN, and Printer Settings. Then there is the rather in-depth option for Network Configuration. That has its own menu, complete with sub-menus: Basic, Wireless LAN, Wired LAN, Notifications, Others, Reset and Complete. Photos of those first five sub-menus are also included in this slider.
The Eco Menu, shown first in the slider above, allows access to all things power-saving. Eco Mode reduces the power, light output and fan speed of the projector. You can also configure the Sleep Mode Timer from this menu.
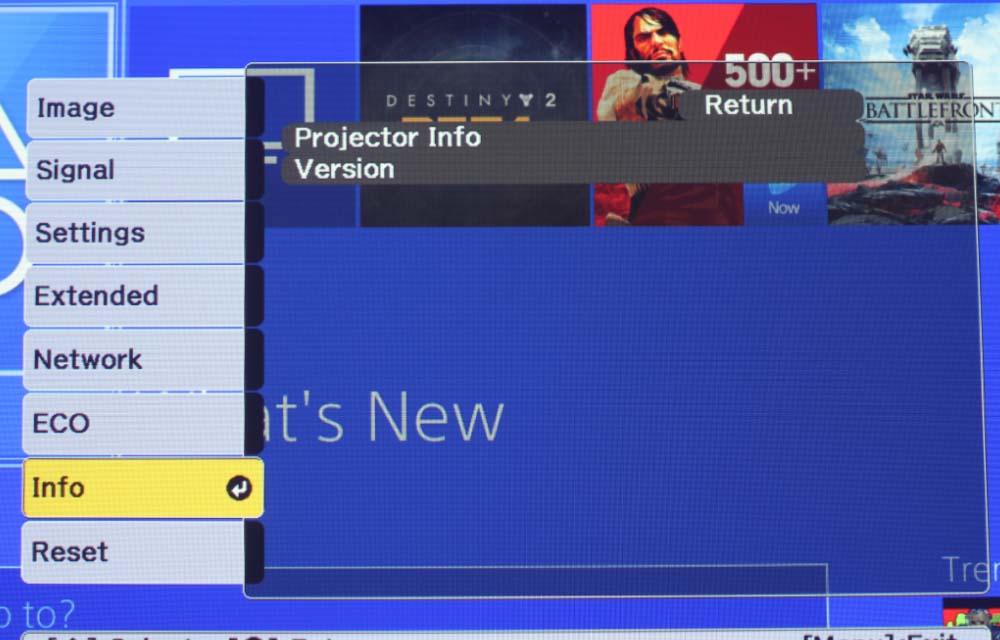
The Info Menu displays the regular projector information such as Lamp Hours for Normal power and ECO, Source, Input Signal, Resolution, Refresh Rate, Sync Info, Status, Serial Number and Event ID, if applicable.
Now, onto our discussion of the interactive features of the Epson Brightlink 696Ui.