Projector Reviews Images

BenQ HT5550 Projector Review - Hardware 1

Posted on July 23, 2019 by Art Feierman

Overview

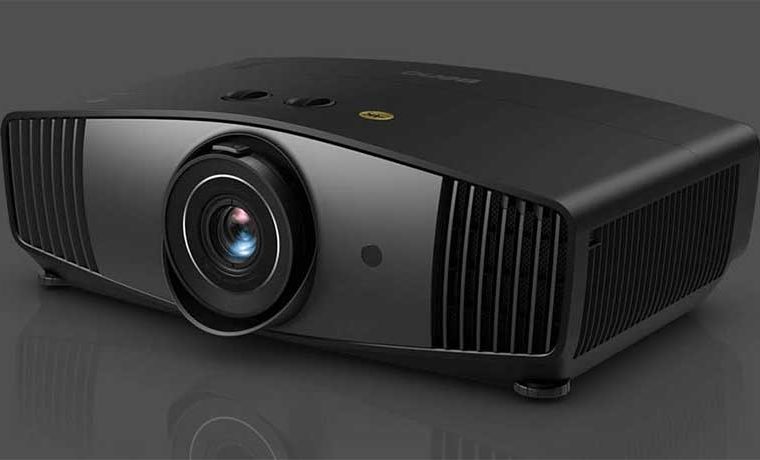
BenQ’s HT5550 is a medium small projector finished in a dark grey/black cabinet that is nicely sculptured. It’s size is in part due to it being designed with a decent amount of lens shift, resulting in it being larger than most less expensive DLP projectors for the home (which have little or no lens shift).

For those familiar with some of the competition: The HT5550 t is definitely a size larger than the BenQ HT3550 or TK800M, and also a good bit smaller than the Epson HC5050UB competition (it’s almost as wide as the Epson but not as deep). It’s a nice size, not too big, so it can be moved easily if you aren’t mounting it. It is also much lighter than the Epson, likely due to the Epson’s fully motorized screen features, which definitely add a good amount of weight.

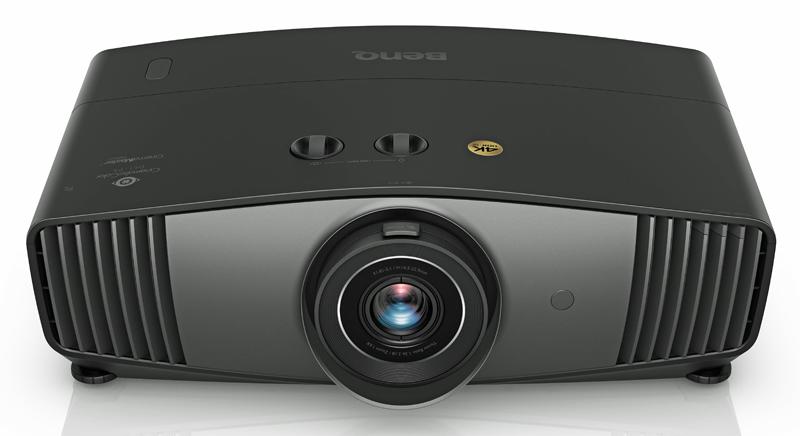
From the front: The 1.6:1 manual zoom lens is located dead center. If you are facing the projector, you’ll spot the front IR sensor for the remote about two inches to the right of the lens. Venting is on both sides of the lens, with the air blowing outward, away from the lens (good design). The front venting will also allow for rear shelf mounting, if your room isn’t too deep.

Two screw thread adjustable feet are located below the front, on the far left and right. The BenQ comes with a lens cap, but there is no motorized cover to keep dust off the lens when the projector is powered down.

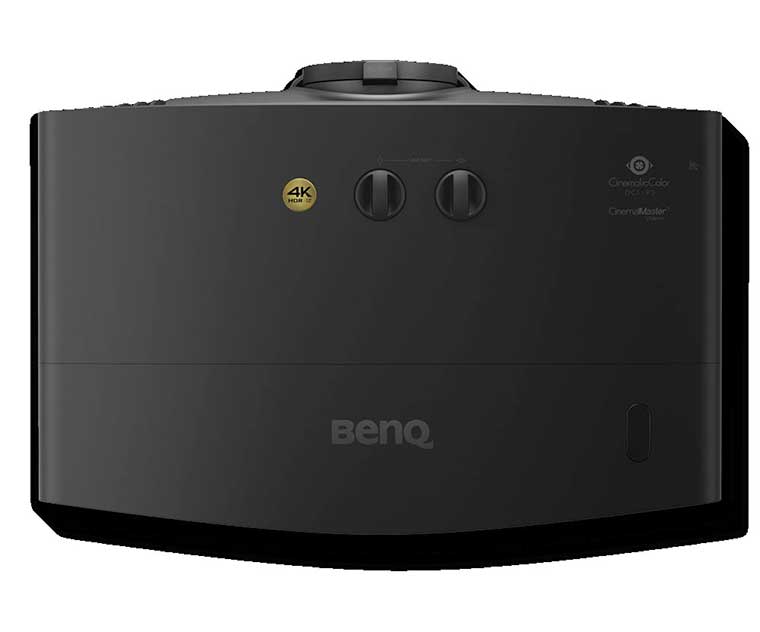
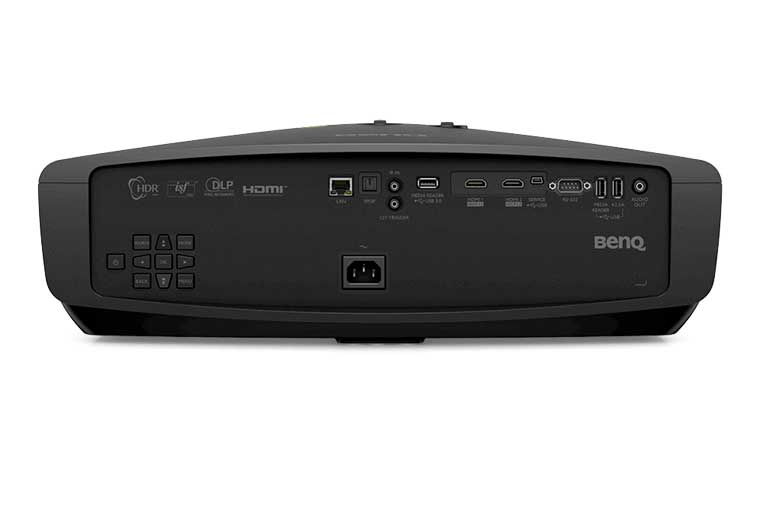
BenQ placed all the inputs and connectors, as well as the control panel itself, on the back of the projector. Both sides of the projector are blank but for venting. If you look at the top of the HT5550, however you will find a pair of dials for vertical and horizontal lens shift. In the back center bottom you will find a rear foot – “bar” several inches long that acts as the rear foot, for a stable 3 point stance.

Let’s take a closer look at each aspect of the hardware. The second hardware page, I should note, looks at the remote control, and also the BenQ’s menus.

The Lens

angle shot of HT5550

Lens Throw and Lens Shift

The HT5550 has separate vertical and horizontal lens shift. As with other projectors, the more you use of one, the less shift is available for the other. Most of us, fortunately, would tend to need vertical, but little or no horizontal shift.

While the HT5550 can’t match the much more significant amount of shift found on many 3LCD and LCoS home projectors, it still offers a whole lot more than most DLP’s which offer only minimal amounts (such as their lower cost BenQ HT3050).

As usual, these are the distances for filling a 100” 16:9 screen (measured from the front of the lens to the screen):

Closest: 118.1 inches 9 feet 10.1 inches

Furthest: 190.0 inches 15 feet 10.0 inches

Lens Shift: The manual has conflicting numbers but the good ones seem to be:
Vertical: range up to 0.65 of vertical height. (For a 100” screen that height would be just a fraction shy of 50”. That works out to that the image can be moved a total of .65*50, or approximate 32.5 inches total – which would be up or down 16.25 inches. (the other spec says only 5 inches of range, which is obviously wrong, as I can tell simply by playing with the controls on the BenQ.

The horizontal shift is a maximum of 0.28 x image width, which would be about .28 x 87 inches.

The plentiful vertical lens shift makes rear shelf mounting mid height or above practical if the room isn’t too deep. As mentioned earlier BenQ vents out the front (pushing air to the front sides – away from the lens), which is also critical for rear shelf mounting so the projector

Lens Hardware  

The HT5550’s all glass lens looks really good.  We’re talking on 4K content, from 4K Blu-ray movies.  As usual, one can do so much these days with various image “sharpening” controls, that being a native 4K projector (of top quality) doesn’t mean that the projector will seem sharper than other projectors that are “merely” 4K UHD or 1080p pixel shifters.

I did detect just a slight amount of lens defocusing as the projector warms up, going into full power mode (after about 25 minutes).  I did not check the lower power settings. The amount of defocusing is less than a couple of other of my favorite projectors, and some defocusing can be spotted on many projectors.  I recommend focusing when the projector is fully warmed up, in this case, if you are mounting it. If you are moving it around, well, you will be refocusing every time you move it. Many of you simply won’t notice the defocusing unless you are looking for it.  (Here’s a reminder, some hard core enthusiasts intentionally slightly defocus, to soften the image, because most manufacturers – all considered, are over sharpening with the many detail enhancement, edge sharpening and other tools available.

The lens is manual in all ways.  The zoom and focus controls are on the lens barrel, while the two lens shift controls are on the top of the projector behind the lens.  With manual control, going widescreen for Cinemascope type movies is mostly impractical, at least if ceiling mounting.

If using on a table top, as I do when reviewing, on the other hand, it just means you get up, and adjust the zoom larger for the wider, less tall Cinemascope image, adjust the lens vertical shift, and then refocus.  That will get you out of your chair for a good minute or so, each time you want to change from widescreen to HDTV shape or the other way. This is typical for projectors under $3000, with only a handful of projectors – mostly Epson’s with the needed power lens features.

BTW if you overall like the HT5550, but want to go widescreen, and are using the projector table top, my take is “go for it”.  If ceiling mounted – on the other hand – only if the ceiling is 8 feet or less, and you are inches taller 6 feet, should you even think about it.  My projector is mounted from an 8 foot ceiling, but at 5’ 8” I just really can’t work the lens controls without a step stool. Good luck!

Control Panel

A pretty standard control panel

BenQ put the HT5550’s control panel on the back of the projector, on the far left side (if facing the back) It’s a fairly standard layout, with the power button (press once for on, twice for off), to the far left.

Immediately to the right of the power button is a matrix of nine buttons laid out 3x3.
The four arrow keys for menu navigation are where you would expect them – top and bottom center, left and right center. In the center is their OK button, aka “Enter”, or “Return”…

Top left is a button for selecting the source while in the top right spot is the Mode button which will allow you to toggle between settings such as, D Cinema, Vivid TV, Cinema…

Bottom left is the Back button which takes you back up one Menu level when navigating. The Menu button, interestingly is in the bottom left. (Typically Menu buttons tend to be on the left, since we read mostly left to right, and that’s often the button folks are most looking for.

No real surprises. As I do all my testing with the projector sitting table top, I’m not a huge fan of rear control panels, as I have to bend over to see/use them. I do prefer top mounted ones, over back or side, in such cases. Installers, however, seem to have a real preference for having the controls on the back with all the inputs and other connectors. I can definitely appreciate the rear location for that. When you or an installer is standing on a ladder trying to get everything set up, I can’t think of a better location. (So I suffered a little, but mostly relied on the remote control.

Bottom Line – a fine control panel. Not really any extra buttons / capabilities, just the usual fare.

© 2024 Projector Reviews

crossmenu linkedin facebook pinterest youtube rss twitter instagram facebook-blank rss-blank linkedin-blank pinterest youtube twitter instagram