BenQ HT4050 Hardware Overview
The BenQ HT4050 home entertainment / home theater projector is a fairly small projector, although still a healthy size of from some of the smaller, but still lamp based models out there. It's about the size of the smallest of the competing 3LCD projectors, and a good deal smaller than most $2000+ projectors.
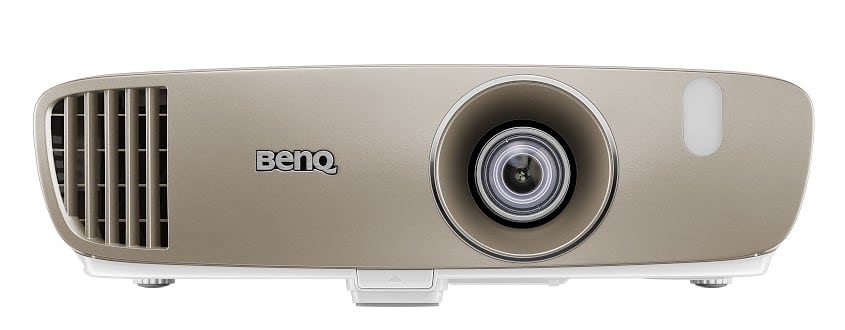
From the front - the projector's zoom lens is recessed and mounted off center closer to the right (if you are facing the projector). the focus and zoom are controlled manually by rotating the lens barrel for focus, and rotating a small extrusion on the barrel to rotate the zoom ring.
Also found on the front is the front IR sensor for the included remote control, and there's a press to release adjustable drop down foot located pretty much below the dead center of the front. The only other thing to report on the front is the rather large fan exhaust. I should note, that as is the case with many, if not most DLP projectors around this price or less, leaks more light out of the front exhaust than one would hope for. In a "media" or living room setup with some ambient light present - no one's likely to notice, but put the HT4050 into a dedicated home theater/ cave, where you have virtually no ambient lighting, and mostly dark surfaces you very likely will spot the light leakage around, and to the right of your screen.
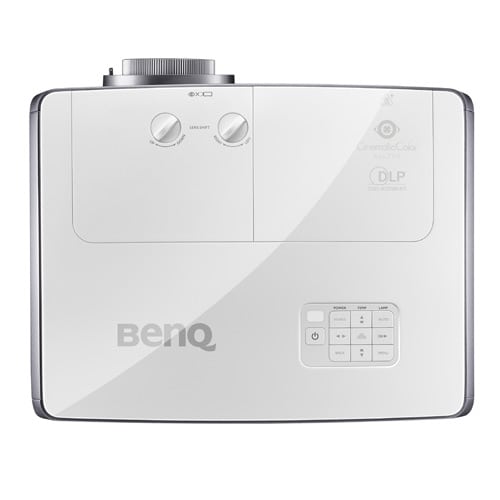
The control panel is located on the top toward the back. It's pretty typical and discussed below. Near the top front, behind the lens are two small dials for vertical and horizontal lens shift control. The rest of the "action" is located on the back, where all the inputs and other connectors are located. Underneath, there are a pair of adjustable rear feet to work with the front solo foot. And, as you would expect, there are the obligatory screw thread holes to attach a typical ceiling mount.
The back of the projector houses all the various connectors. And the 10 watt speaker system.
The speaker, btw, sounds pretty good - for what it is. It's fine for the kids, or the backyard movie night, but I have to chastise BenQ like I do everyone else making projectors that have an internal speaker, and a stereo audio out: BenQ should allow the internal speaker to work simultaneously with outputting the audio through the jack. This would be great for almost everyone who lacks a separate high quality sound system to plug into. Why you ask?
Easy, today you can choose from a great many, pretty small, yet powerful, powered subwoofers. They start from perhaps $30. Plug any of them into the audio out jack, and you will get far better, and lower bass than the speaker in the projector. That would provide a massive improvement when watching action flicks, or listening to music videos, etc. If you add Bluetooth out for the audio, then you could even wirelessly connect to any of those subwoofers that are Bluetooth enabled, which many are. Either way, sound quality goes way up, with little expense for the projector owner. Well, maybe next generation? I've been pushing this to manufacturers for several years, still waiting for someone to implement this simple change. Tsk, tsk.
BenQ HT4050 Lens Throw
| Closest Placement |
100" (2546mm) |
| Furthest Placement |
162" (4118mm) |
|
As mentioned elsewhere, placing the projector only 100" away from a 100" diagonal screen is hardly short throw, but it is shorter than most other home theater projectors except the very few "very" short throw, and ultra short throw projectors. Most projectors can't be placed closer than 10 feet for the same sized screen, so this is about two feet closer than most can do.
As far as lens shift goes, the amount is relatively modest, If ceiling mounted the center of the lens can be placed in line with the top of the screen surface, or just over six inches above the top. If table top, even with the bottom of screen or the projector can be as much as 6 and change inches below the bottom.
In addition there's some horizontal lens shift, just remember, that using horizontal further limits the amount of vertical shift available.
HT4050 Control Panel
The control panel is pretty straightforward.
There are 10 total buttons on the panel. Nine are in a 3x3 pattern, with the 10th being the Power button (once for on, twice for off), located just to the left of the other buttons.
Power, Temp, and Lamp led indicators run across the top of the panel.
On the top left is the Source button, Top right is the Auto (sync, for computers) button. In the center is the Enter button, while the Back button is lower left.
The Menu button is in the lower right corner. The four navigation arrow keys are in the usual diamond configuration. When not in the menu system they take on other purposes, with the Up and Down arrows used to adjust the Keystone Correction, and the Left and Right arrows controlling the volume. It's that simple. BTW, the labeling could be better, not high enough contrast, making them very hard to make out if the lighting is low or off. But then, since you are probably using the remote, let's not be overly concerned.
HT4050 Inputs and Connectors

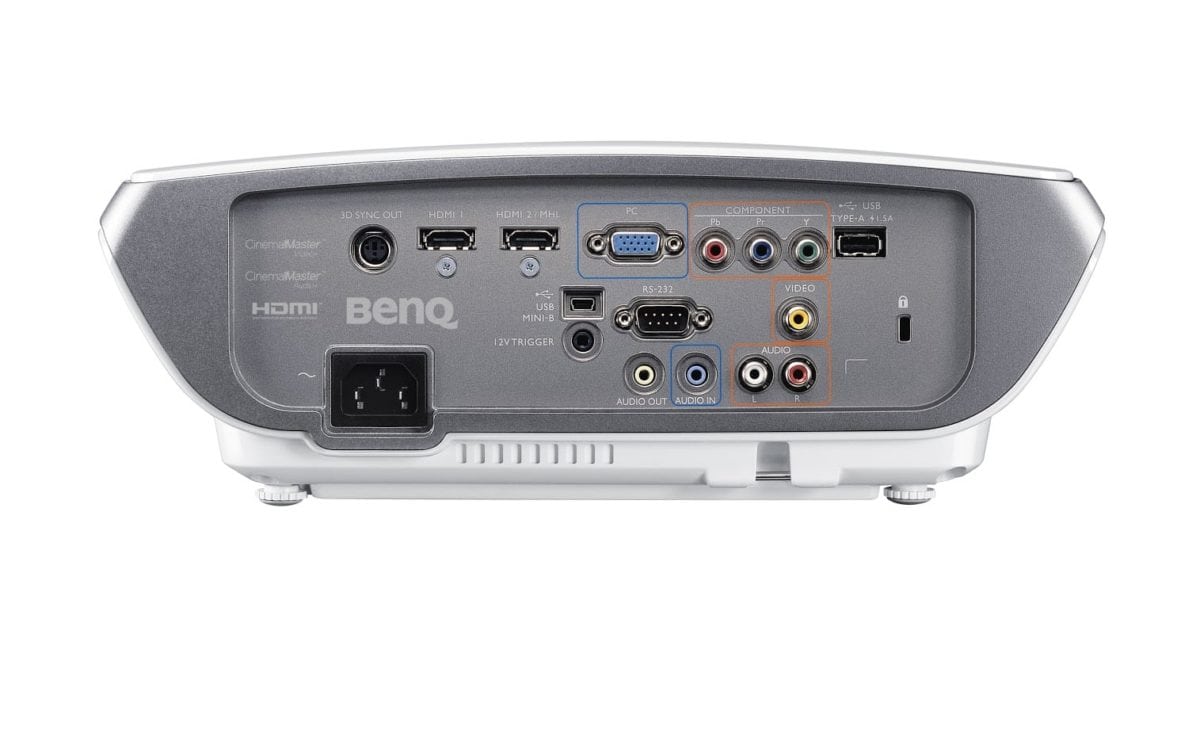
The back of the BenQ HT4050 is where all the inputs and other connectors are found
Let's run though everything on the input panel, starting at the top on the left side.
First is the DIN port for an optional 3D emitter for using RF type active 3D glasses (recommended). The Emitter is a reasonable $49. (Although, having it built in, is better!) Next up are a pair of HDMI ports, with HDMI two being the MHL compatible one. Next over is an HD15 which is your classic analog computer monitor connector. That's followed on the right, with three color coded RCA jacks which make up the Component Video 1 input. Far right is one of two USB inputs, this one a Type A. Note: This projector is not designed for end user upgrading of firmware.
Moving downward, you'll find another RCA jack, this time a yellow one indicating composite video. Further down are two more RCA jacks, this time for left and right audio inputs. Moving to the left, you'll find a second stereo audio input, and a stereo audio output, both stereo mini-jack types.
Sadly, it must be pointed out, when you use the audio out, it turns off the internal speaker. This is sad, because some times, to have far superior bass, it might be practical to simply attach a small powered sub-woofer. A full surround sound system, would be better, but that sub could really help, compared to just using the internal 10 watt speaker.
OK, just up from those audio jacks are an RS232 serial port for "old school" command and control of the projector, and just to its left, the USB B type, and a 12 volt screen trigger. That folks covers the back, except for the small Kensington lock slot, the power receptacle, and a security bar. Overall, the HT4050 is reasonably well endowed.


