Projector Reviews Images

Acer S5201M Projector - Physical Tour-1

Posted on May 14, 2012 by Art Feierman

Acer S5201M Appearance

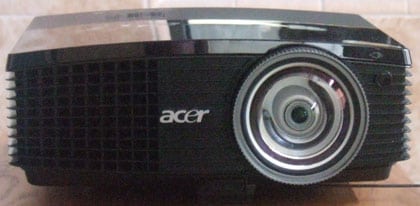
The Acer S5201M has a standard, black plastic case.  The lens is located slightly right of center, protrudes from the front of the projector and has a tethered cap to protect it when not in use.  The lens is surrounded by a focus ring.  To the right of the lens, near the top of the projector, is an IR receiving eye.  There is a single height-adjustable button release foot in the center for adjusting the height.  There are also screw-adjustable feet in the rear corners of the projector.  On the left side of the front panel is an exhaust vent.

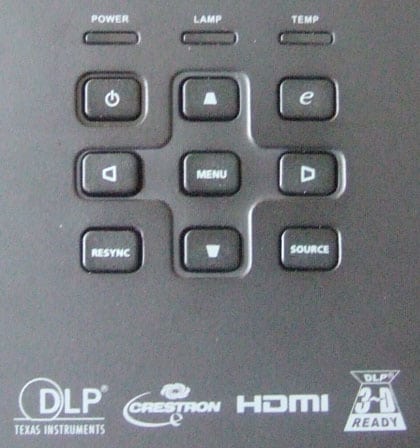
On top of the projector, toward the rear left corner, is a control panel with basic control functions.  There are indicator lights for Power, Temp and Lamp.  There are buttons for Power, Source selection, Menu and menu navigation (Up/Down/Left/Right buttons).  The Menu button also acts as a Select button once a menu item has been highlighted.  The Up/Down buttons also function for keystone correction adjustment.  There are also buttons for Resync (for syncing the projector to a new source) and an “e” key for accessing Acer empowering technology (see “Special Features” above).  In front of the control panel, the left half of the projector top is a removable cover to access the lamp.  This makes lamp replacement easy if the projector is ceiling mounted.

On the right and left sides of the projector are the two 5-watt stereo speakers, as well as additional intake and exhaust vents.  On the rear, bottom corner of the left side is a Kensington lock port.


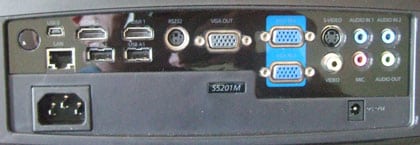
The rear panel sports just about every connection option one would need.  Starting on the left side, there is a second IR receiving eye, a mini USB Type B jack (for connecting your PC to use the SmartPen) and an RJ45 LAN port.  Next up are two HDMI ports, two USB Type A ports and a RS232 control port.  They are followed by a VGA output, two VGA (and component with adapter) inputs, S-video and composite video inputs.  For audio, we then have two 3.5 mm audio inputs, a microphone input and an audio output.  There is also a 12V DC output to trigger a screen drop and the AC power cord connector.

Acer S5201M Setup and Menus

Click to enlarge. So close.

The S5201M (and short throw projectors in general) does not have any zoom capability (other than a digital zoom), so setup can be slow as the projector must to be positioned at both the correct height and distance from the screen.  Fortunately, in addition to the front height adjustable foot, the S5201M also has two rear adjustable feet.  So, setup can be achieved fairly quickly and without the use of keystone adjustment.  That being said, the S5201M’s keystone correction works quite well and, when judiciously used, does not cause noticeable distortion.  Also, there is an OSD (on-screen display) that displays a grid that can be used while positioning the projector and making adjustments with the manual keystone correction to properly align the displayed image.


Click Image to Enlarge

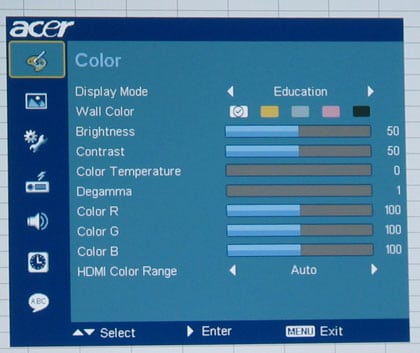
Once it’s in position, the user can select the desired display mode from the main menu and make the usual adjustments (contrast, brightness, color and tint) to the picture.  As we noted with other Acer projectors we’ve reviewed, Acer includes a wide range of available adjustments.  There are five picture modes (plus a User mode) and five wall color settings to choose from.  You also have a choice of different color temperatures and degamma settings, plus RGB levels.  While most projectors either don’t offer this level of adjustment in every mode, or require multiple menus, the Acer S5201M does it all in the main menu with any picture mode as the starting point.  Overall, this is an impressive array of control for any projector in this price range.

© 2024 Projector Reviews

crossmenu linkedin facebook pinterest youtube rss twitter instagram facebook-blank rss-blank linkedin-blank pinterest youtube twitter instagram